
Step-by-Step Guide
1. Enable the Zapier Integration in Atarim
Description:
Before you can connect Atarim to Zapier, you need to enable the integration and retrieve your API key.
Instructions:
- Navigate to your Atarim Dashboard.
- Go to Settings – Integration Settings.
- Find the Zapier toggle and enable it.
- Your API key will appear—click the copy icon to copy it to your clipboard.
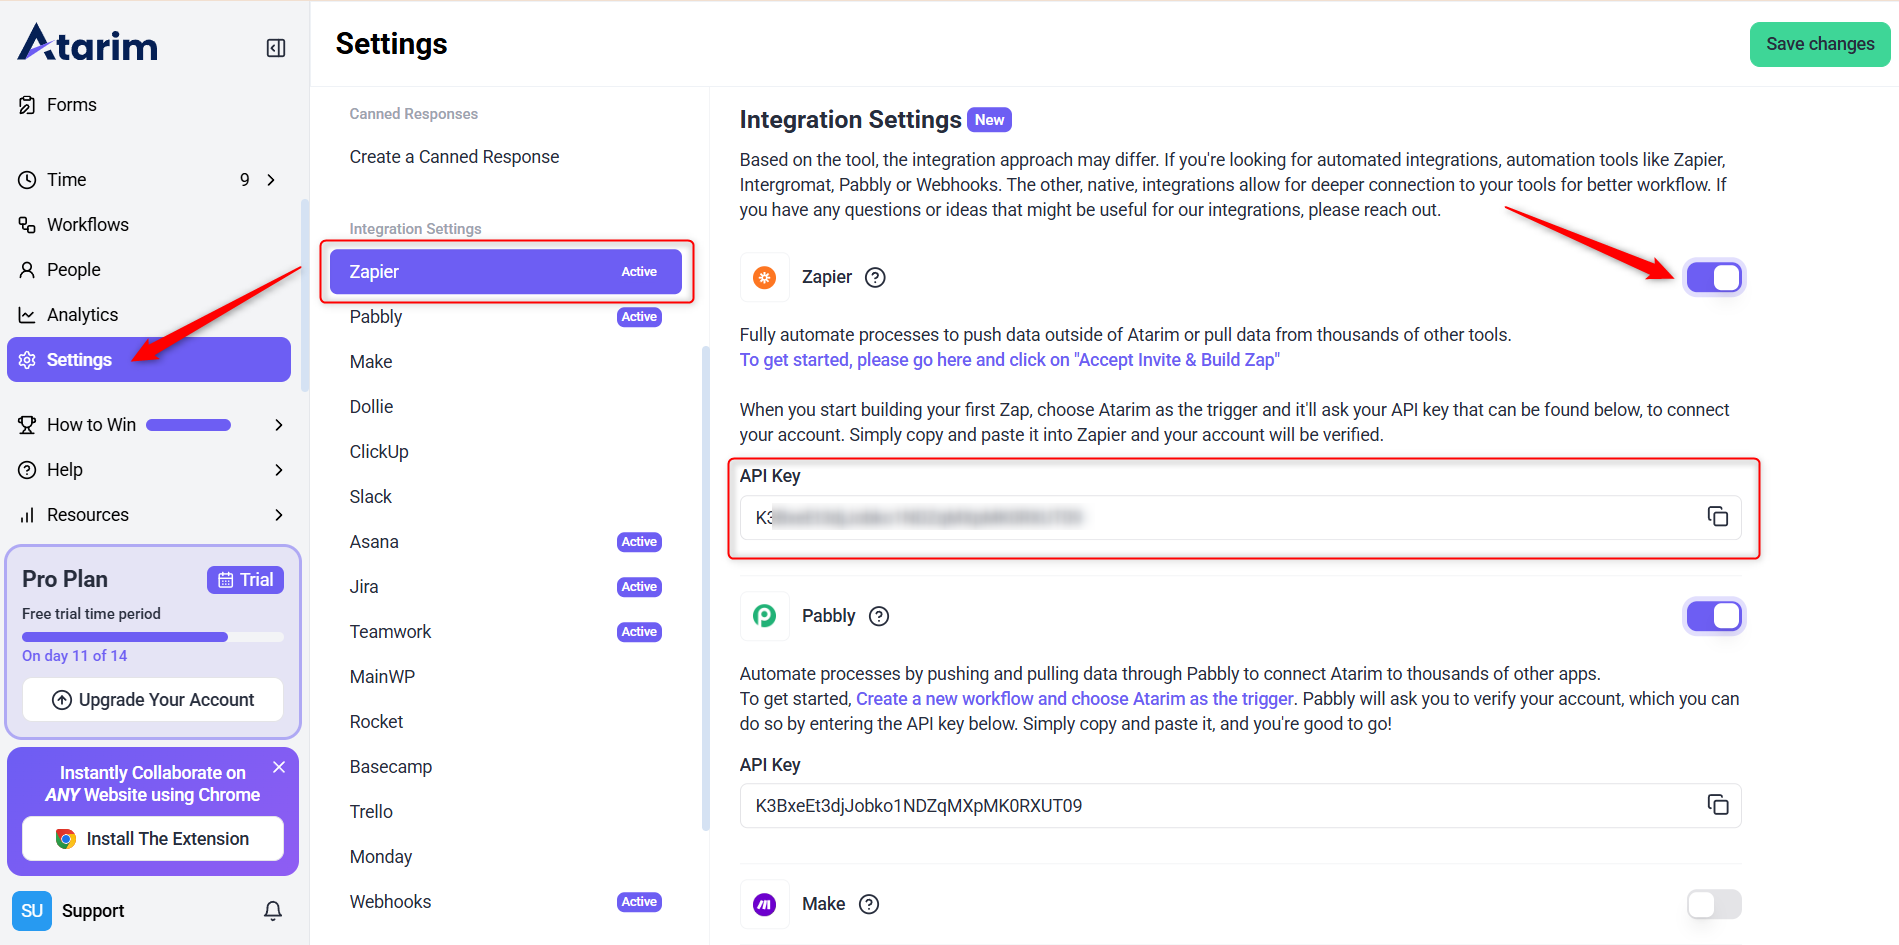
Note: Your API key is unique and should be kept private.
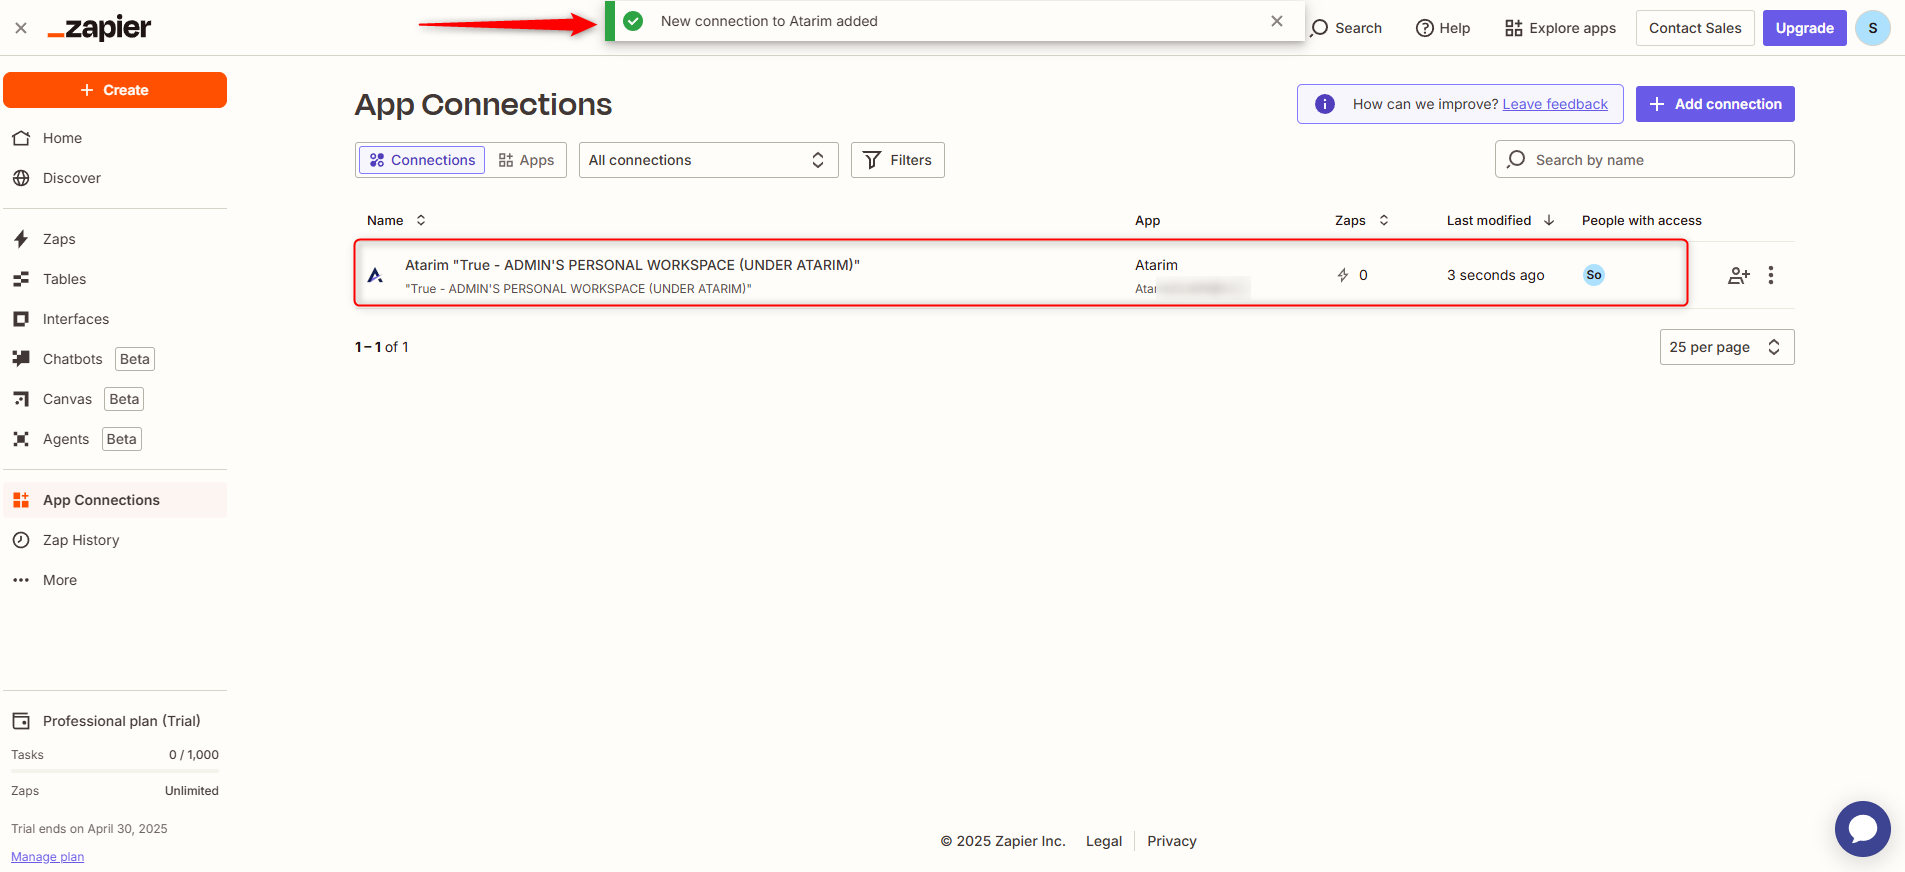
2. Connect Atarim to Zapier
Description:
Now that you have your API key, it’s time to link Atarim to your Zapier account.
Instructions:
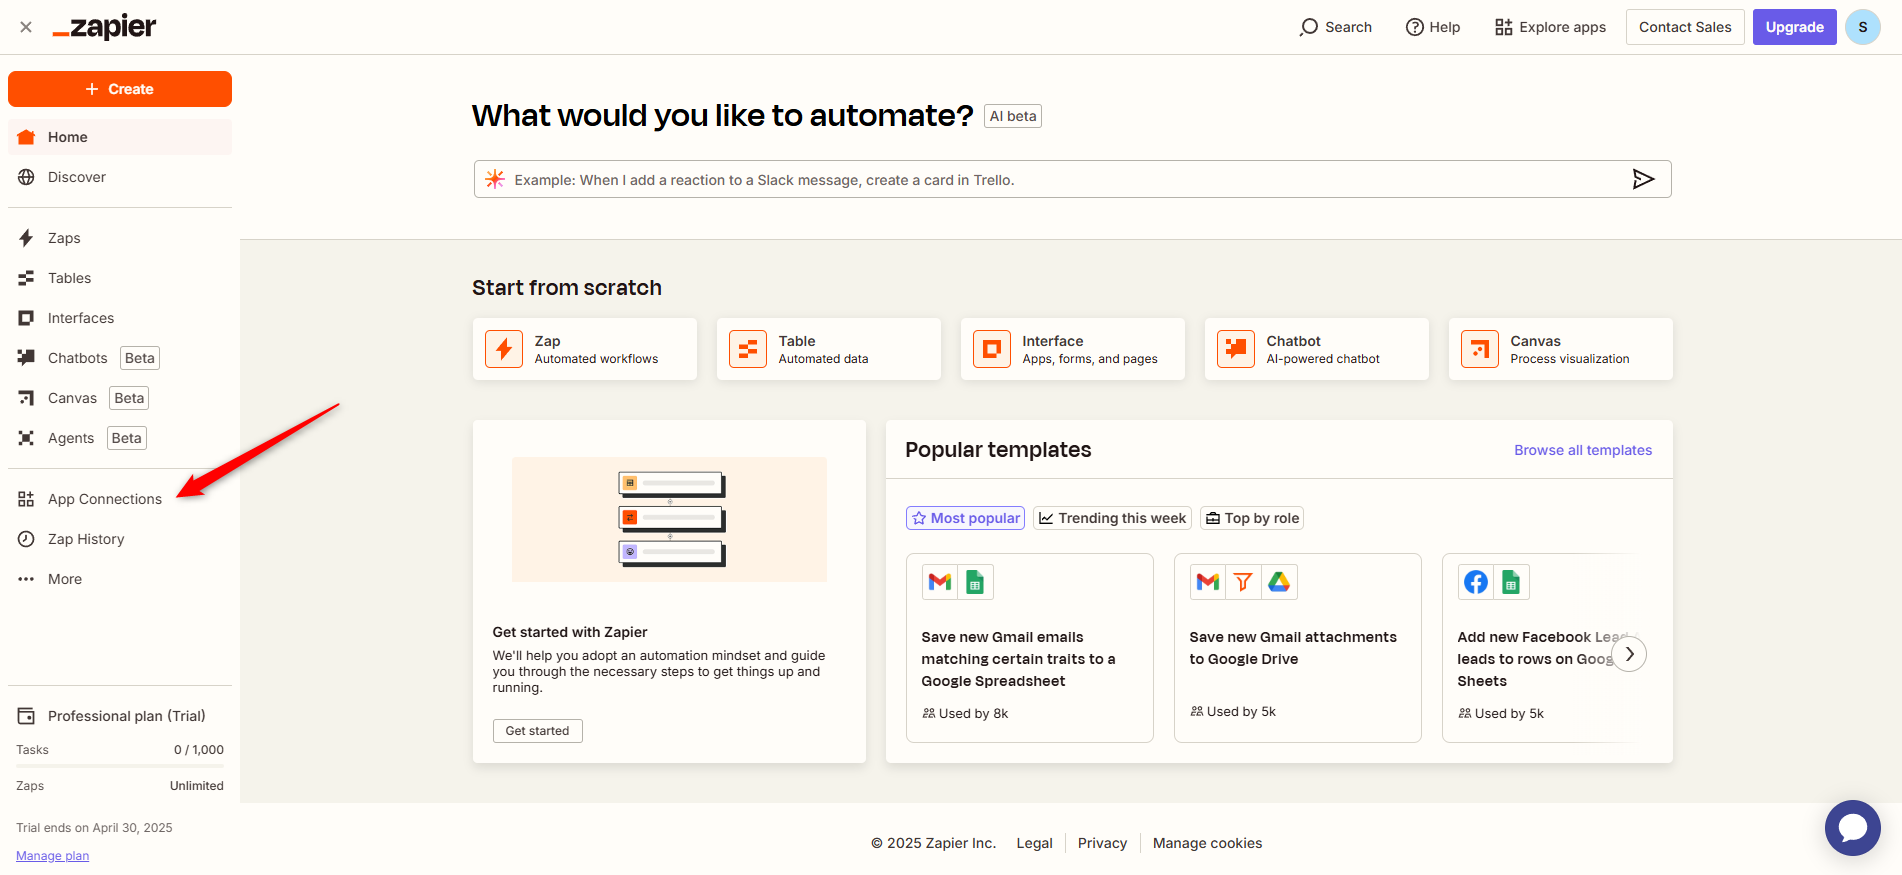
- Log into Zapier.
- Go to Apps Connection from the left sidebar.
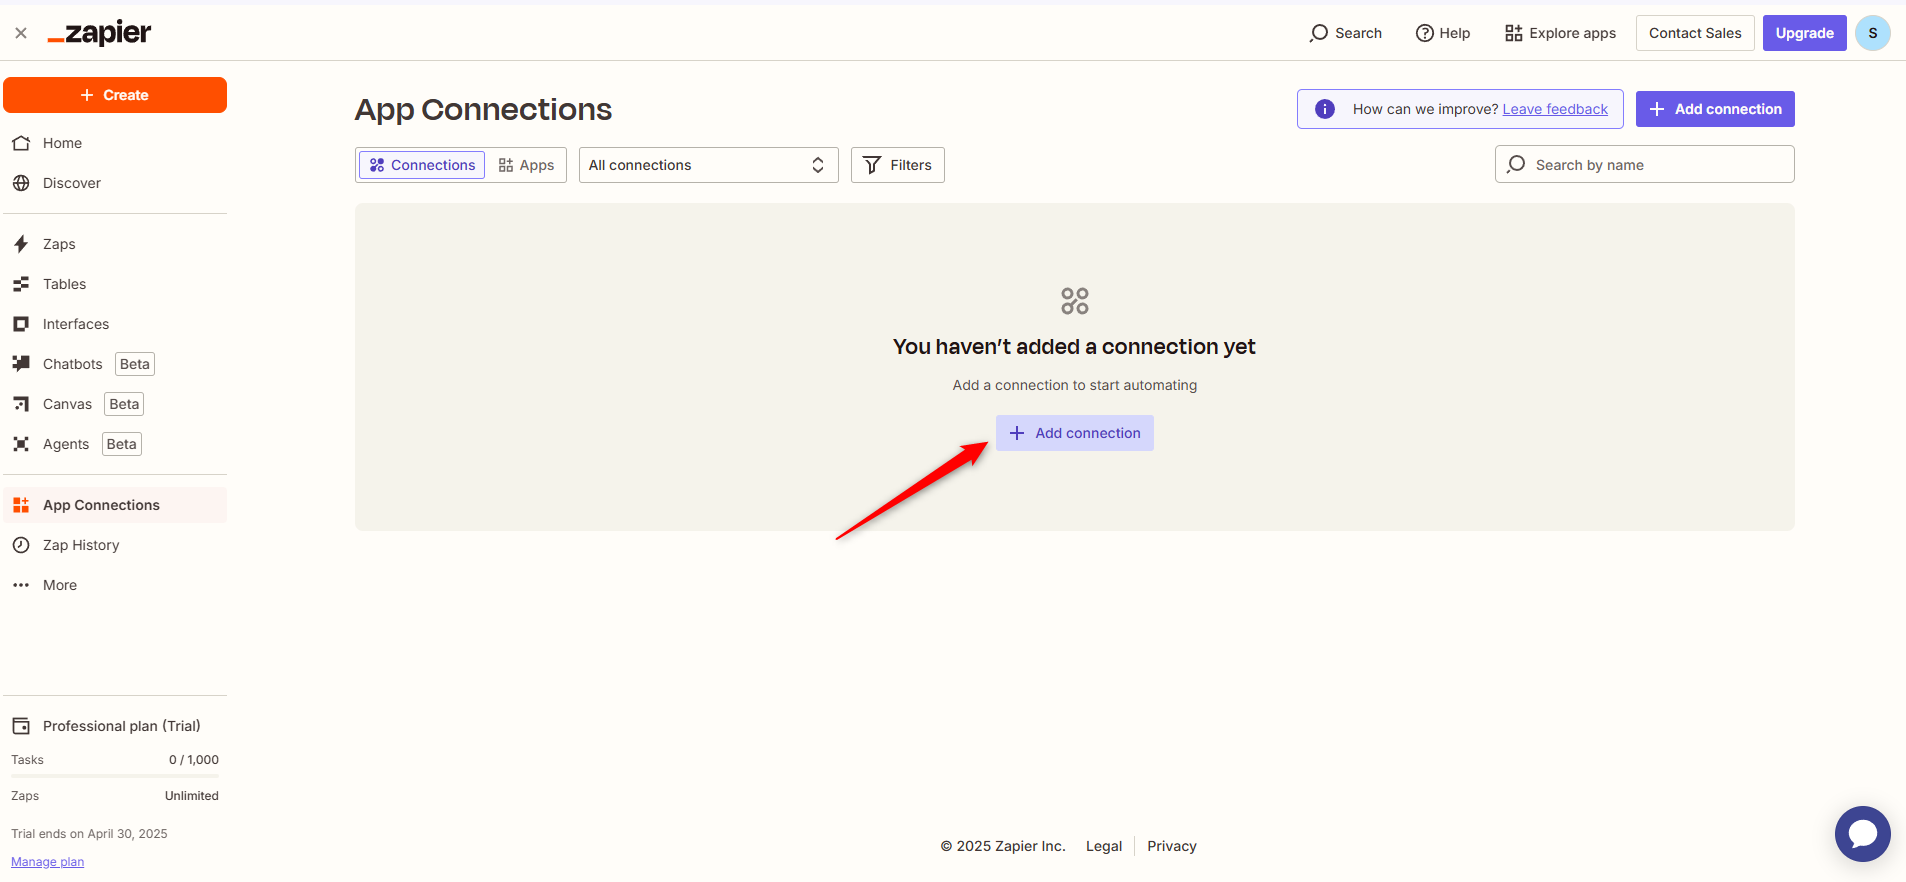
- Click “+ Add Connection”.
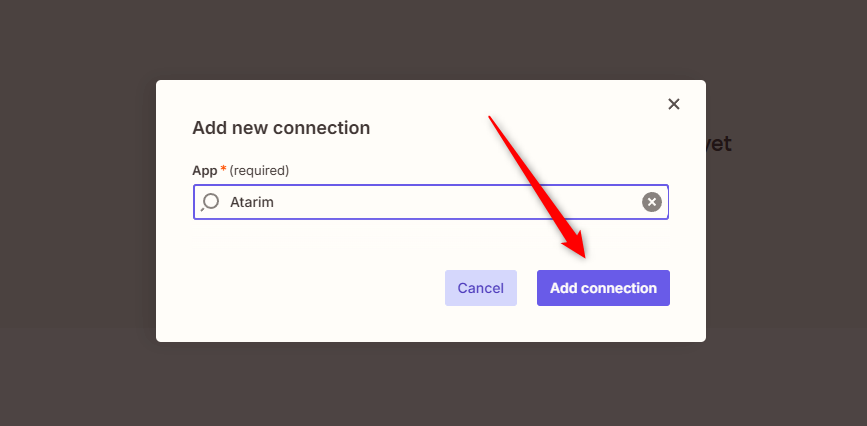
- Search for “Atarim” and select it.
- A modal will appear—paste your API key and click Yes, Continue to Atarim.

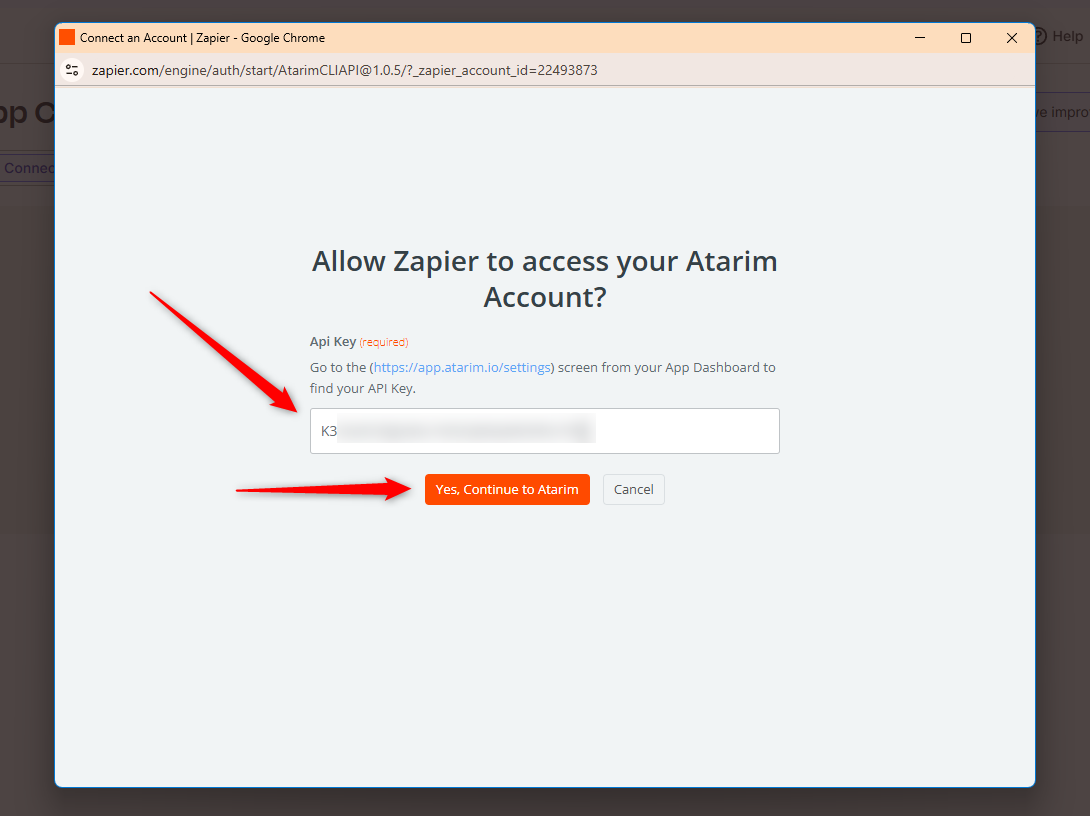
Warning: Make sure you’re using the correct API key for the workspace you’re intending to automate. Using the wrong key may result in failed triggers or exposure of project data.
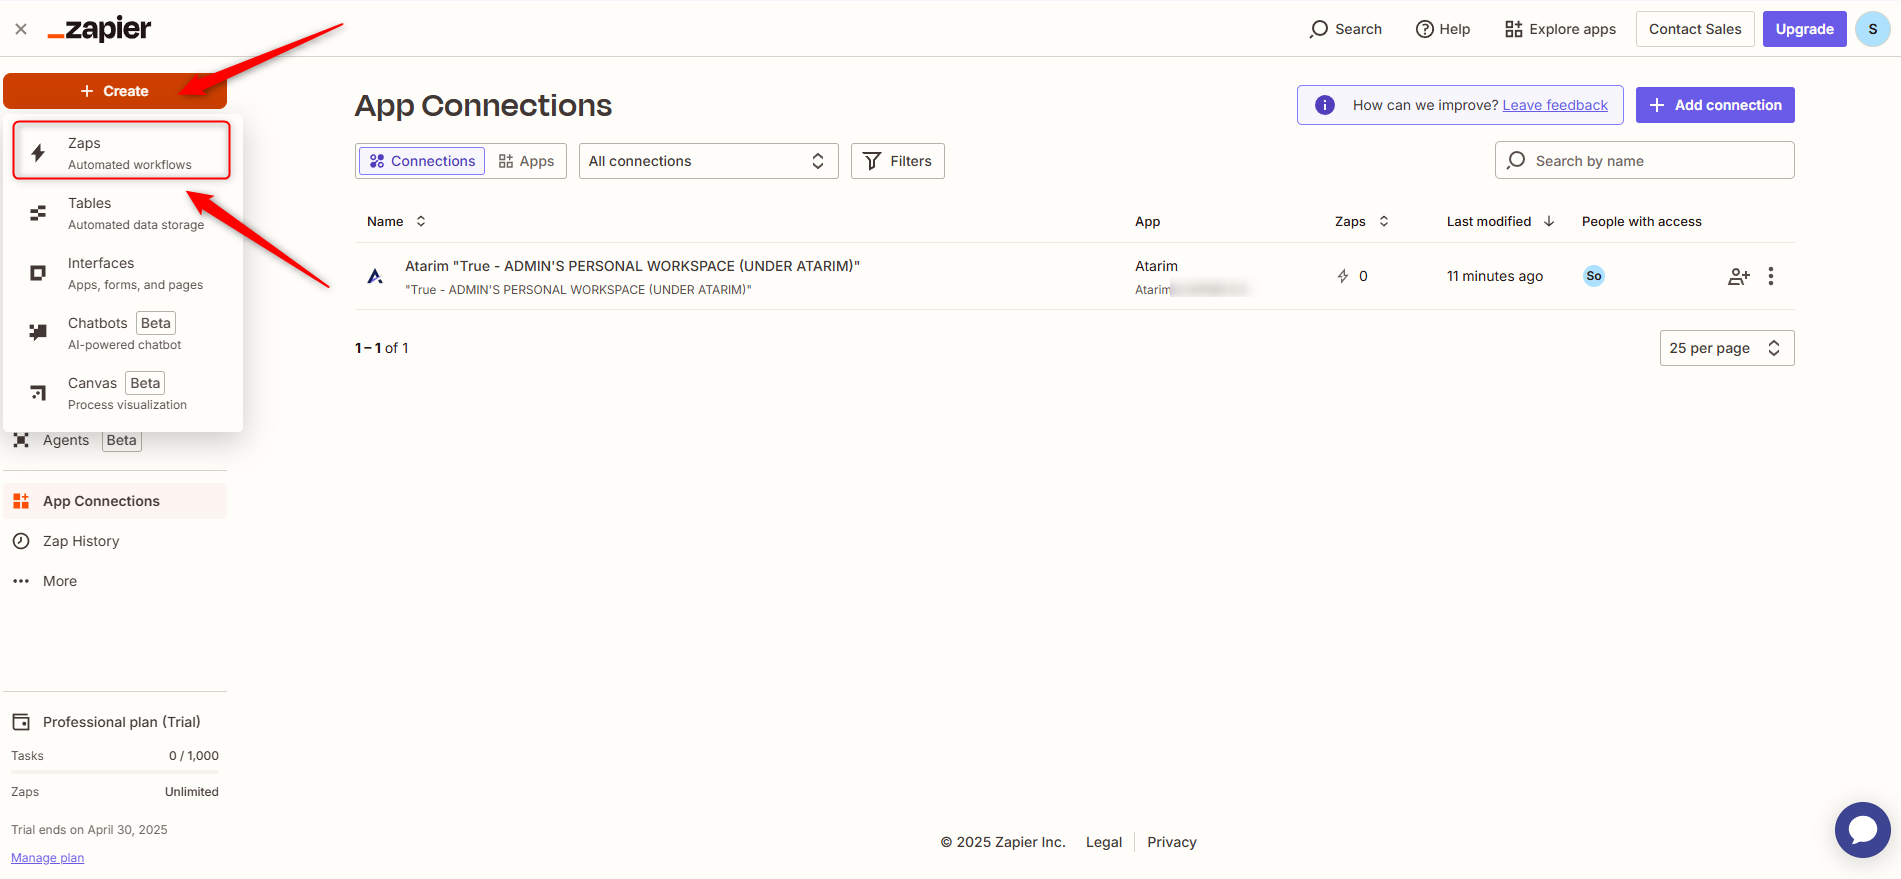
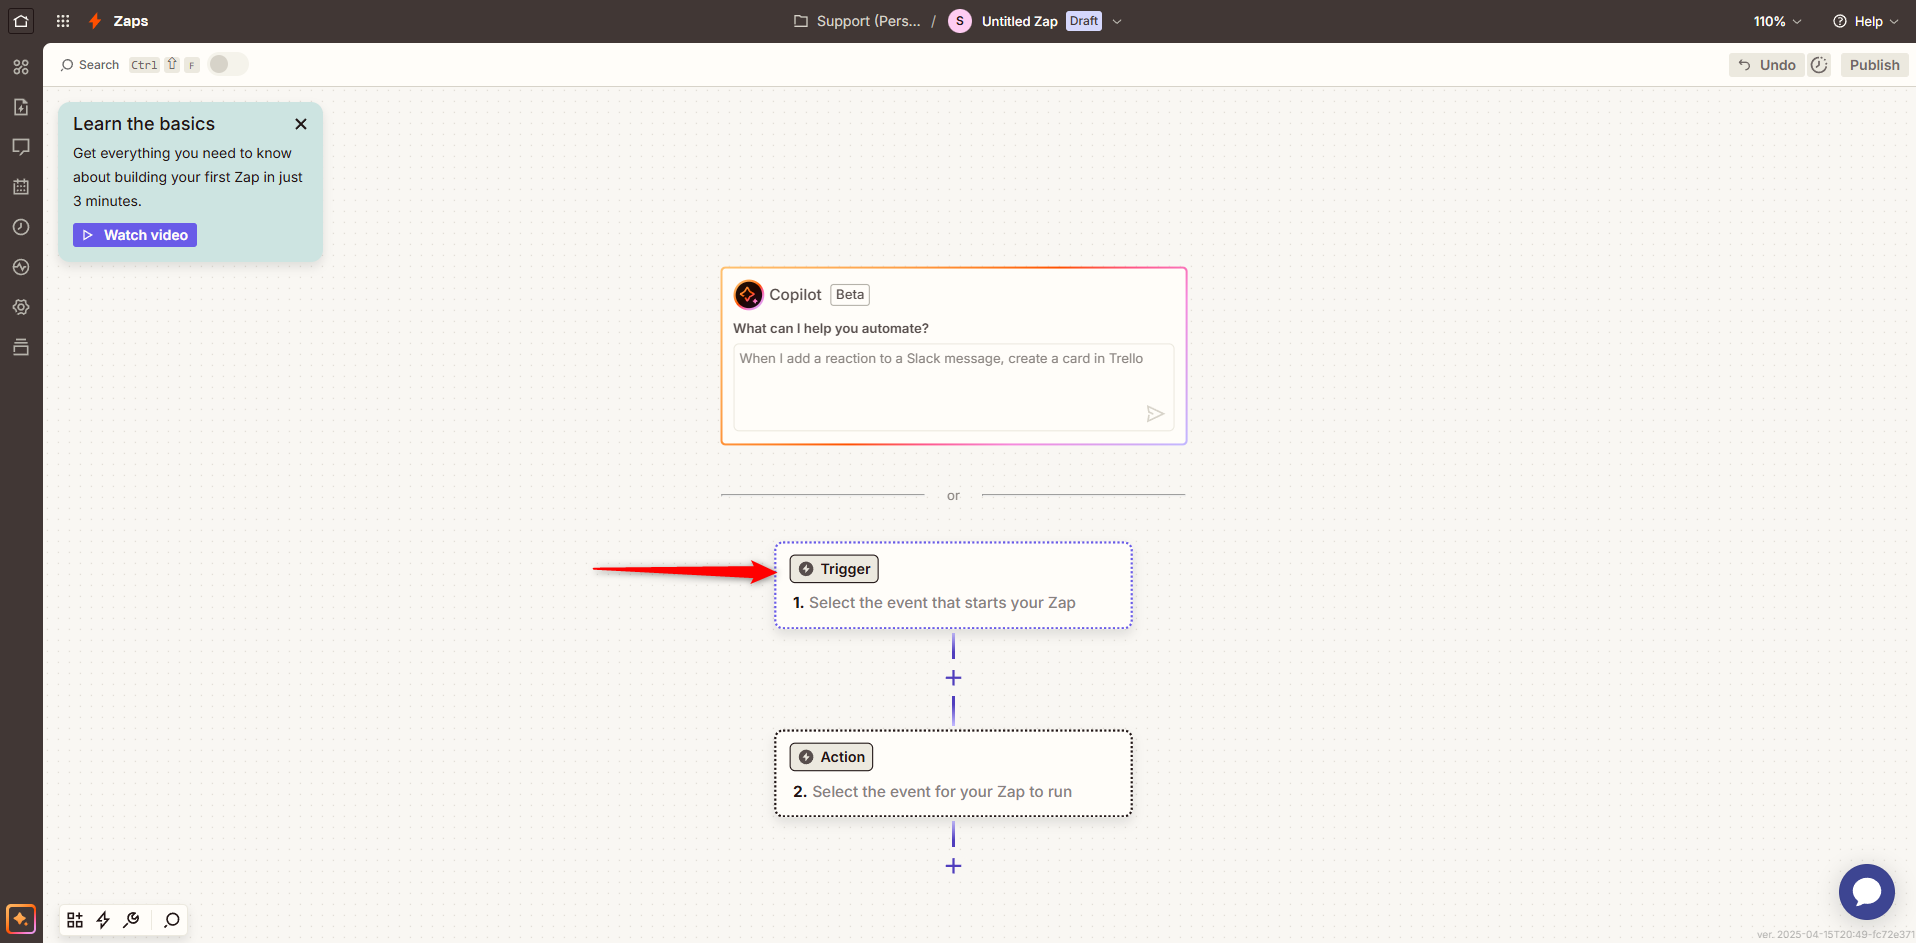
3. Set Up a Trigger from Atarim
Description:
Triggers are events inside Atarim that start your Zap (e.g., a new task is created).
Instructions:
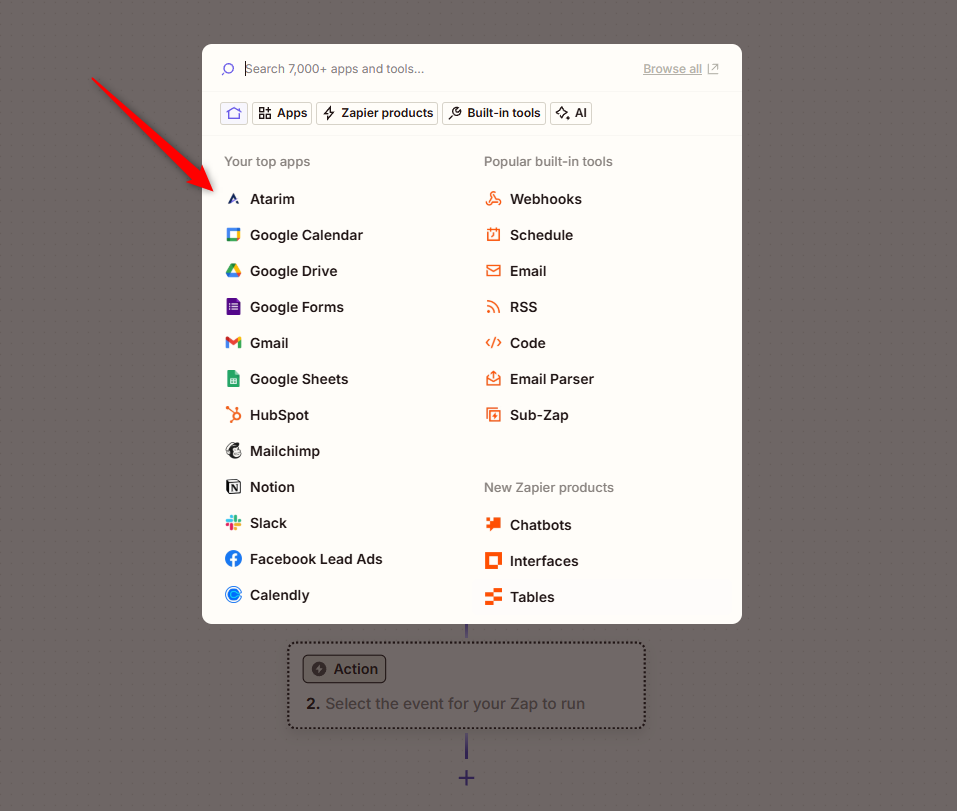
- In Zapier, click Create and choose Zaps
- For the trigger, either search for and select Atarim or choose it from the list.
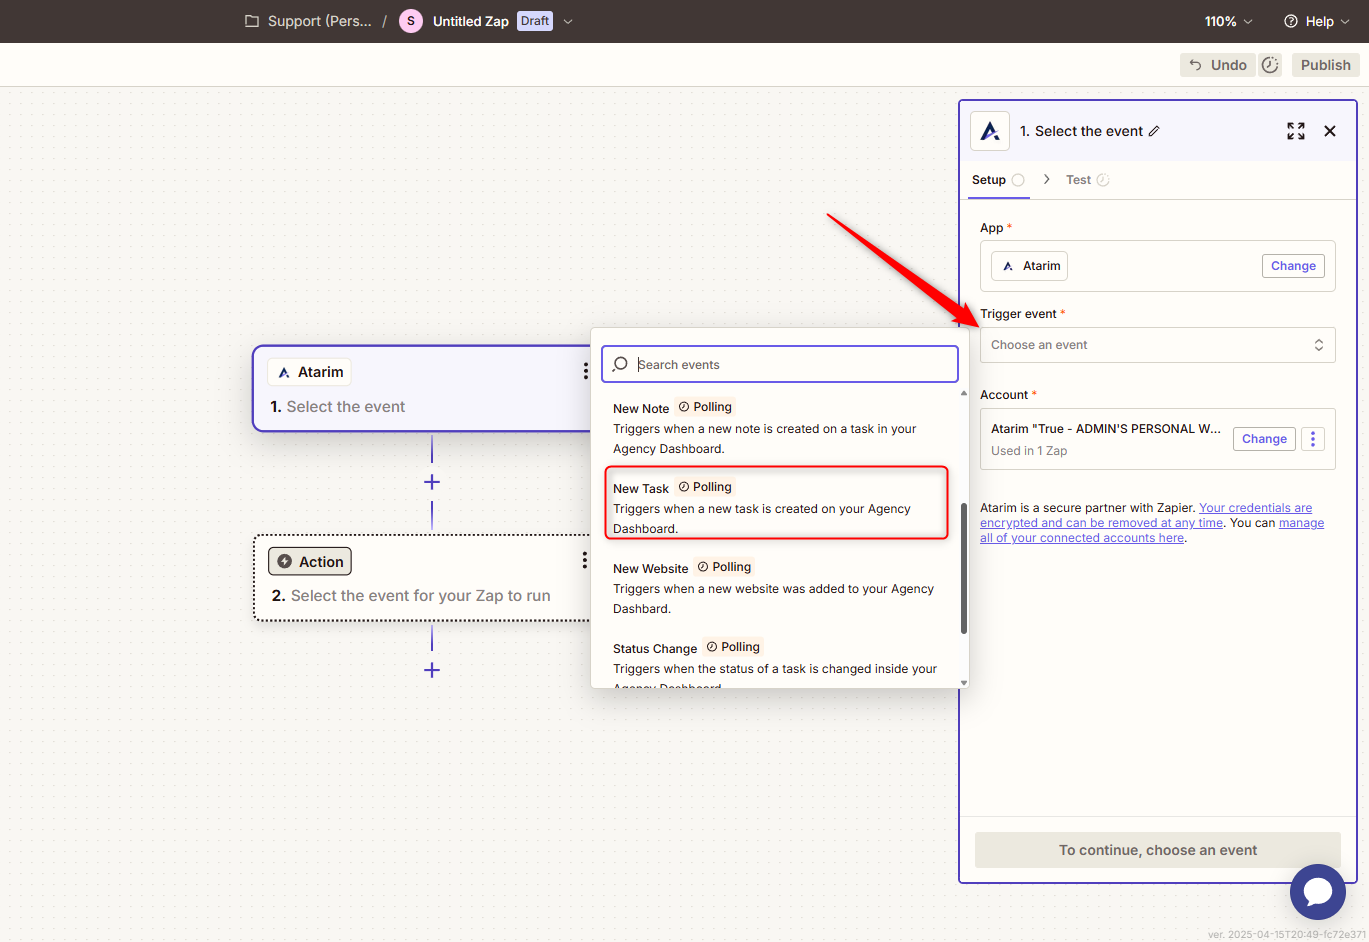
- Choose a trigger event from the dropdown. Options include:
- Add Tag
- New Comment
- New Time Entry Logged
- New Note
- New Task
- New Website
- Status Change
- Urgency Change
- Select New Task for this example.
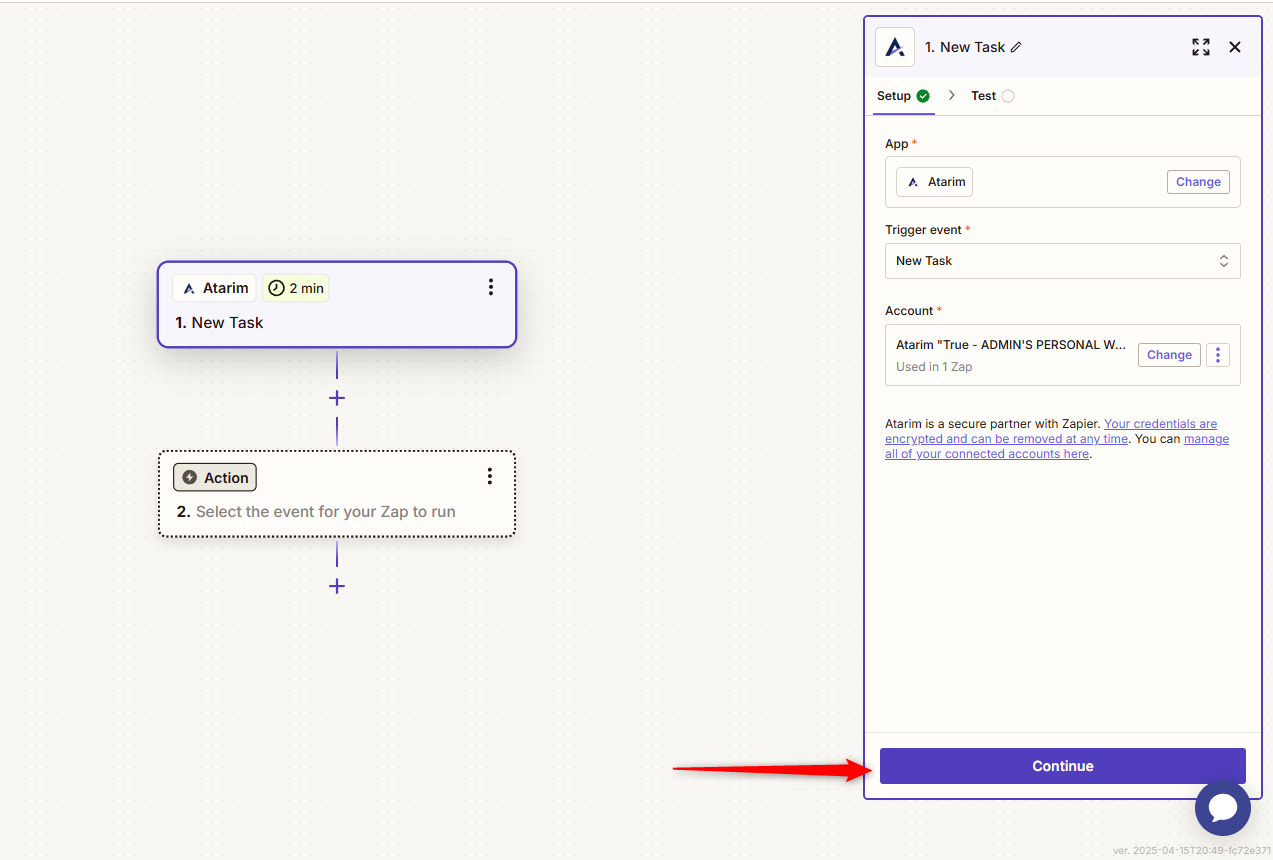
- Choose your Atarim account (connected earlier).
- Click Test Trigger.
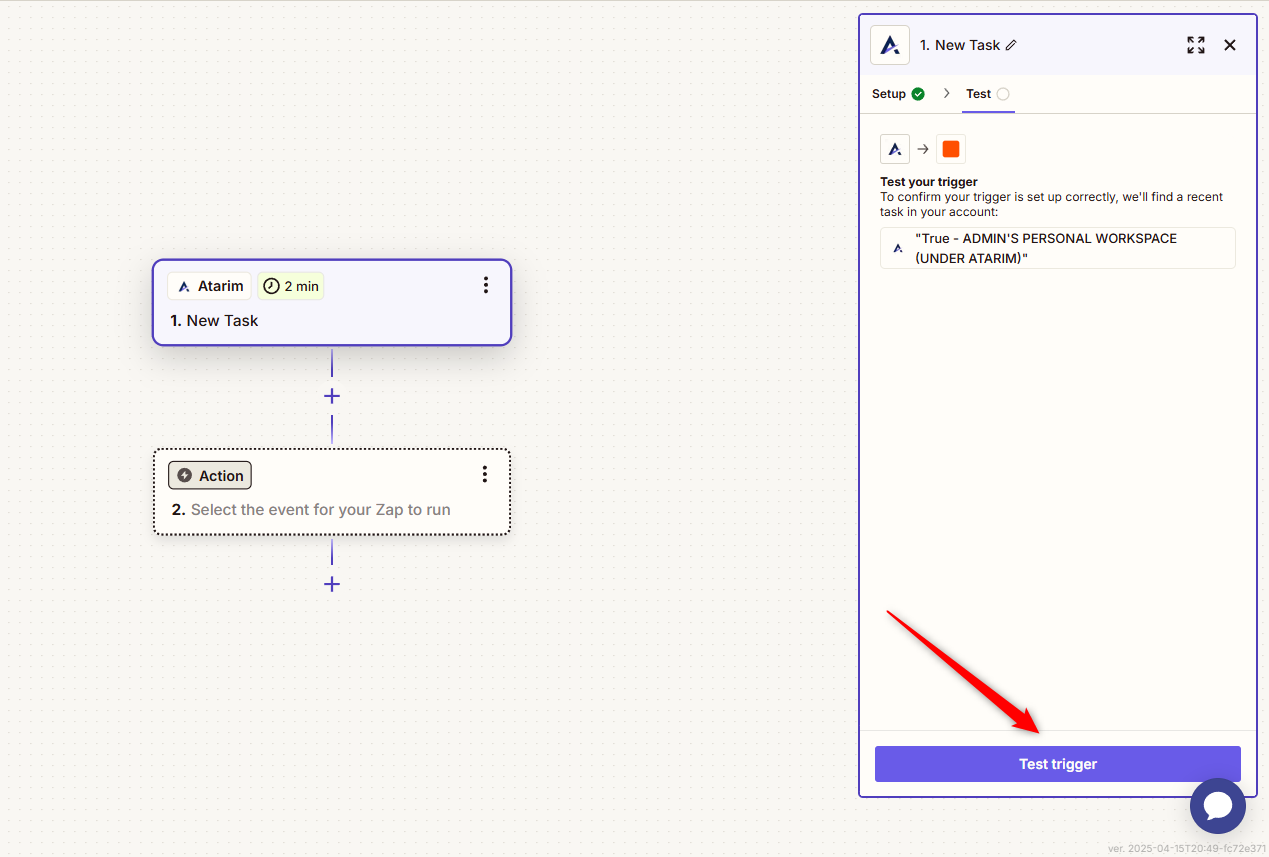
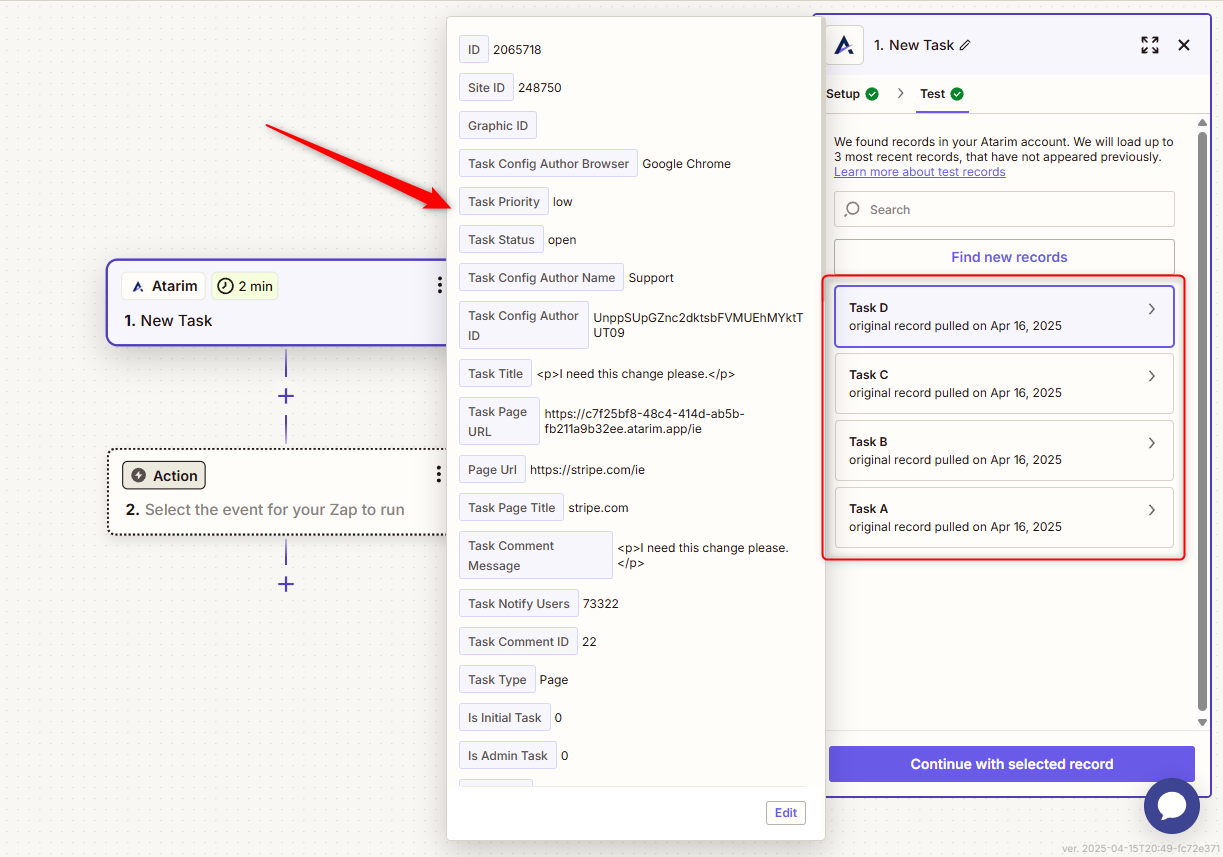
Tip: If the test fails, make sure you’ve created at least one task inside your Atarim dashboard.
4. Choose an Action in Another App
Description:
Actions define what happens in another app when a trigger is activated in Atarim.
Instructions:
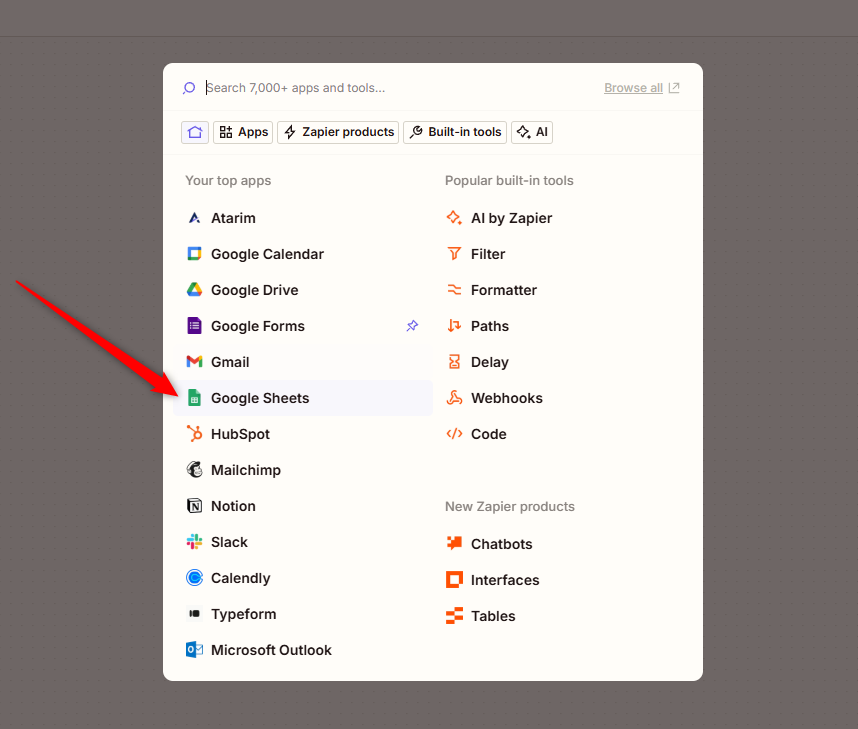
- Click on Action in the Zap setup.
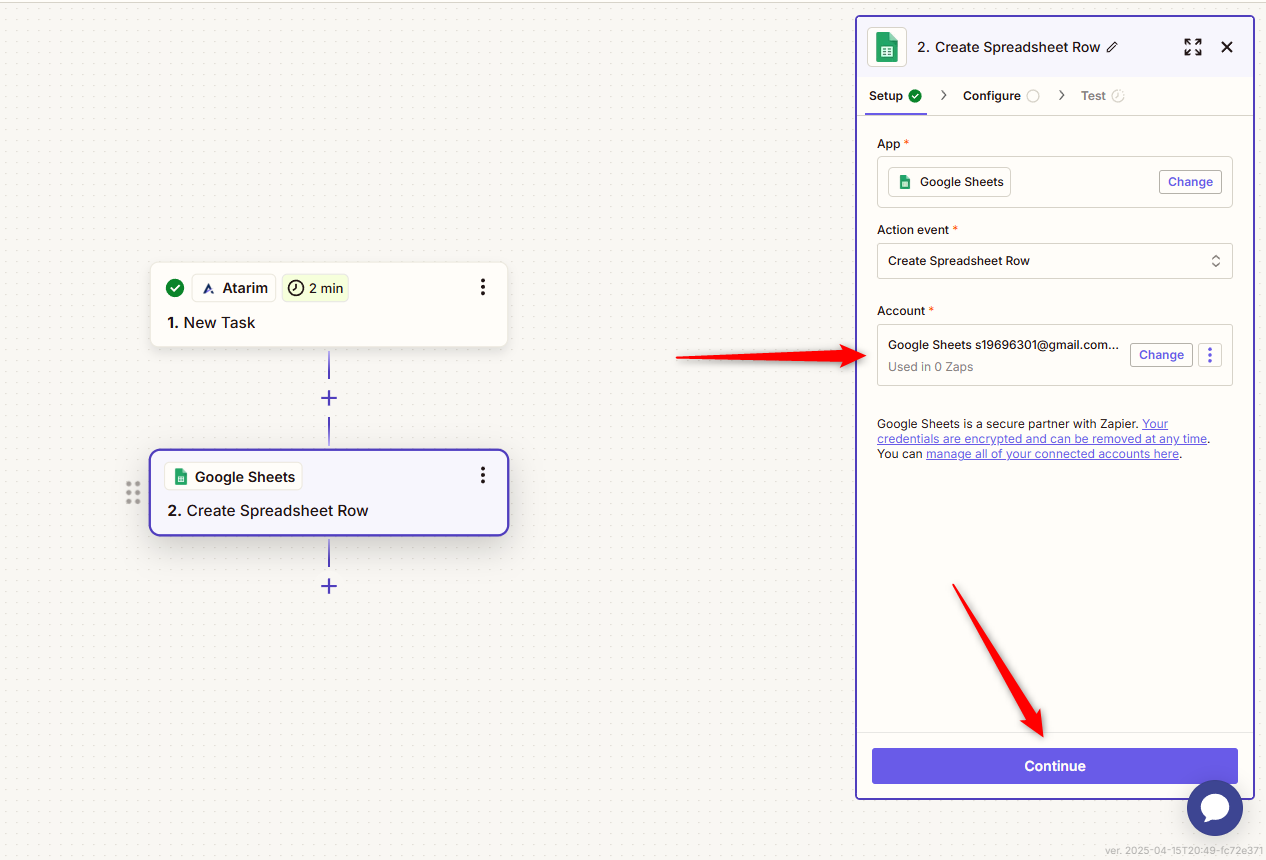
- Search for and select Google Sheets (or another app).
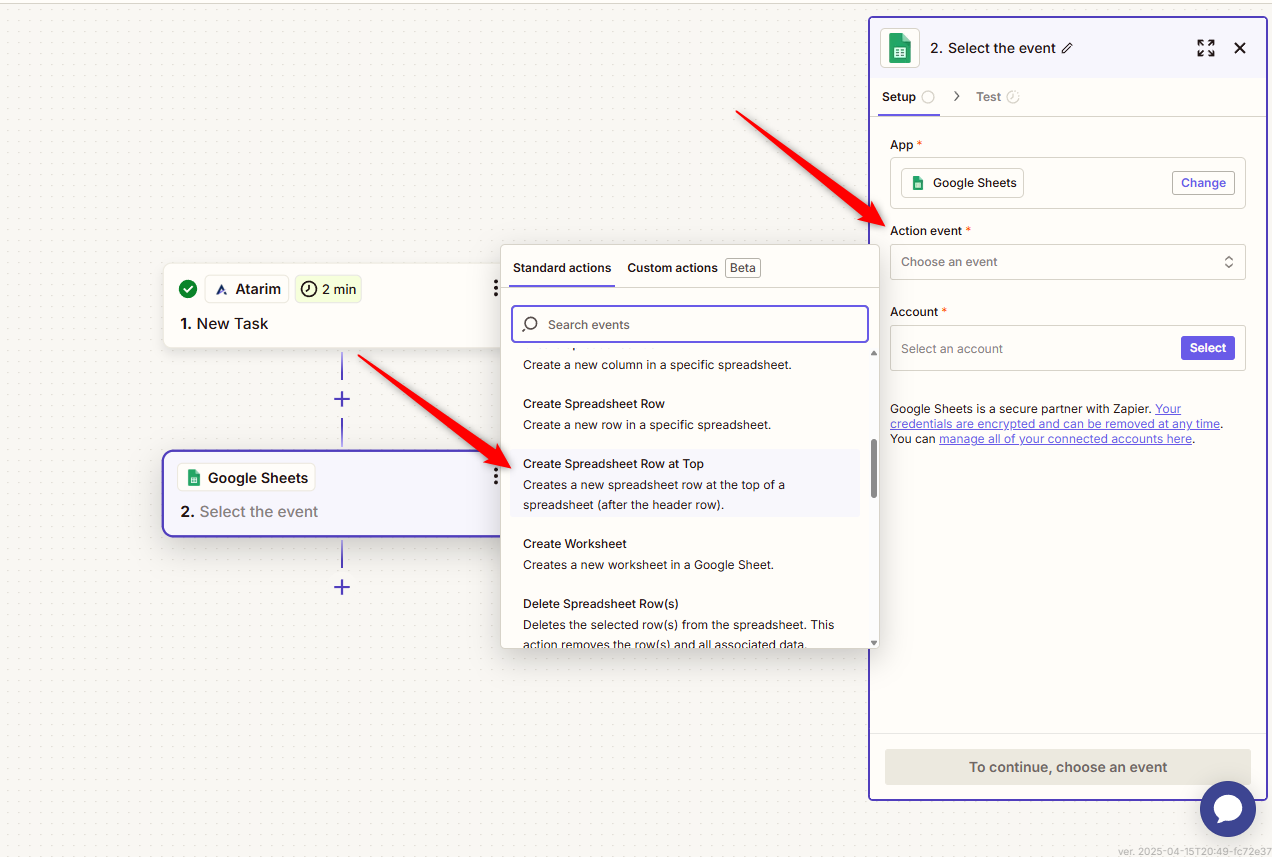
- Choose Create Spreadsheet Row.
- Connect your Google Sheets account.
- Select the drive, spreadsheet, and worksheet.
- Map fields from the Atarim task (e.g., task comment, status) to columns.

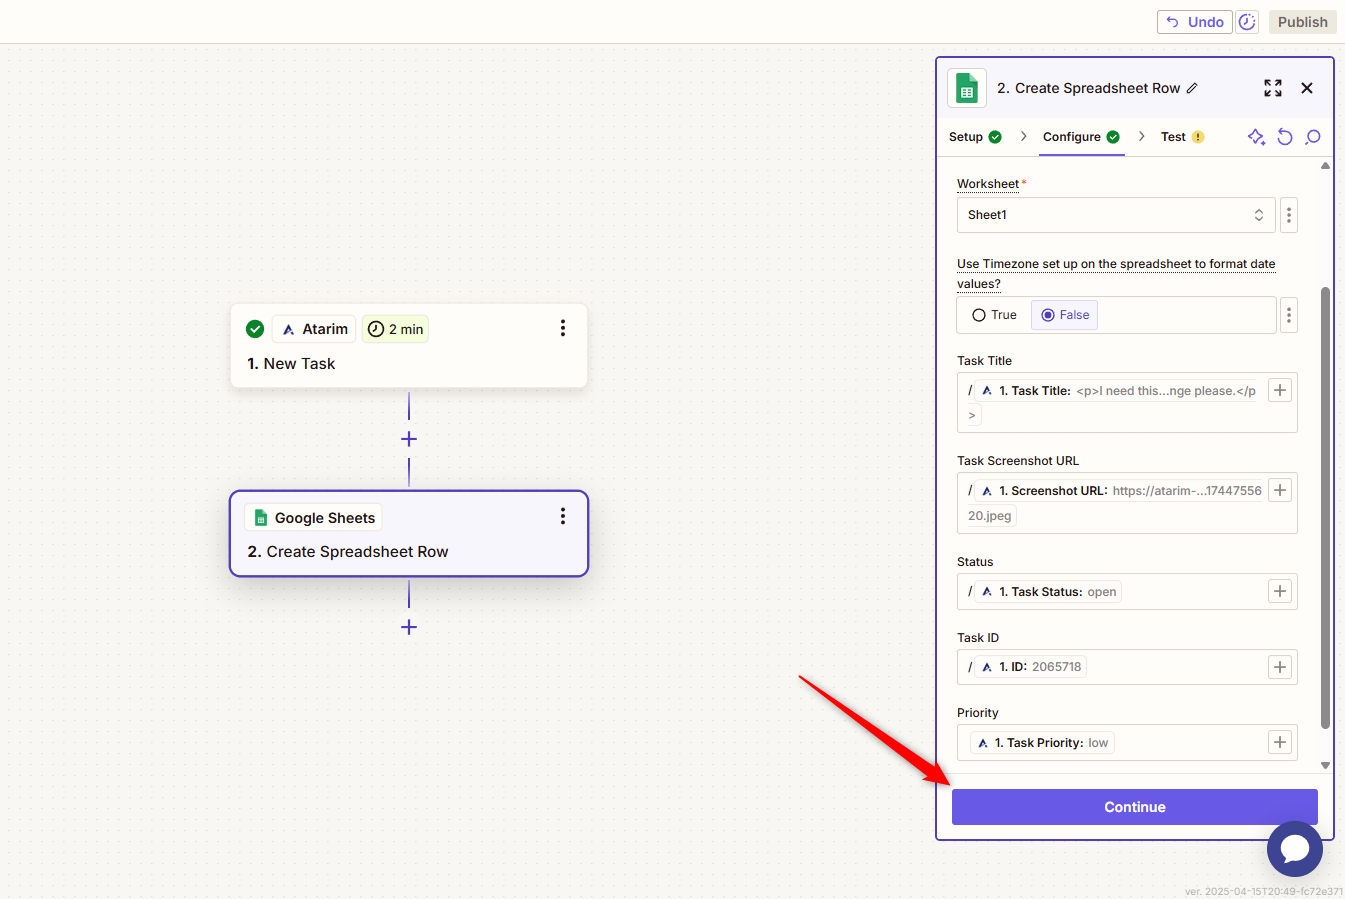
Tip: Remove the slash symbol to prevent it from being included in the spreadsheet.
Recommendation: Use a dedicated sheet to keep your Atarim task log clean and organized.
5. Finalize and Test Your Zap
Description:
Ensure everything works correctly by running a live test.
Instructions:
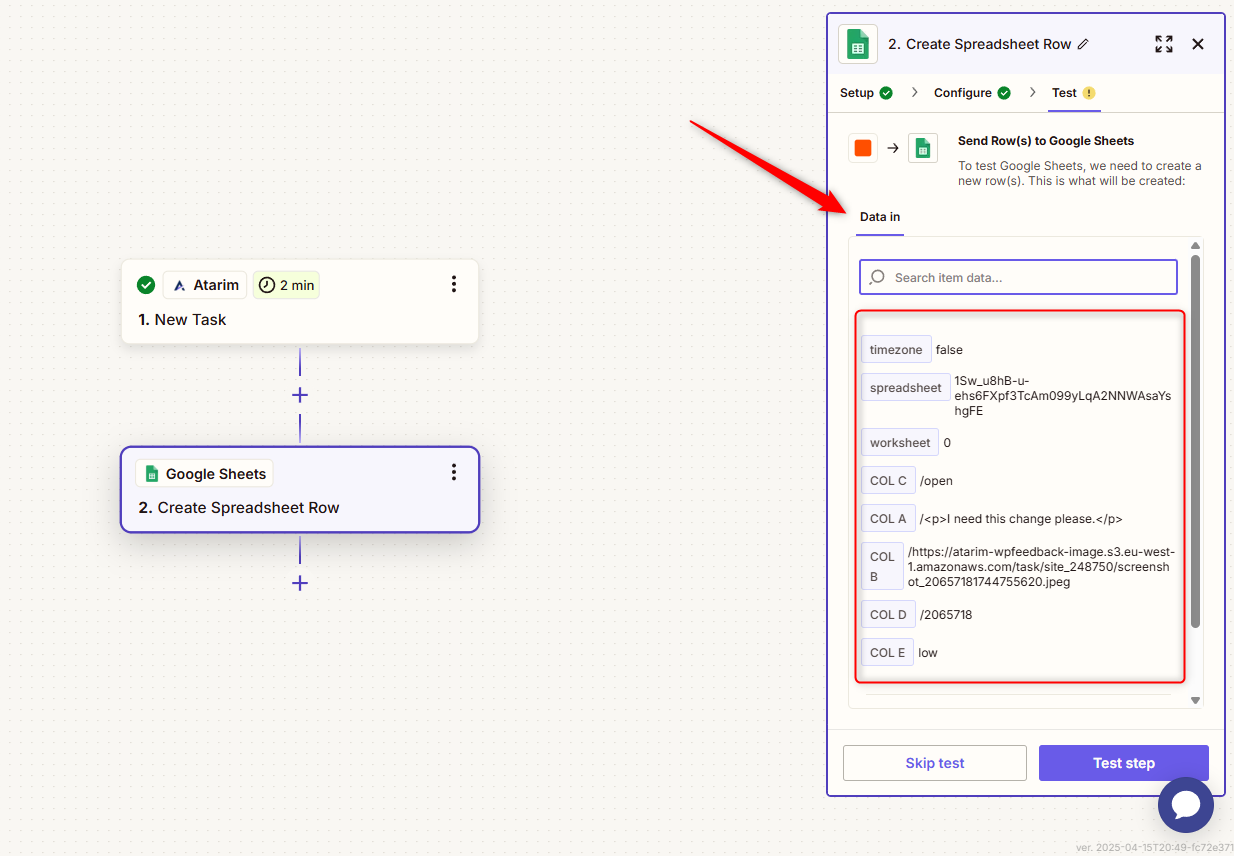
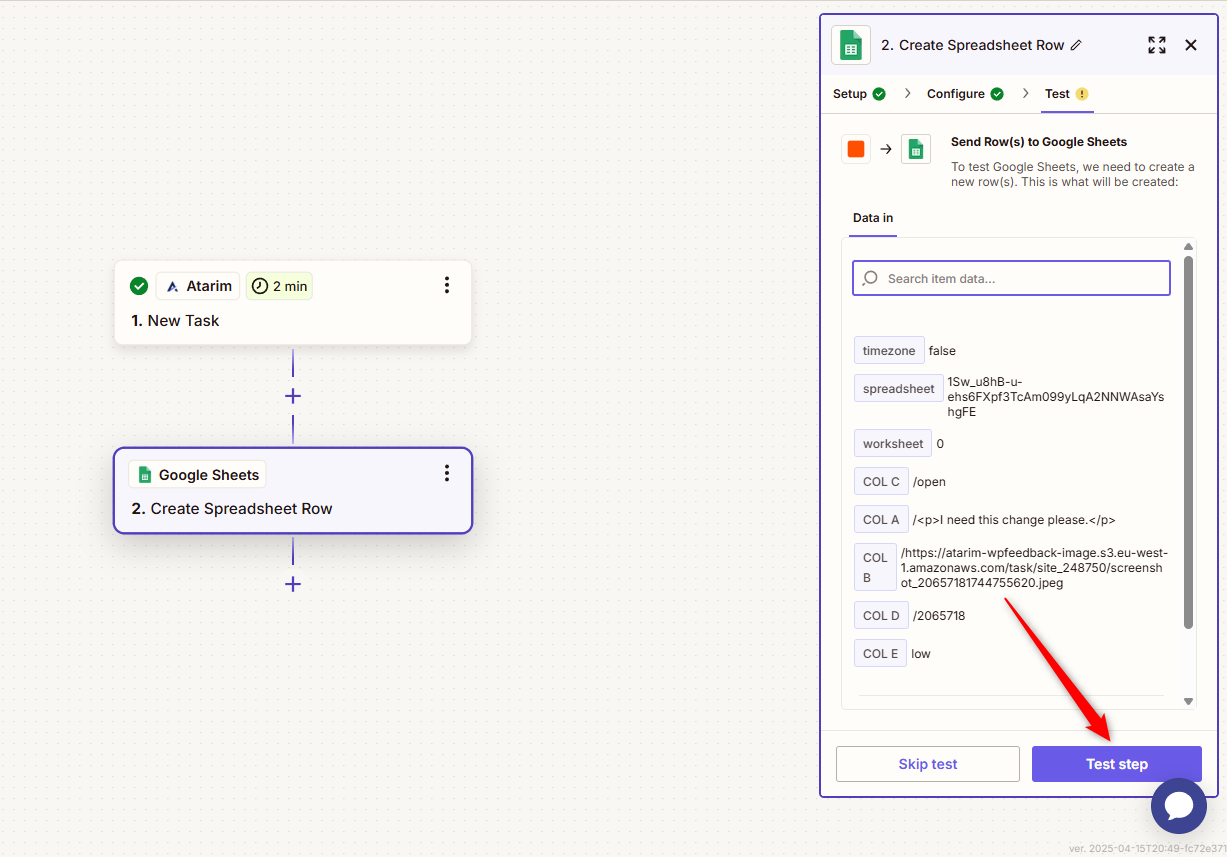
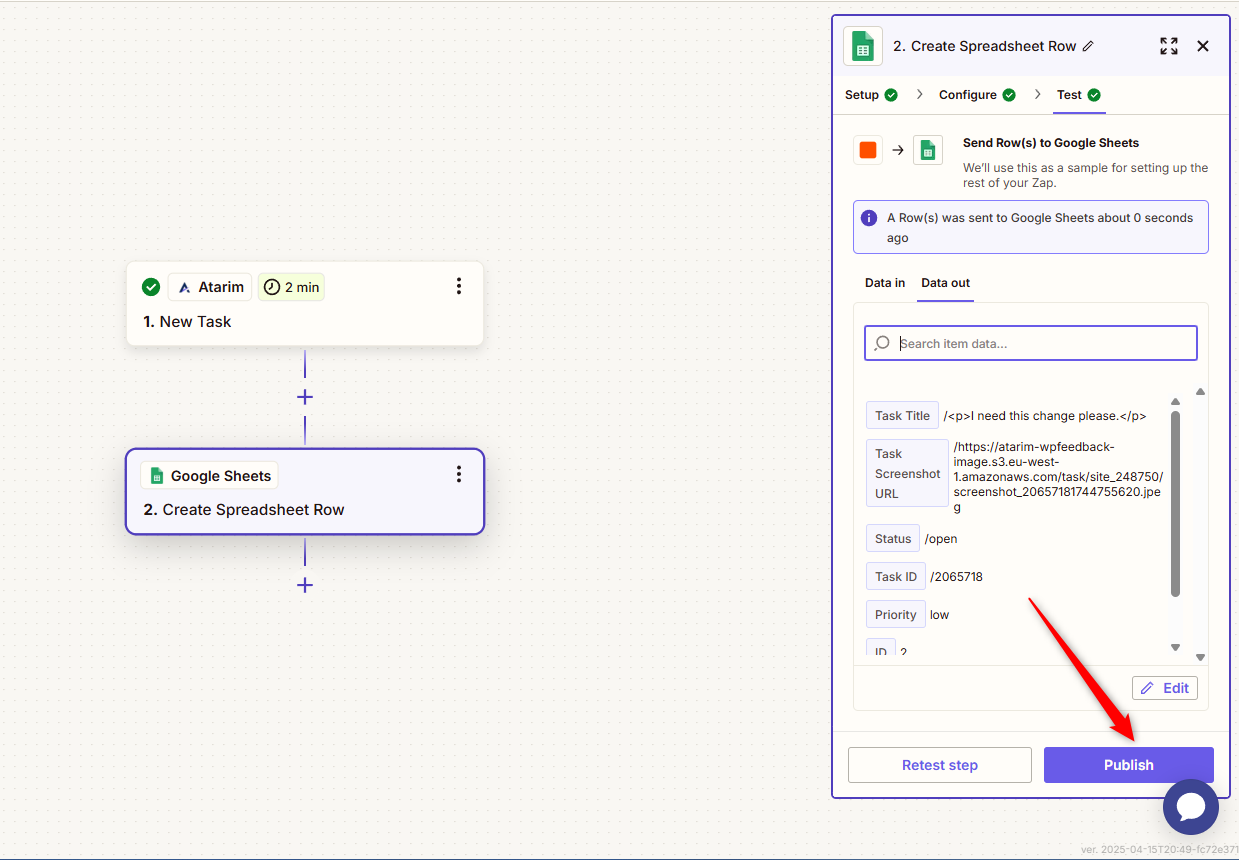
- Click on Test Step.
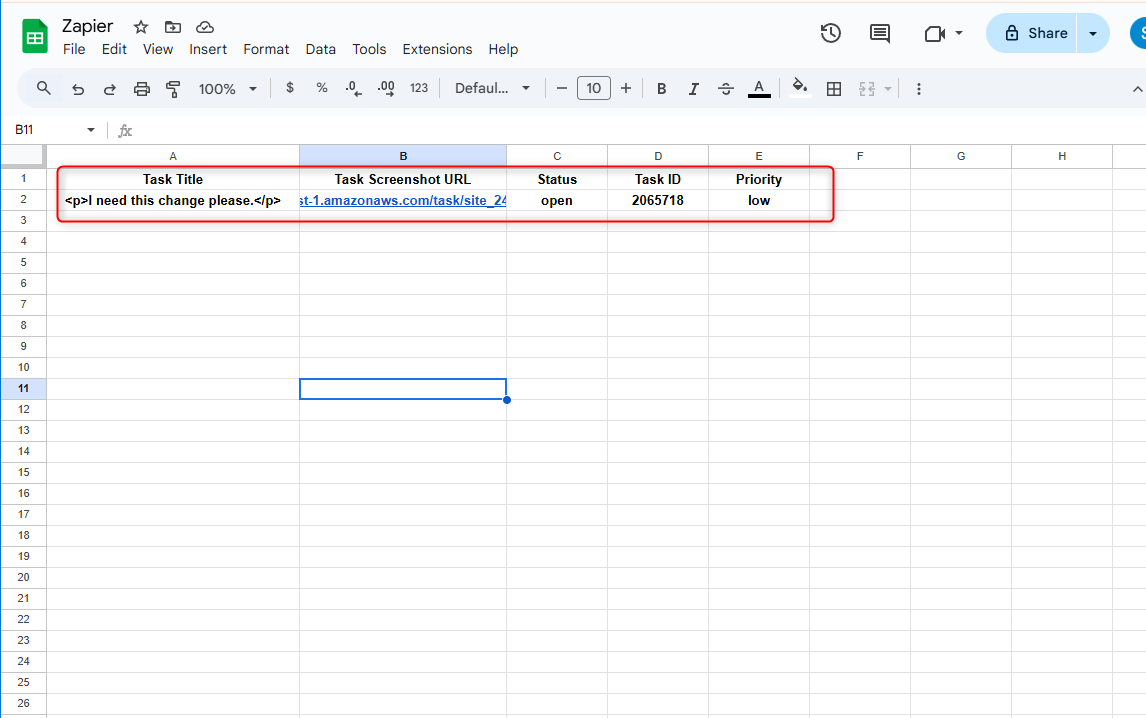
- Open your spreadsheet to confirm the data was added.
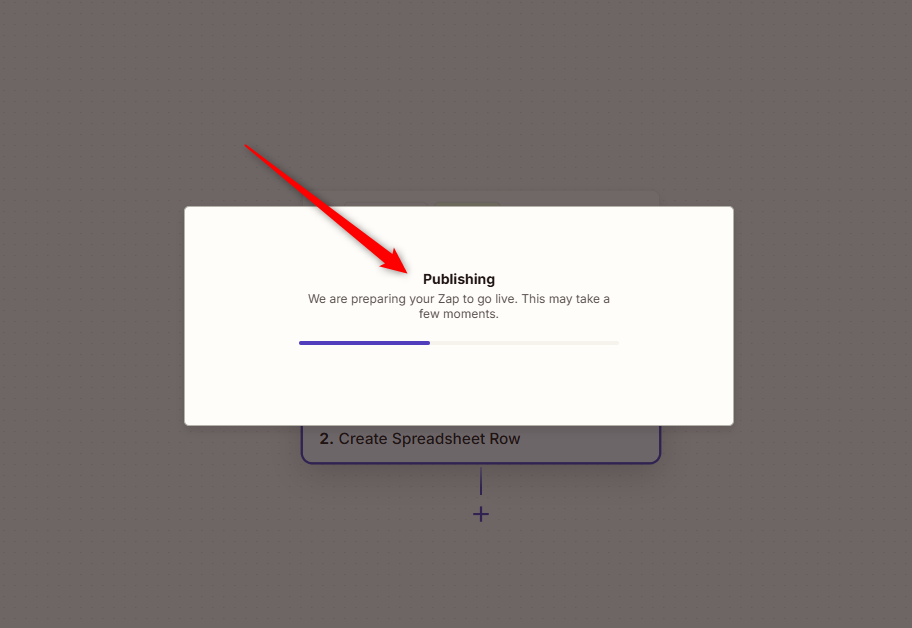
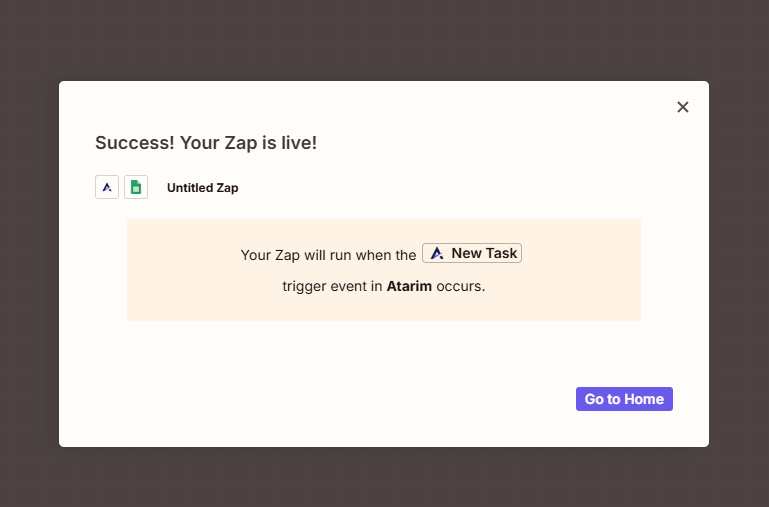
- If successful, click Publish Zap.
FAQs
It allows you to automate task updates by sending Atarim data to other apps.
The integration is available on Atarim Pro, Business, and Enterprise plans.
No, you can use your existing Atarim account to connect with Zapier.
Go to Atarim Dashboard – Settings – Integration Settings, then enable Zapier to generate an API key.