Step-by-Step Guide
1. Exploring the Grid View
Description:
The Grid View offers a card-based layout that’s perfect for creative teams and visual-first users. Each card provides a snapshot of key project information, helping you identify and act on high-priority work fast.
Instructions:
- Go to the Projects Screen.
- Select the Grid View toggle (icon with squares) in the top-right corner.
Each project card includes:
- Thumbnail – A visual preview of the project.
- Active Project Stage – Displays the current phase of the workflow.
- Folder Name – Indicates project grouping.
- Assigned Users – Avatars of team members.
- Project Type Icon – Whether it’s web-based or a design project.
- Project Name and URL – Quick navigation to the site.
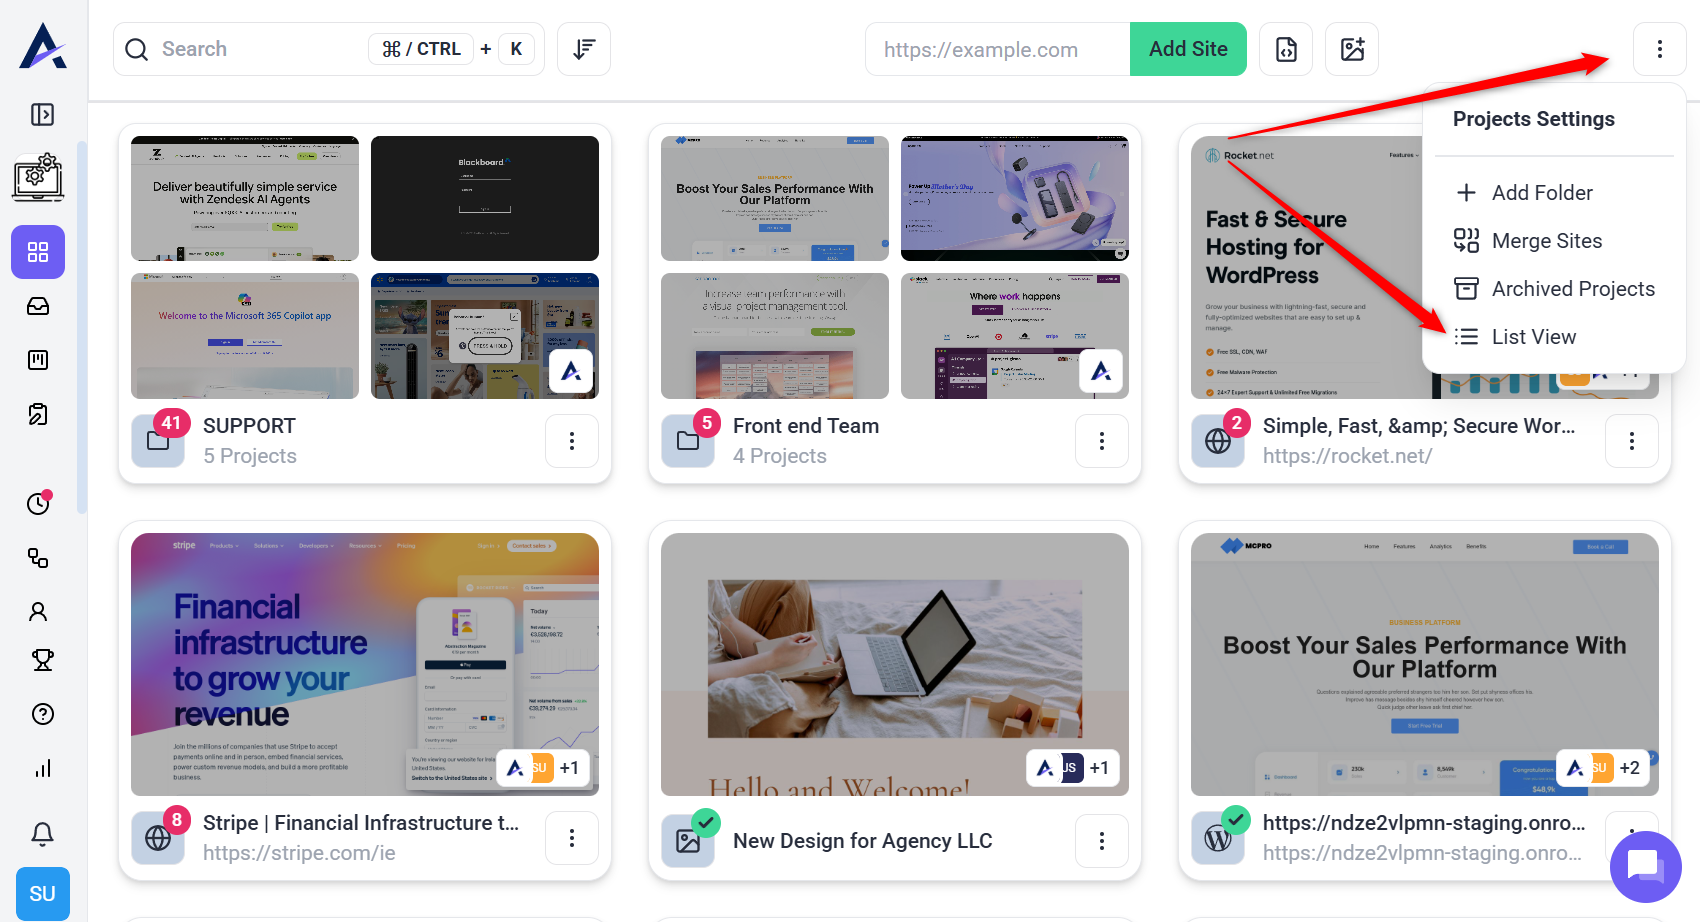
- Settings Button – Three-dot menu for project actions.
Quick Actions on Hover:
- Inbox Icon – Jump to project’s feedback and task inbox.
- Collaboration Icon – Open the visual collaboration interface.
- Share Icon – Invite stakeholders or copy share link.
- Checkbox – For bulk actions like archive/delete.
- Drag-and-Drop – Drag onto another project to create a new folder, or into an existing folder to group it.
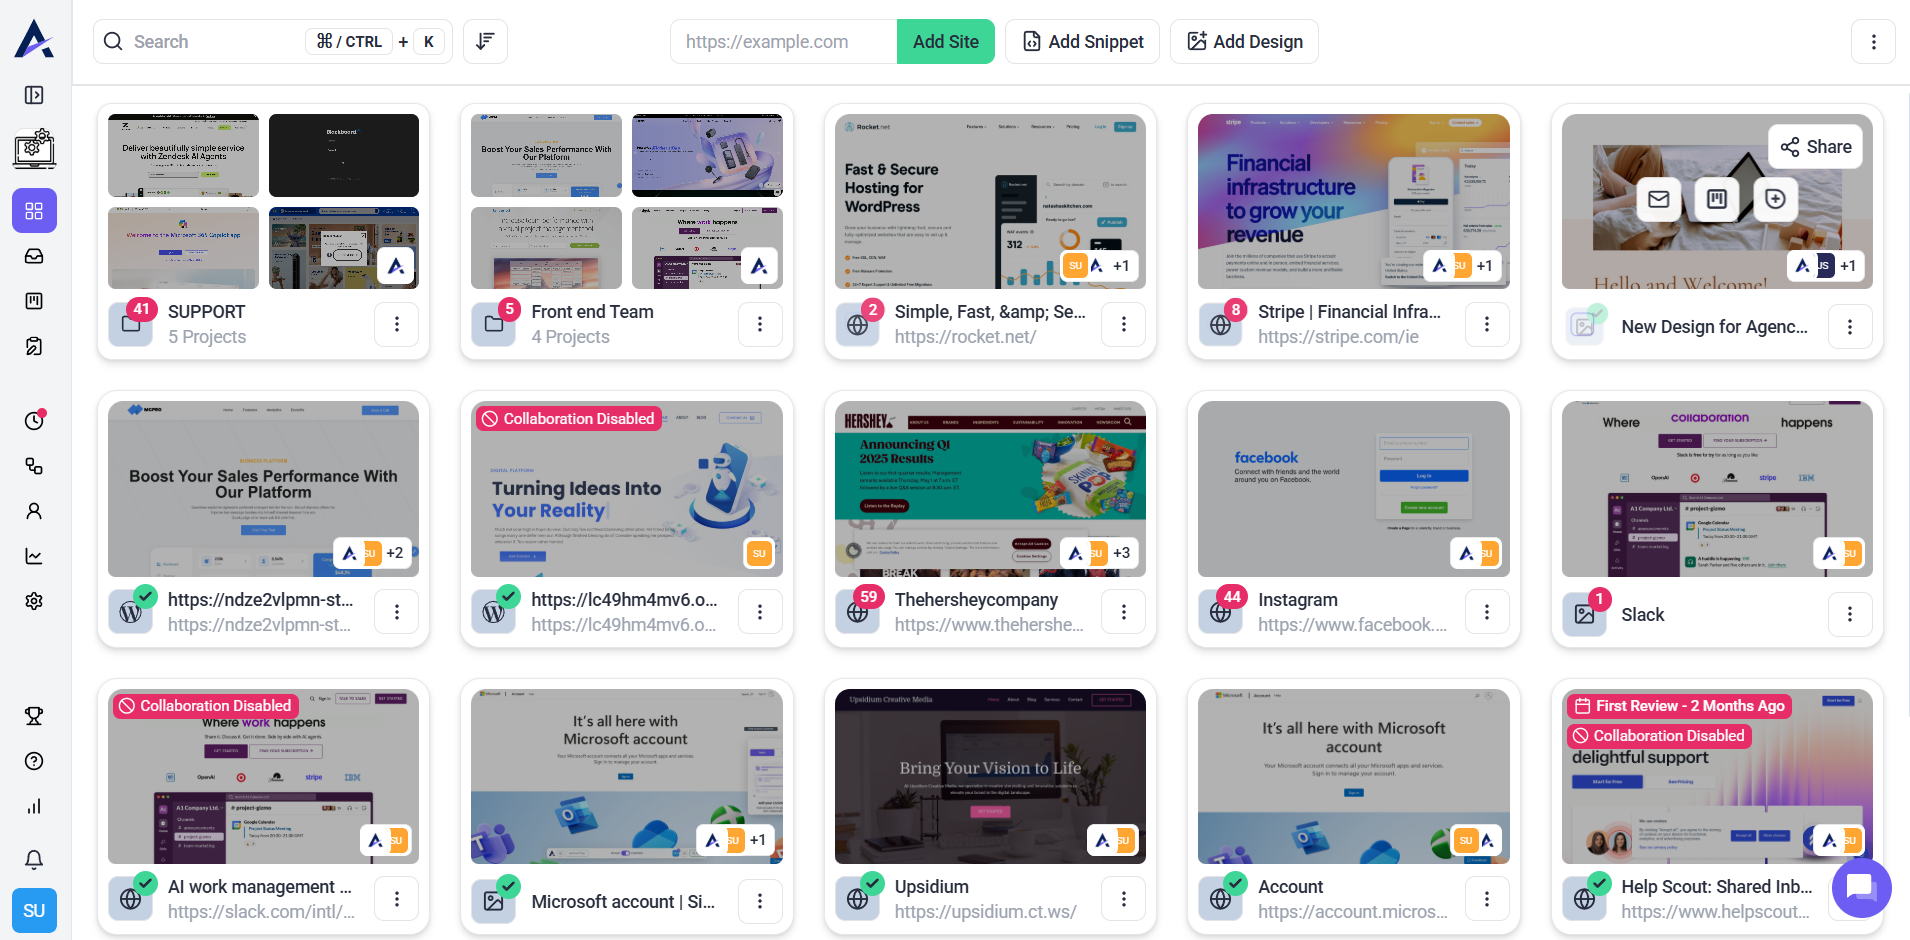
Tip: Use Grid View if you’re managing multiple creative assets or want to organize projects visually by status or design.
2. Exploring the List View
Description:
The List View provides a row-based layout designed for users who need detailed data and direct access to every action—without hover interactions.
Instructions:
- Go to the Projects Screen.
- Select the List View toggle (icon with lines) in the top-right corner.
Each project row includes:
- Thumbnail – Project preview.
- Task Count – Total number of tasks.
- Project Name and URL
- Folder Name
- Active Project Stage
- Assigned Users
Always-Visible Actions:
- Inbox – View tasks and feedback.
- Collaboration – Open the project interface.
- Share – Invite team members or get the link.
- Checkbox – Use for bulk actions like archiving or deleting.
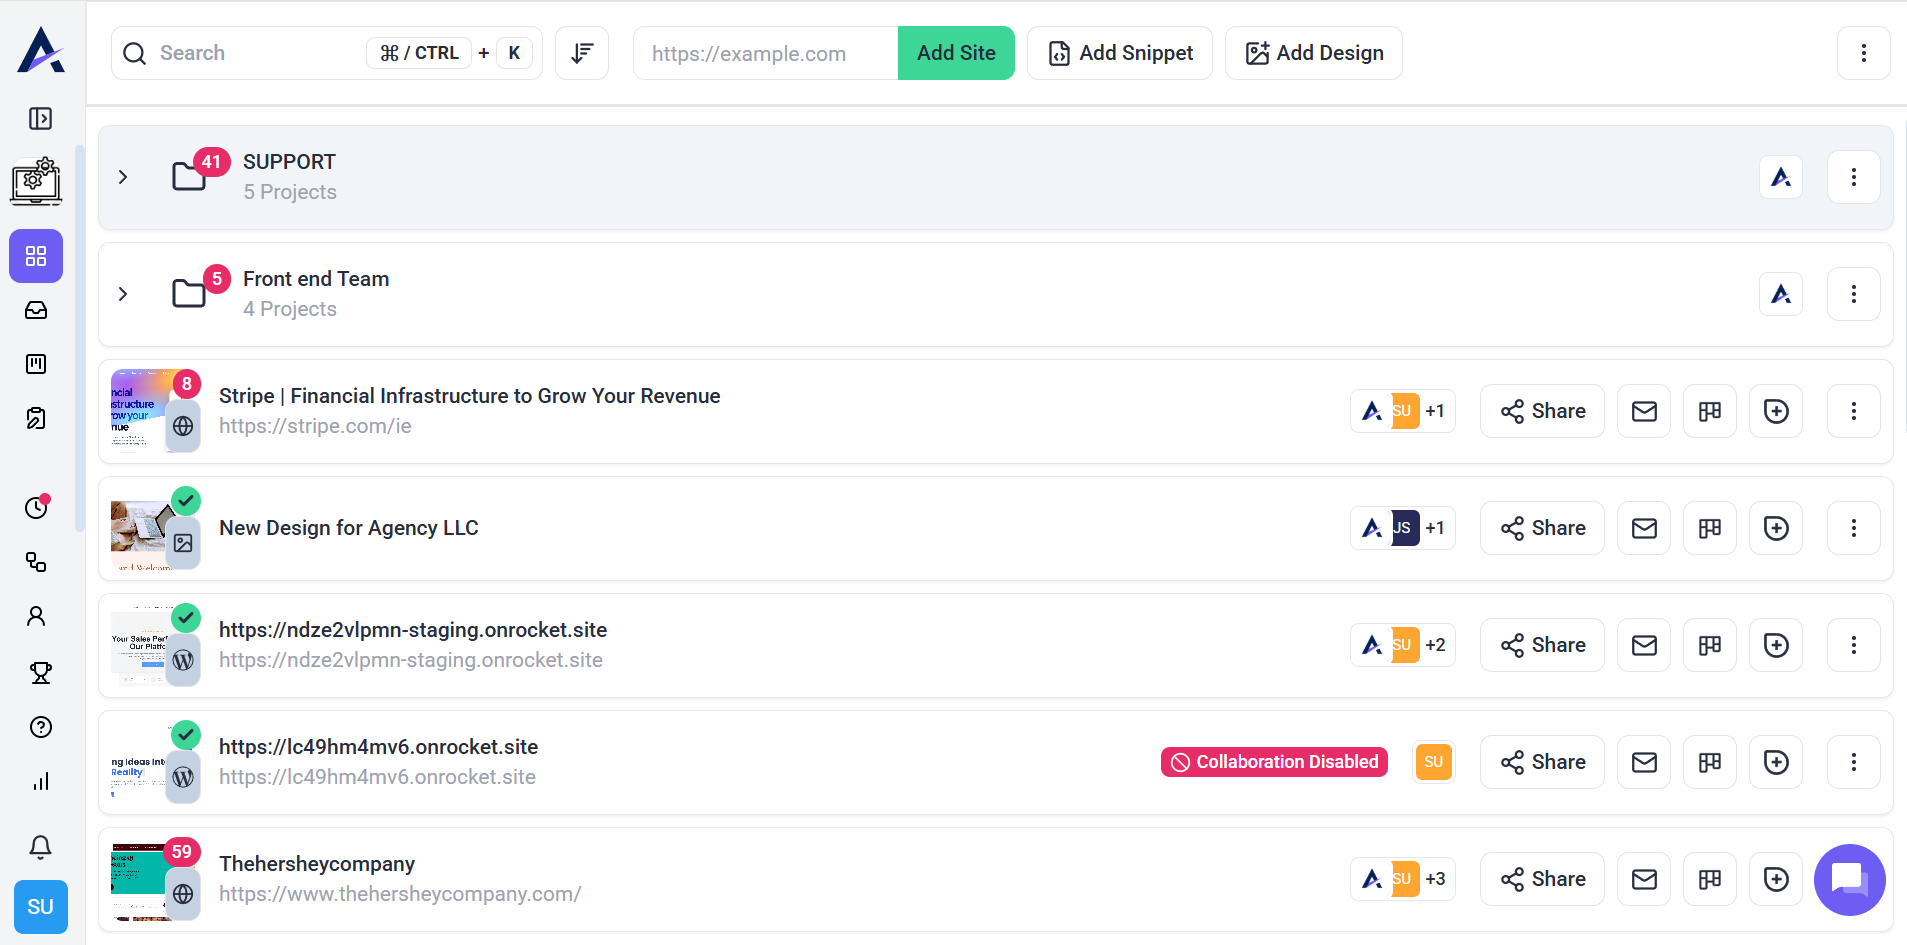
Note: All actions are visible by default—ideal for fast decision-making without hovering.
3. Switching Between Views
Description:
Atarim makes it easy to toggle between both layouts, depending on your needs or team workflows.
Instructions:
- From the Projects Screen, locate the view toggle in the top-right.
- Click:
- Grid View (square icon) for visual cards.
- List View (lines icon) for structured rows.
Tip: Your view preference is remembered per user—so each team member can work in their ideal environment.
FAQs
Yes, switching between views is seamless and can be done from the toggle button in the Projects Screen.
No, both views provide the same functionality. The difference lies in presentation and user preference.
List View is ideal for users who want all actions and information readily visible without hover interactions.
Yes, filters and sorting options are accessible in both Grid View and List View, ensuring flexibility in project management.
Yes, bulk actions like archiving or deleting can be performed in both views using the checkboxes provided.