Navigating Your Atarim Dashboard
Once you log into Atarim, you’ll land on the Projects Page, where all your projects are displayed. This is where you can quickly access and manage your websites, design tasks, and team collaboration.
1. Log In to Your Atarim Account
- Visit Atarim’s login page.
- Enter your credentials and click Log In.
- If you have multiple Workspaces, choose the relevant one to proceed.

Recommendation: Bookmark the Projects page for quick access when switching between multiple websites.
2. Understanding the Projects Page
The Projects Page provides an overview of all your active projects.
Key Features:
- Quick Access: View all projects in one place.
- Assigned Users: Instantly see team members and stakeholders assigned to each project.
- Task Overview: Track the number of tasks per project for workload insights.
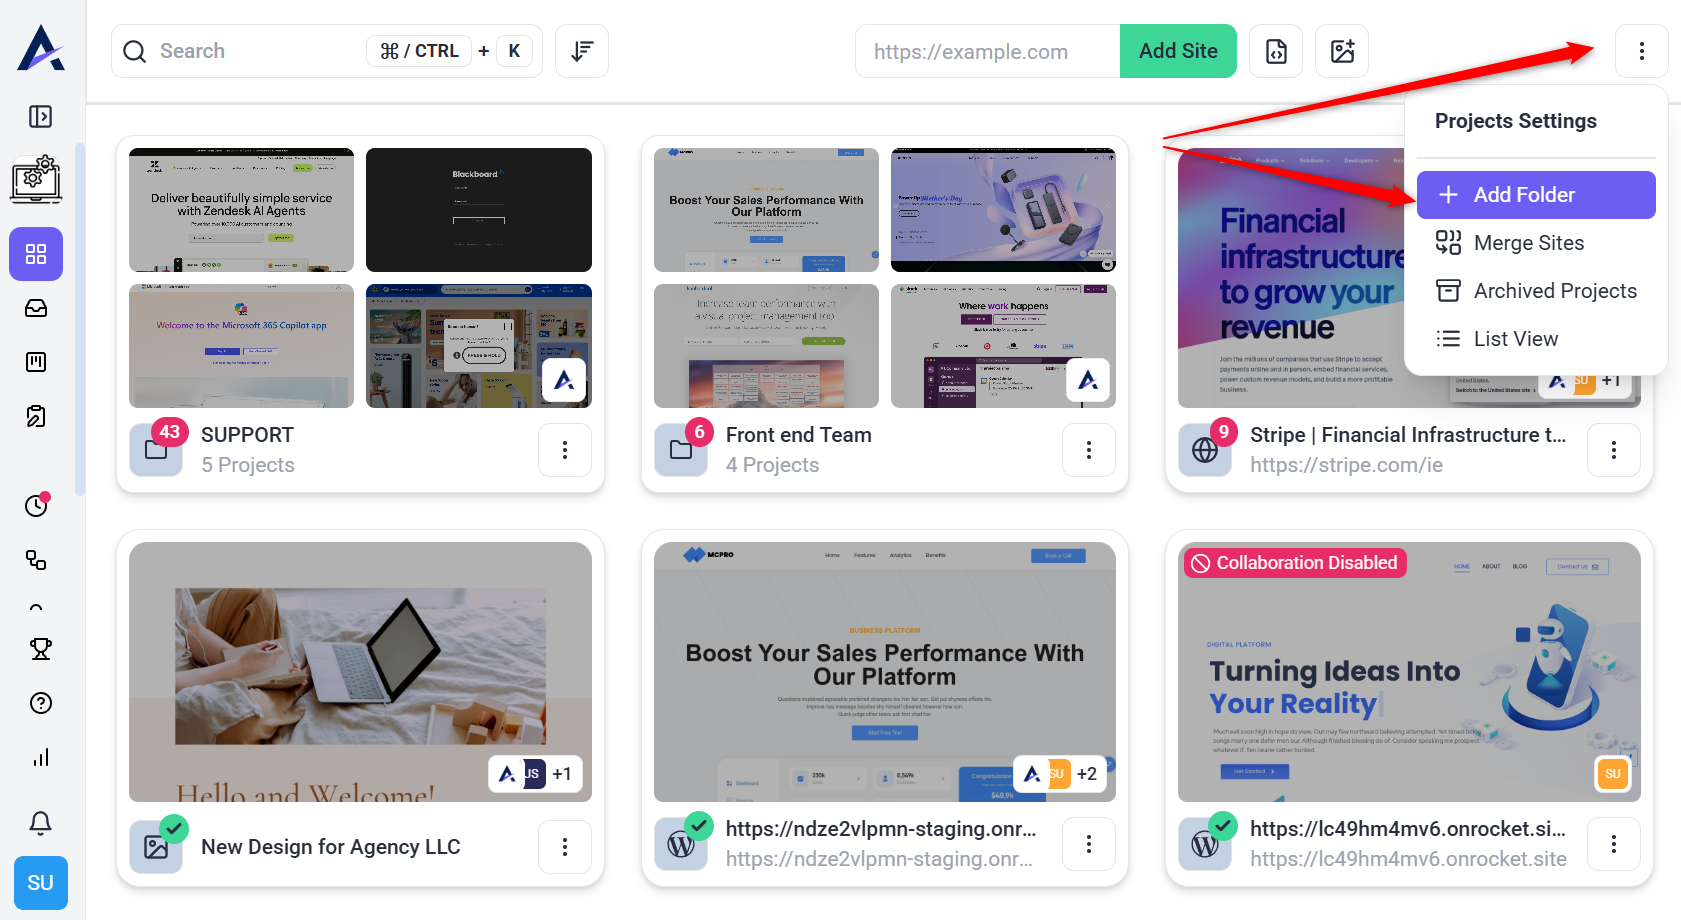
Managing Your Projects
- Click Projects from the left sidebar.
- Websites with the Atarim WordPress plugin installed will be listed.
- Manually added websites can also be accessed via URL entry.
- Use Folders to organize projects by client, team, or campaign.
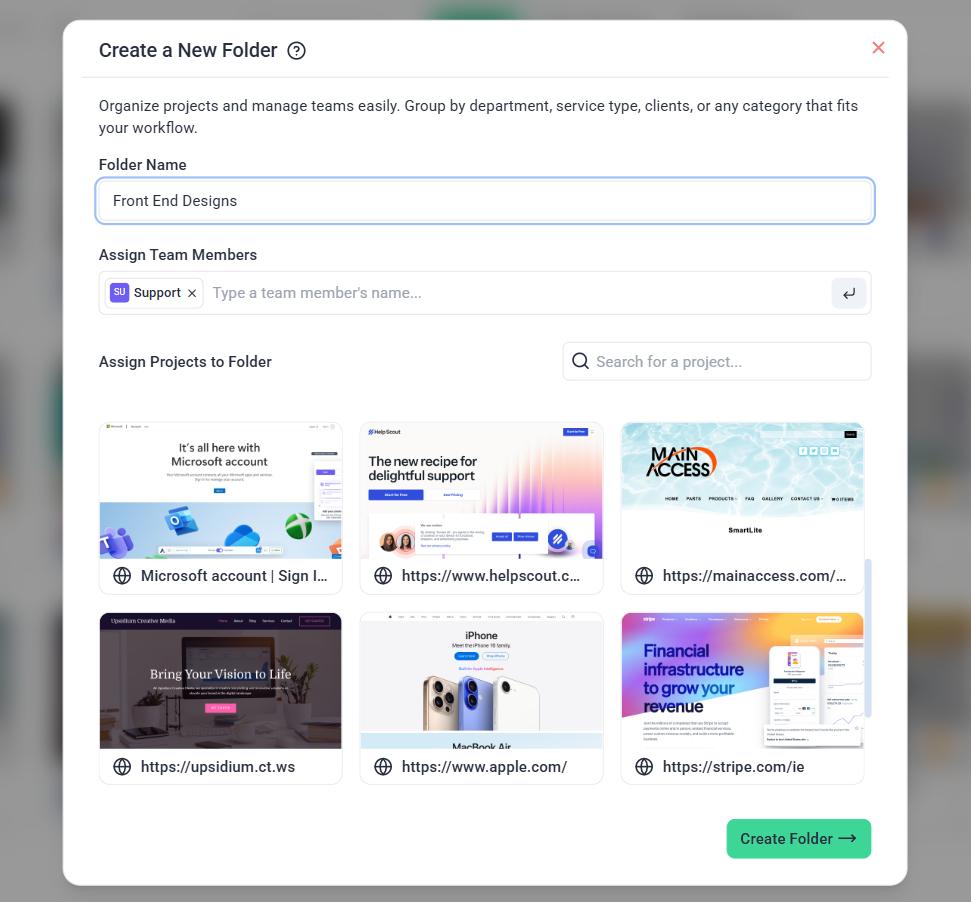
Tip: Keep frequently accessed projects in a dedicated folder for faster navigation.
Key Dashboard Sections
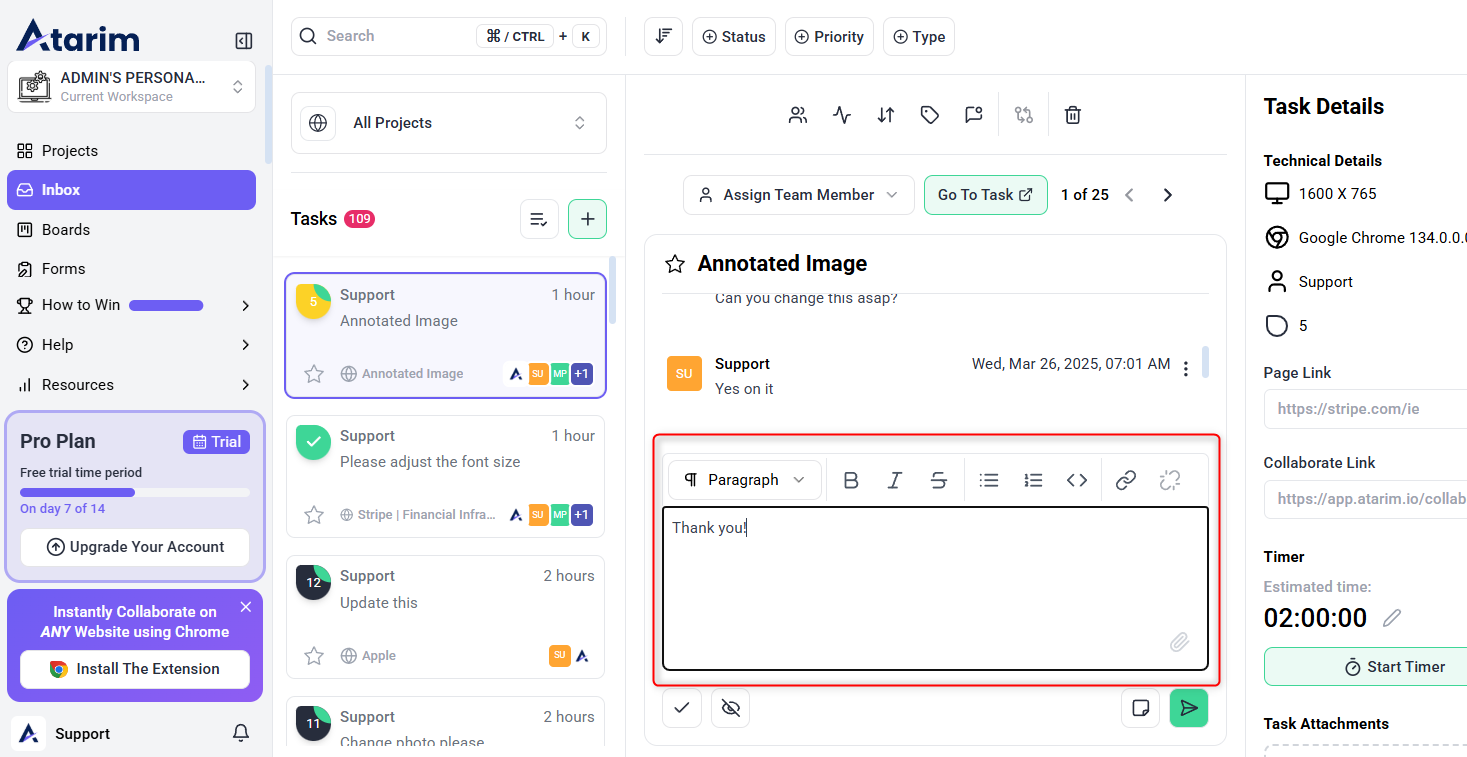
1. Communicate with Your Team via the Inbox
The Inbox is where you track client messages, team discussions, and task comments.
How to Use the Inbox:
- Click Inbox from the left sidebar.
- Reply to messages directly.
- Mark messages as Completed when resolved.
- Use filters to sort messages by project, status, or sender.
- Centralized Space: Keep all communication in one place.
- Filtering Options: Organize messages efficiently.
- Archiving Feature: Declutter while retaining important discussions.
Recommendation: Enable email notifications for important messages so you never miss critical updates.
2. Plan and Track Tasks Using Boards
The Boards section allows you to visualize your workflow using a Kanban-style system.
How to Use Boards:
- Click Boards from the left sidebar.
- Click Create Task to create a general task.
- Assign the task to a project and a team member.
- Set task priorities and add labels.
- Move tasks across columns: Open → In Progress → Pending Review → Completed.
- Drag-and-drop functionality for quick updates.
- Task prioritization using labels and due dates.
Tip: Review your board daily to keep team members aligned on project priorities.
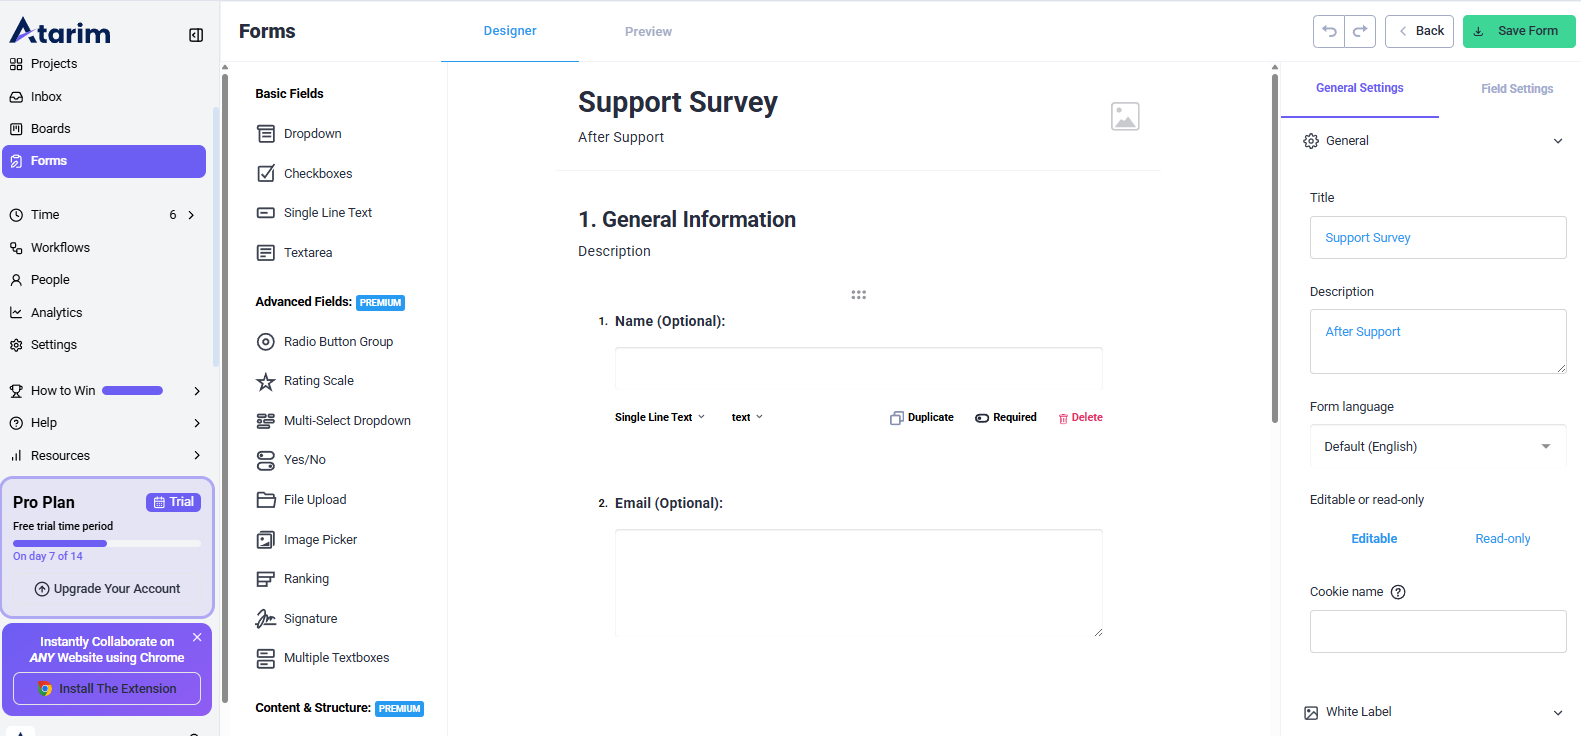
3. Collect Client Feedback Using Forms
Atarim’s Forms feature simplifies content collection and client approvals.
Creating and Sharing Forms:
- Click Forms from the left menu.
- Click Add New and add required fields (text, images, approvals, feedback).
- Customize form layout using dropdowns, checkboxes, or file upload fields.
- Click Share to copy the link or embed the form on a webpage.
- Streamlined client feedback collection.
- Customizable fields for different data types.
- Easy sharing via links or embedding.
Tip: Use forms to eliminate lengthy email chains when gathering client input.
4. Customize Your Settings and Integrations
Settings allow you to personalize Atarim’s features, notifications, and integrations.
Managing Your Settings:
- Click Settings from the left menu.
- Adjust global settings, white-label branding, and notification preferences.
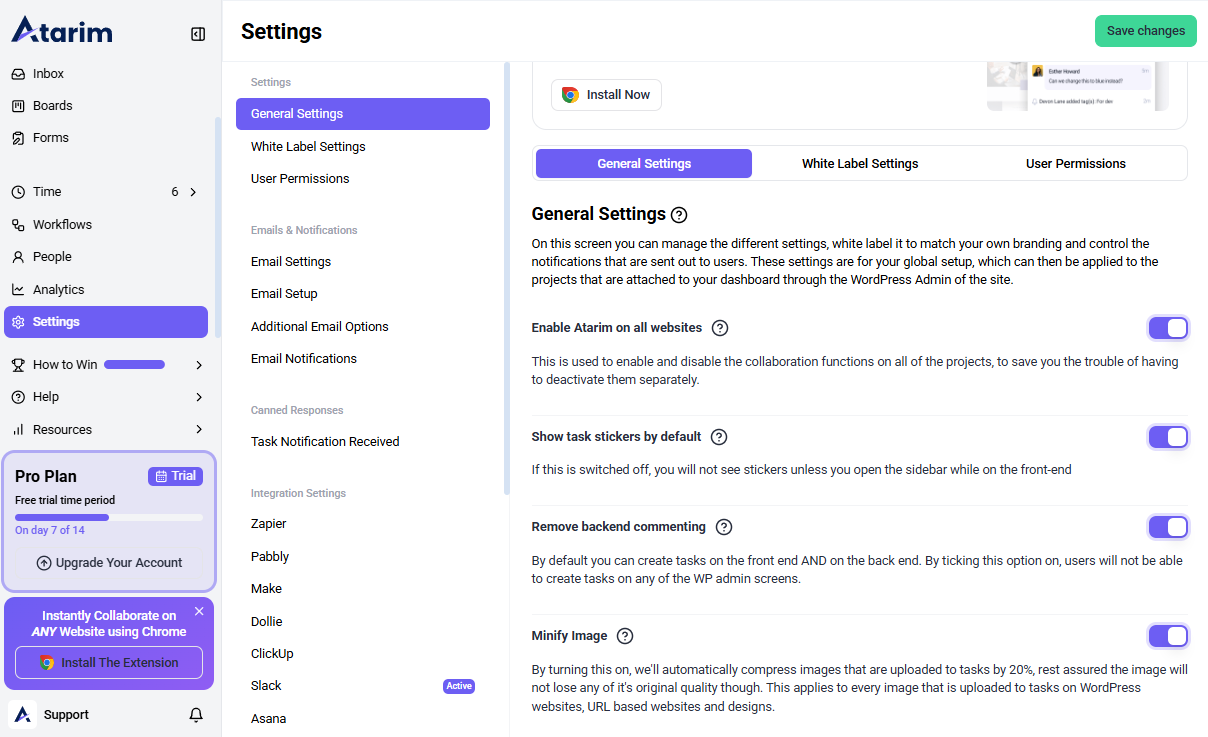

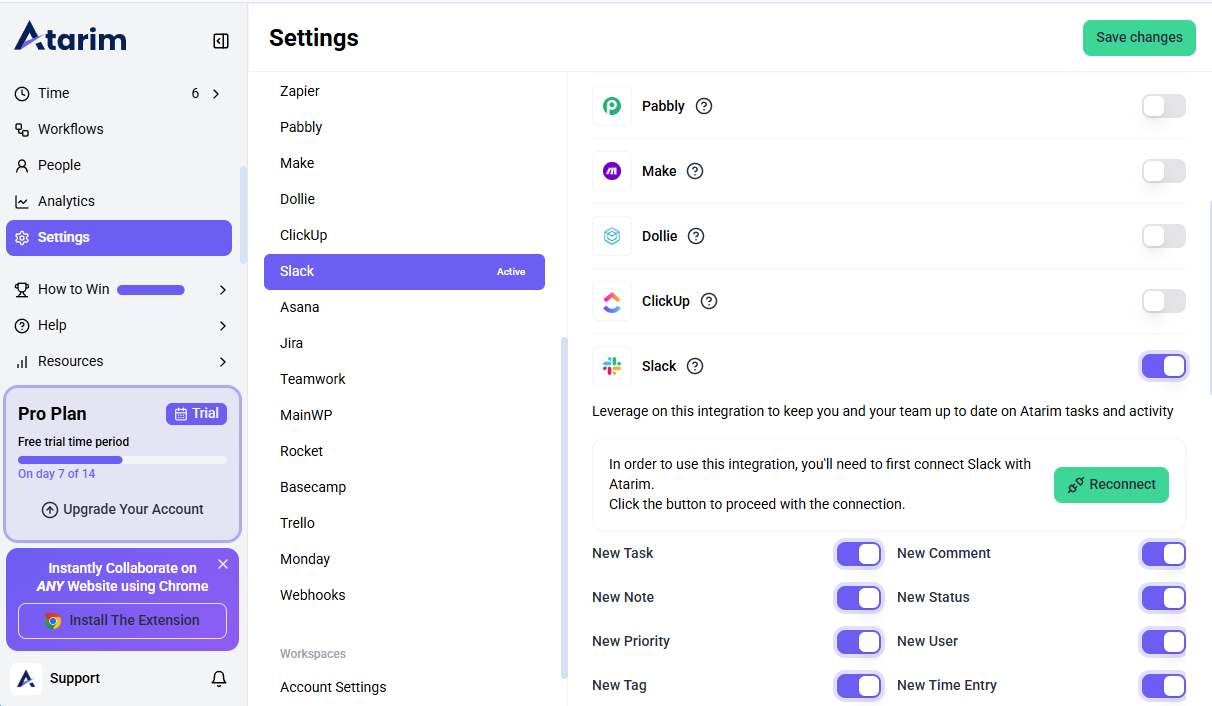
5. Manage Integrations
Connect Atarim with Slack, Trello, Asana, and Jira for seamless collaboration.
How to Set Up Integrations:
- Go to Settings in your Atarim dashboard.
- Click on Integration Settings.
- Select the integration you want to configure.
- Click Enable to activate notification settings for that integration.
- Click Save Changes to apply your settings.
- Control notification preferences for better focus.
- Integrate with external tools for improved workflow.
- Customize branding with white-label settings.
Tip: Enable only essential notifications to reduce distractions.
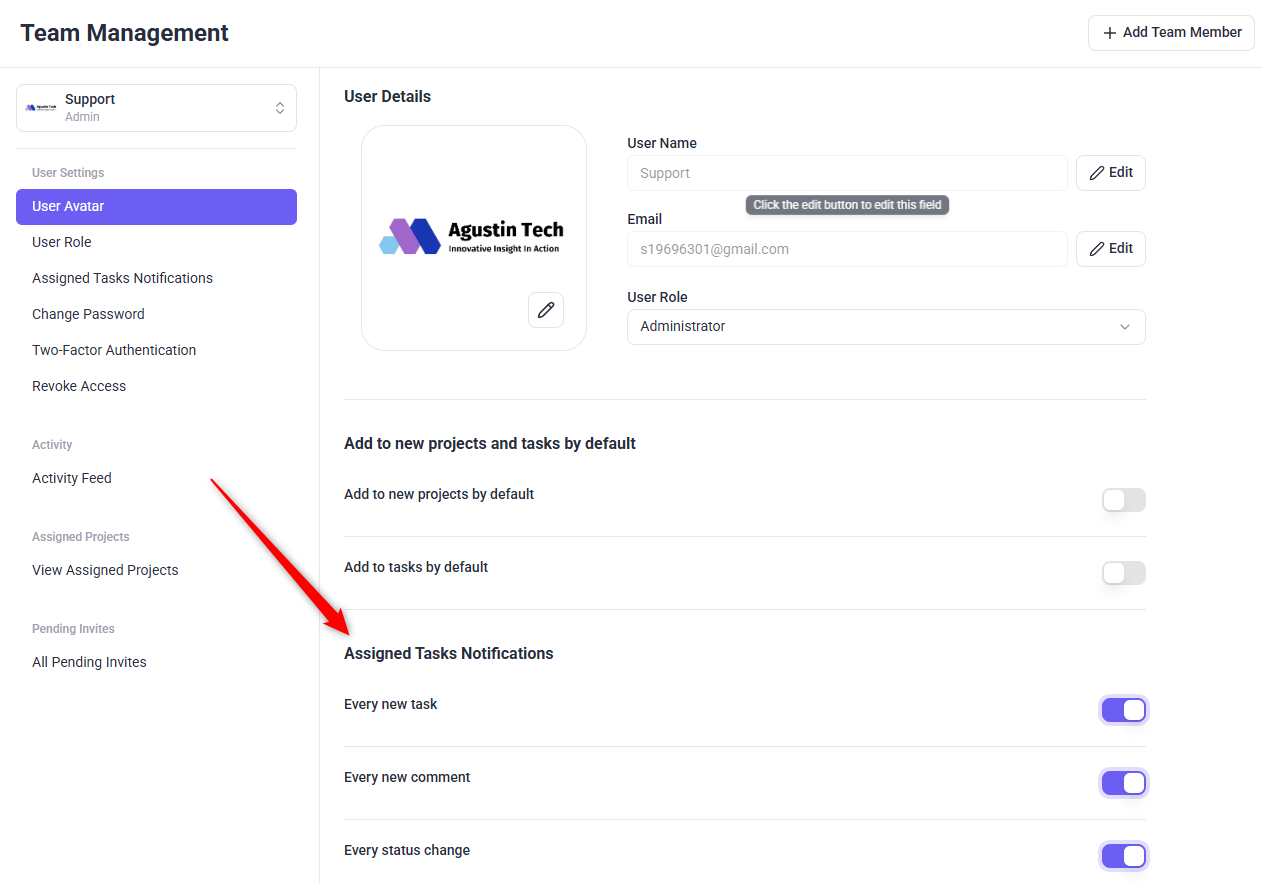
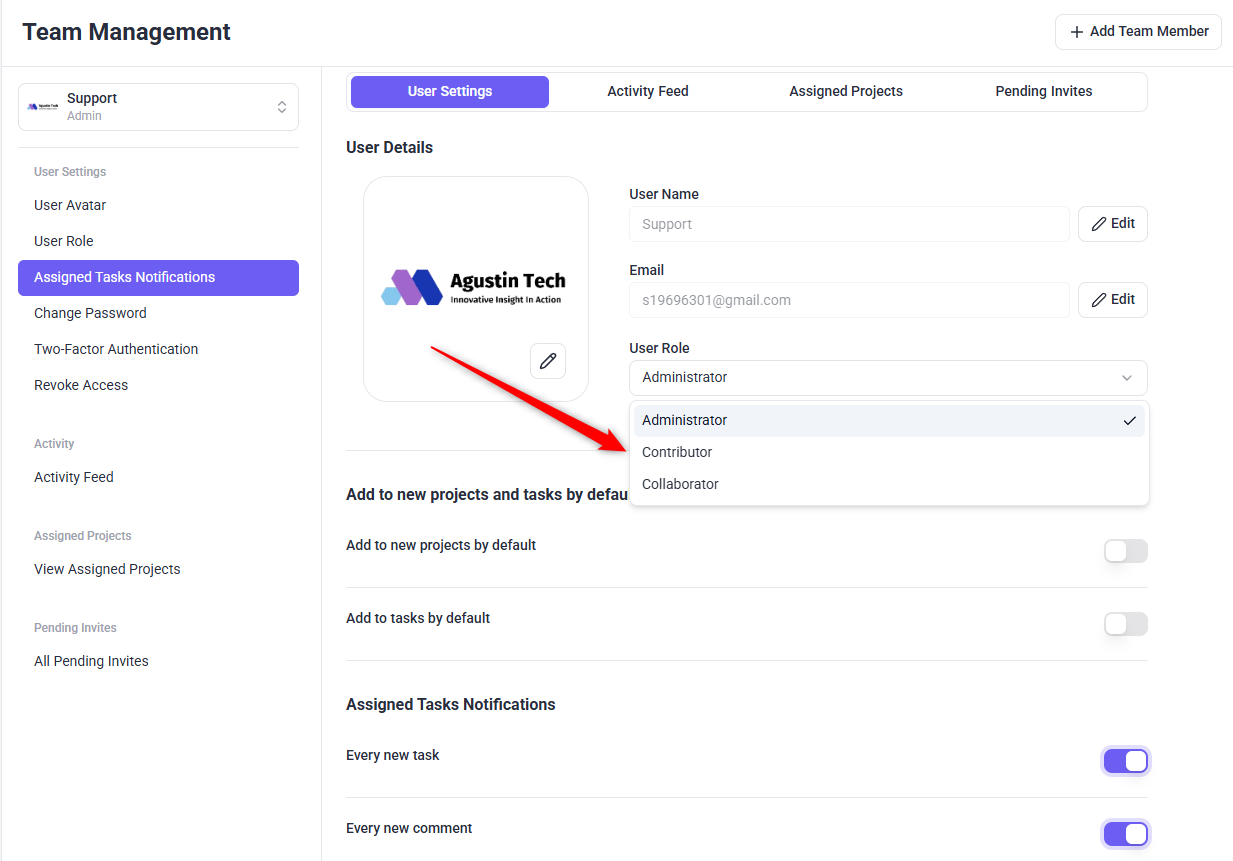
6. Manage Users and Control Access
Managing users ensures that team members have the right permissions and access.
Adding and Managing Users:
- Click People in the left sidebar.
- Click Add Team Member.
- Enter their name and email address.
- Assign a user role (Admin, Contributor).
- Easily add or remove team members.
- Assign roles to control permissions.
- Monitor user activity for accountability.
Tip: Assign permissions carefully to prevent unauthorized changes.
7. Stay Updated with the ‘What’s New’ Section
The What’s New section keeps you informed about announcements, feature updates, and roadmap plans.
Accessing ‘What’s New’
- Click Help in the left sidebar.
- Select What’s New from the dropdown menu.
- Stay informed about Atarim’s latest updates.
- Discover new features, bug fixes, and improvements.
- Contribute ideas and feedback to the roadmap.

Tip: Check this section regularly to discover new ways to improve your workflow.
FAQs
Yes! You can manually add websites using a URL and manage tasks the same way.
Navigate to Boards → Select a Task → Assign To, then choose a team member.
Yes! Atarim integrates with Slack, Jira, Trello, Asana, and more.
Yes, go to Settings → Notifications to customize your preferences.