Step-by-Step Guide
1. Accessing the Task Inbox
Description:
The Task Inbox is where all tasks across all projects are listed for easy management.
Instructions:
- Click on the Inbox tab in the navigation bar.
- By default, you will see tasks from all projects.
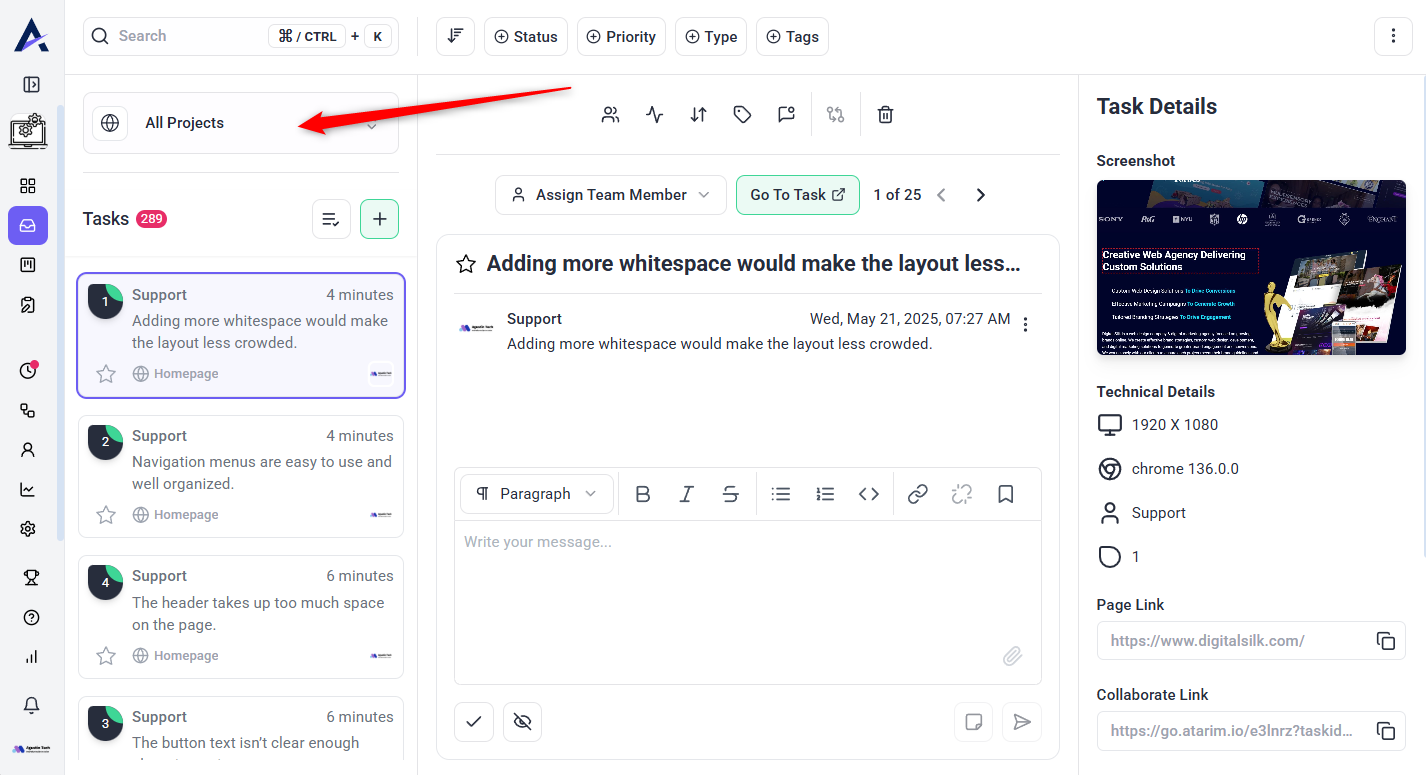
- If you want to filter tasks by project, click on the project selector and choose a specific project.
Tip: Use the search bar at the top to quickly locate specific tasks using keywords.
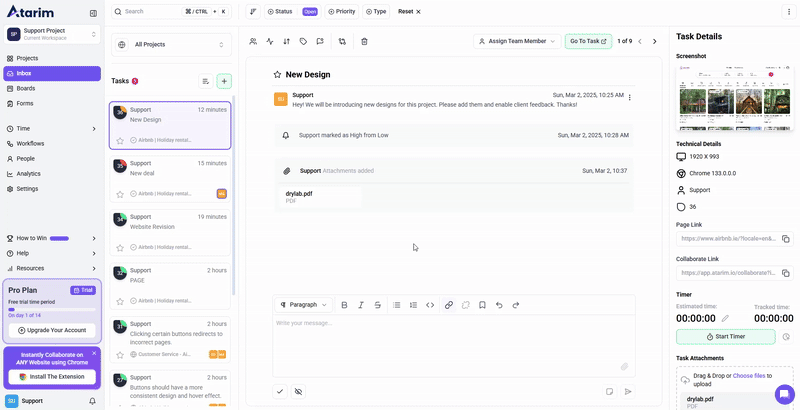
2. Understanding the Task Inbox Layout
The Task Inbox is divided into three main sections:
A. Project Column
- Displays all projects/assets that contain tasks.
- Click on a project to filter and view its tasks.
- You can visit the project site by clicking on the project name.
- WordPress Sites: Clicking will log you in automatically and take you to the front-end (Learn more about autologin here).
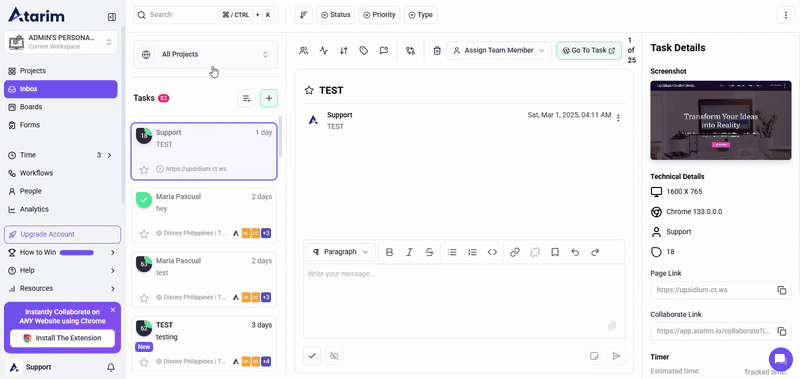
B. Task List Column
- Displays the tasks for the selected project (or all tasks when no project is selected).
- Each task displays:
- The creator’s name
- The creation date
- Task title
- Assigned users
- Task Counter: Displays the total number of tasks (including completed ones).
- Sorting & Filtering: Click the sort icon to organize tasks by urgency, status, or type (Learn more about sorting tasks here).
- Creating a Task: Click the + icon to create a new general task.
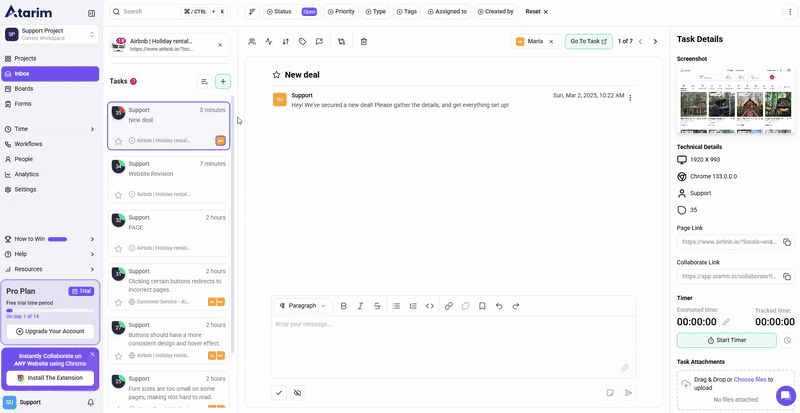
C. Task Feed Column
- Shows details of the currently selected task, including:
- Task title
- The website it’s on
- Who created it and when
- Task activity (comments, status updates, urgency changes, time entries, and notes)
3. Managing Tasks in the Inbox
A. Navigating to a Task’s Location
- Click the “Go To Task” button to jump to the task location on the website.
- If the site is WordPress-based, you will be automatically logged in and redirected to the correct page (Read more about autologin here).

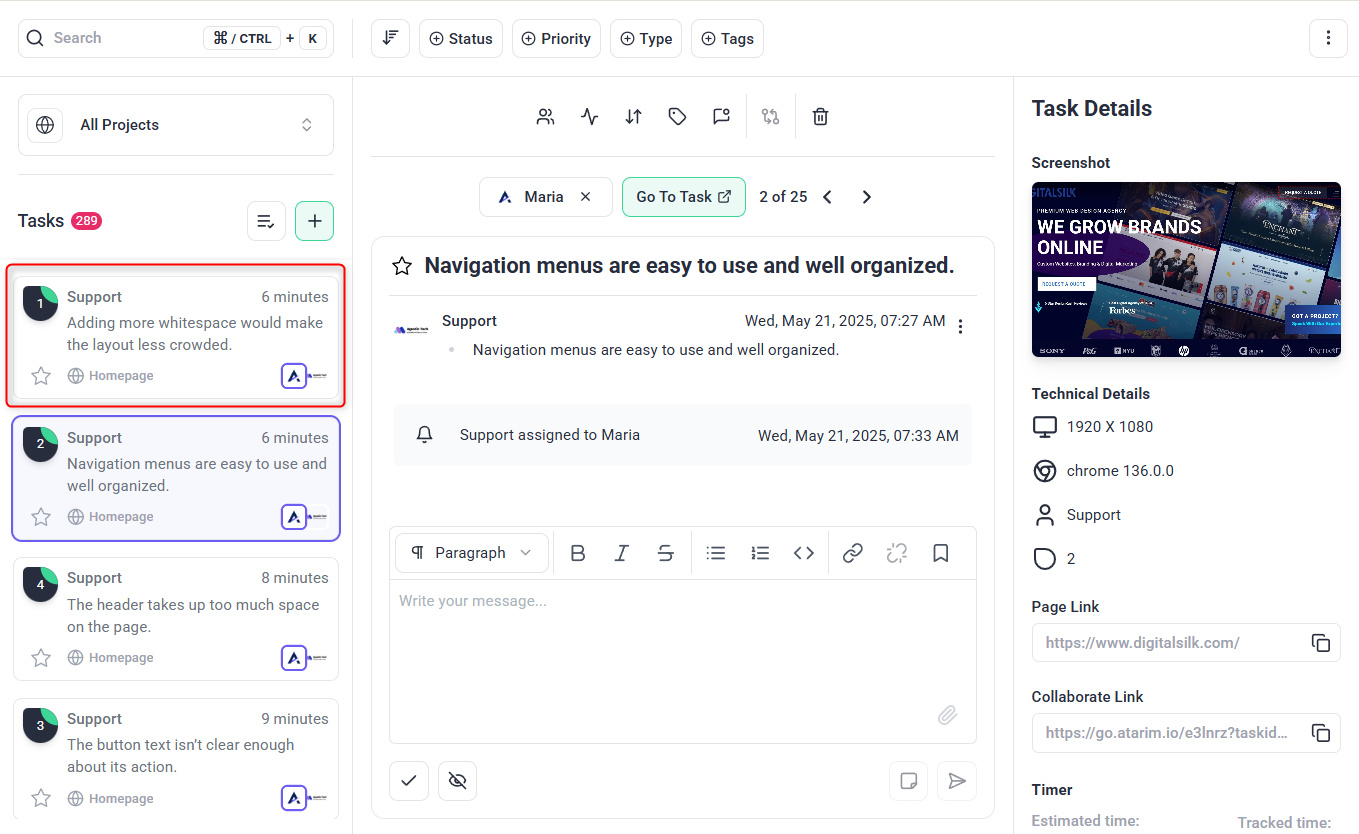
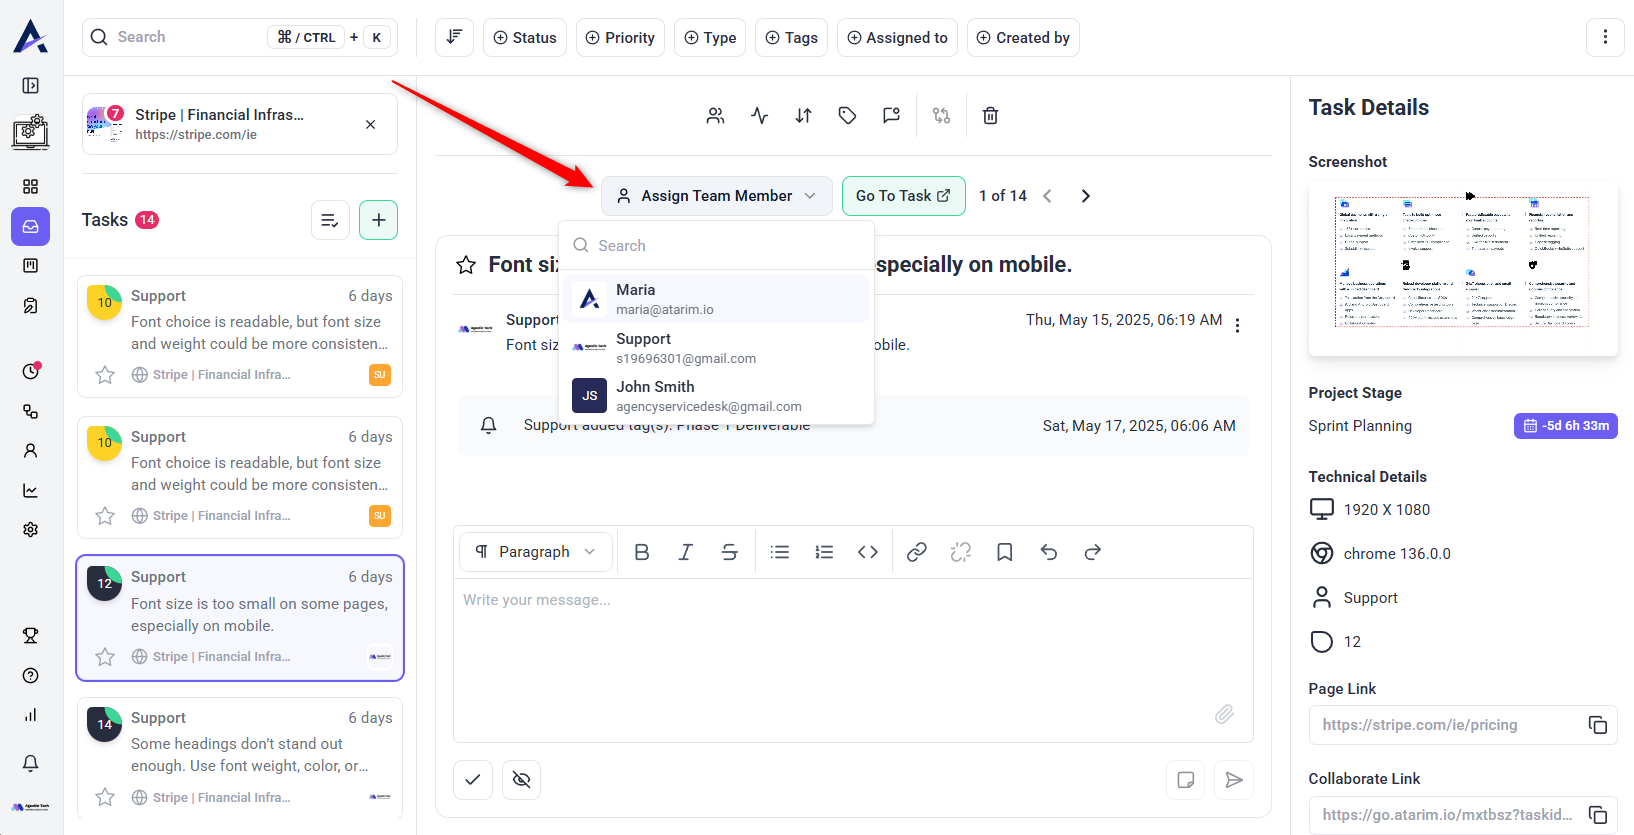
B. Assigning Users
- Click on “Assigned To” inside a task to add or change the assignee.
- The assigned user will be highlighted in the Task List.
- Previously assigned users remain visible, showing task ownership history for accountability.
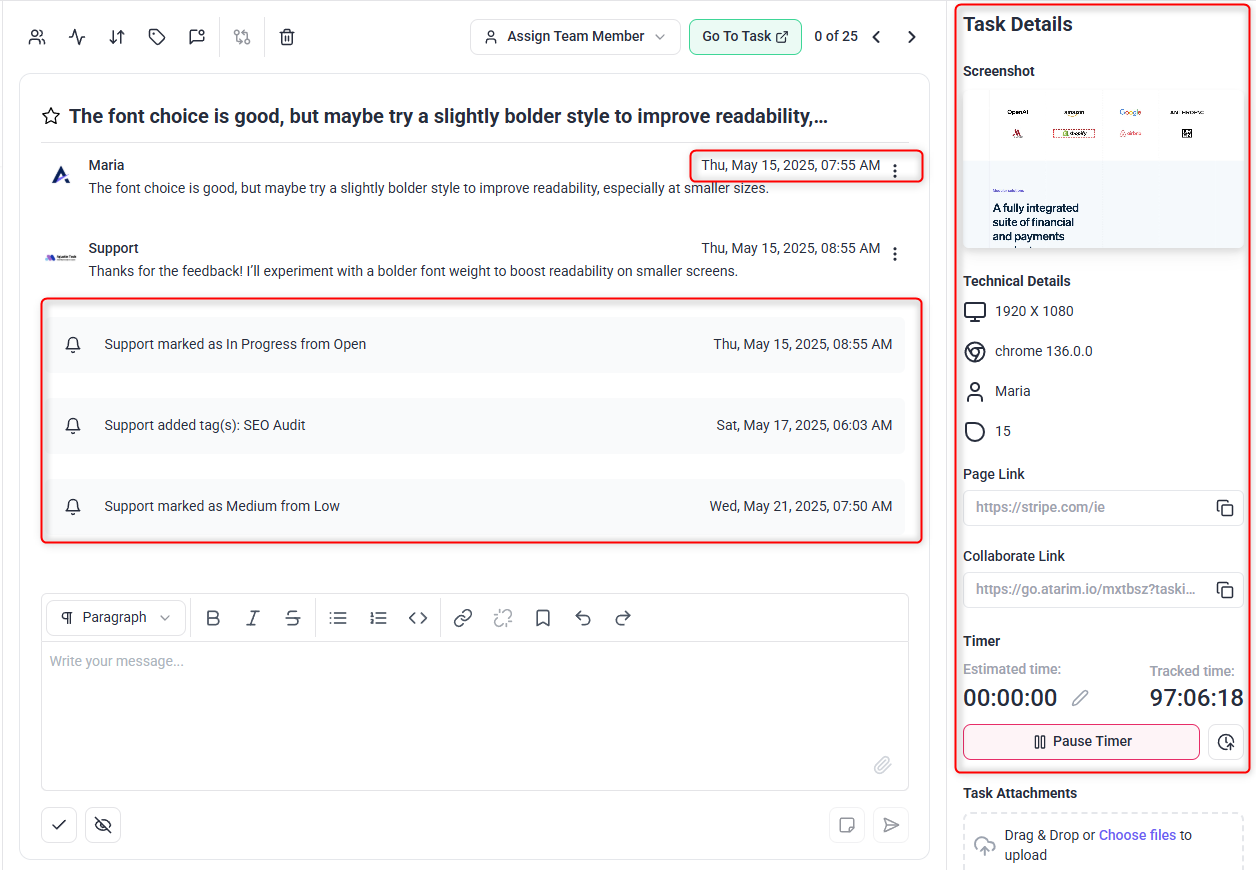
C. Adding Comments, Files & Notes
- Comments: Type inside the text box at the bottom and click Comment to add a message.
- Notes: Click the yellow note icon to leave an internal note (hidden from clients).
- Files: Click the paperclip icon to attach images, PDFs, or ZIP files.
- Downloading Files: Click on an attached file or its download icon to save it locally.
4. Working with Task Attributes
A. Tracking Time
- Click “Add Timer” to log time spent on the selected task.
- View all logged time entries in the Task Feed. (Learn more about time tracking here)
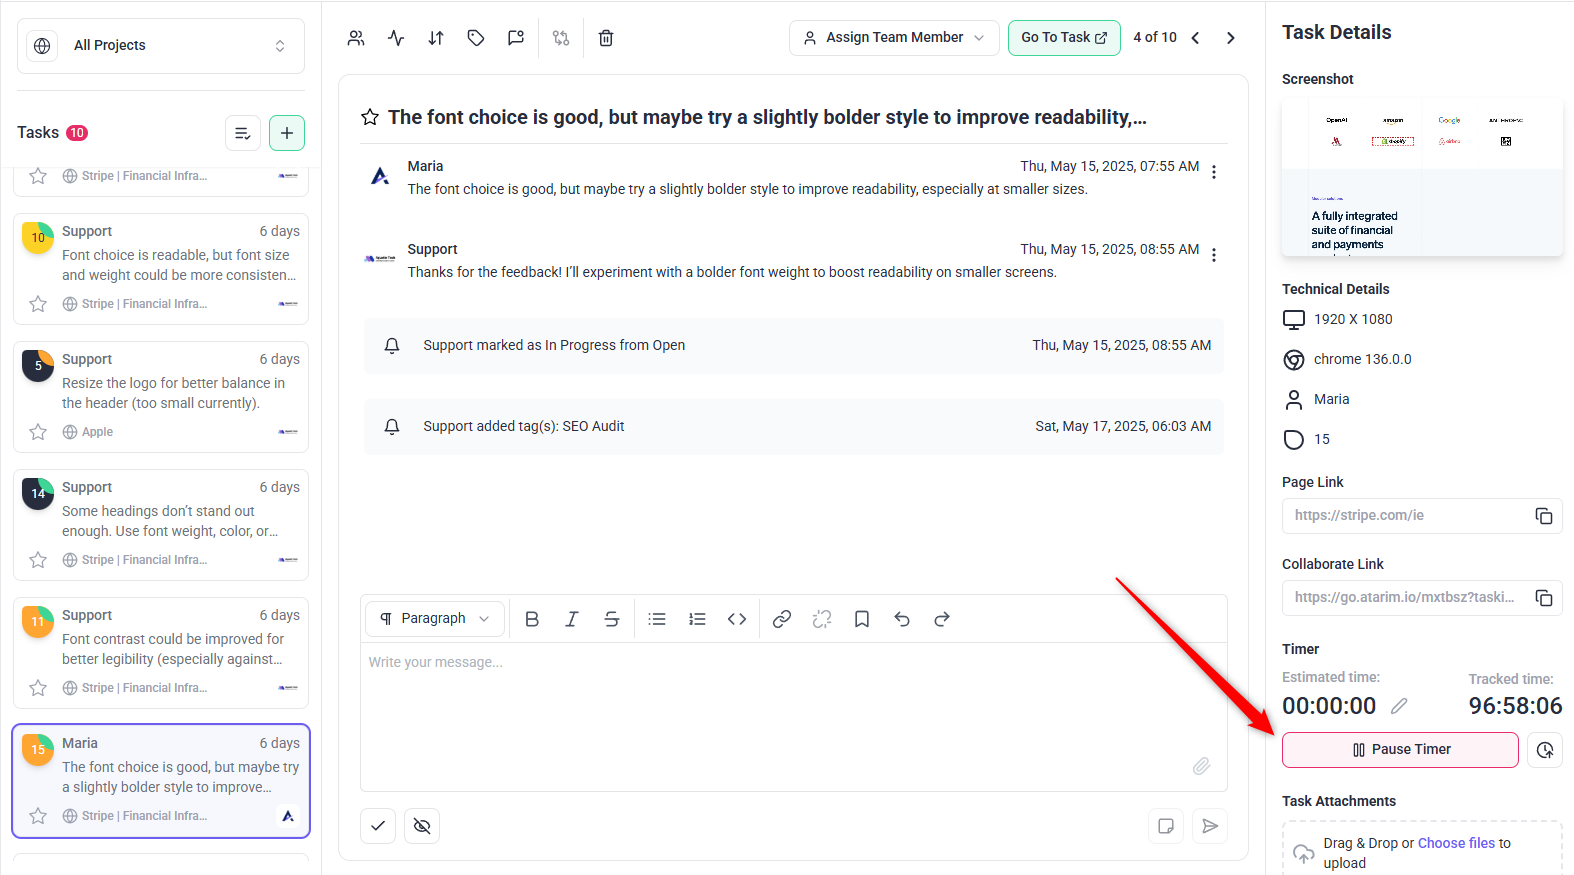
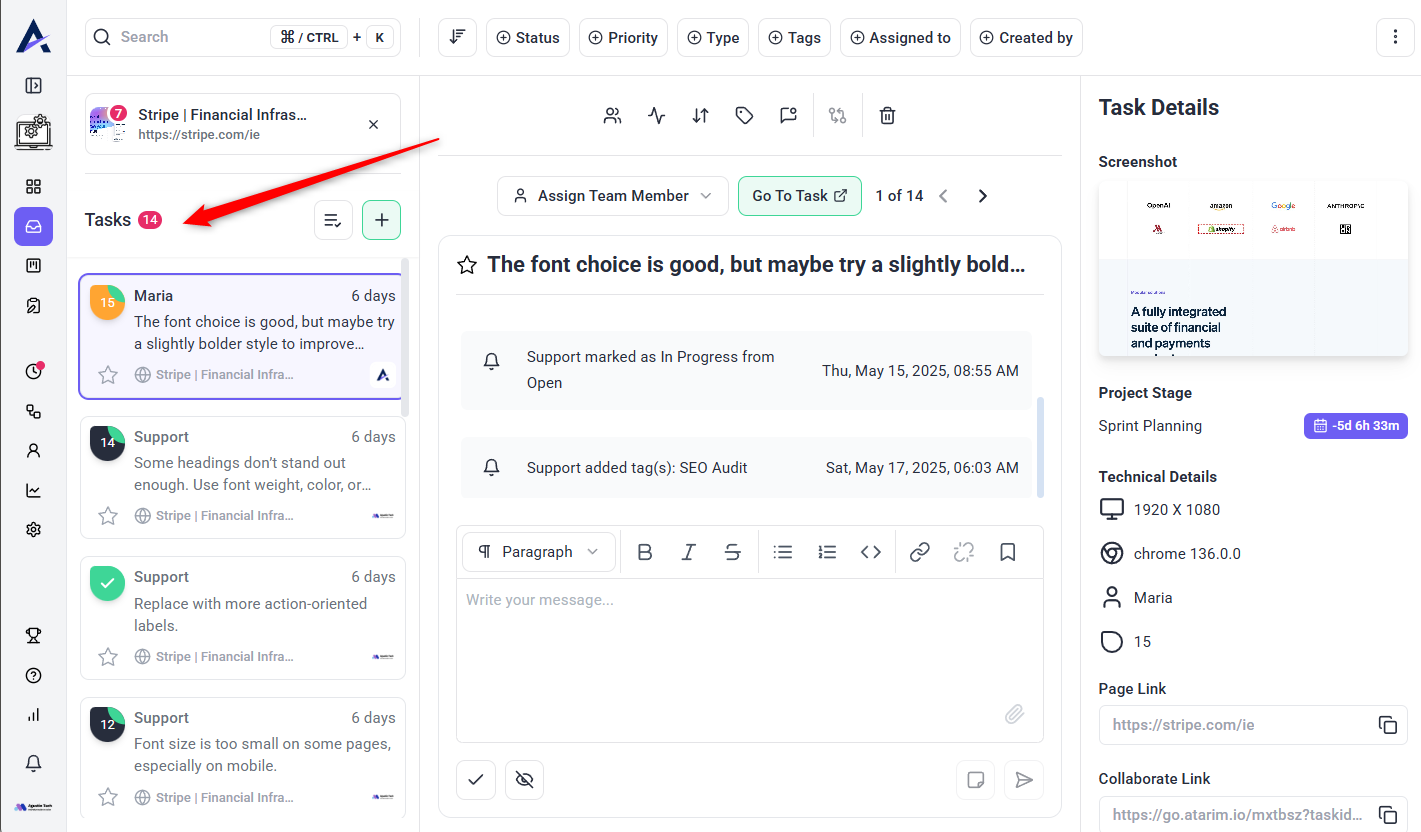
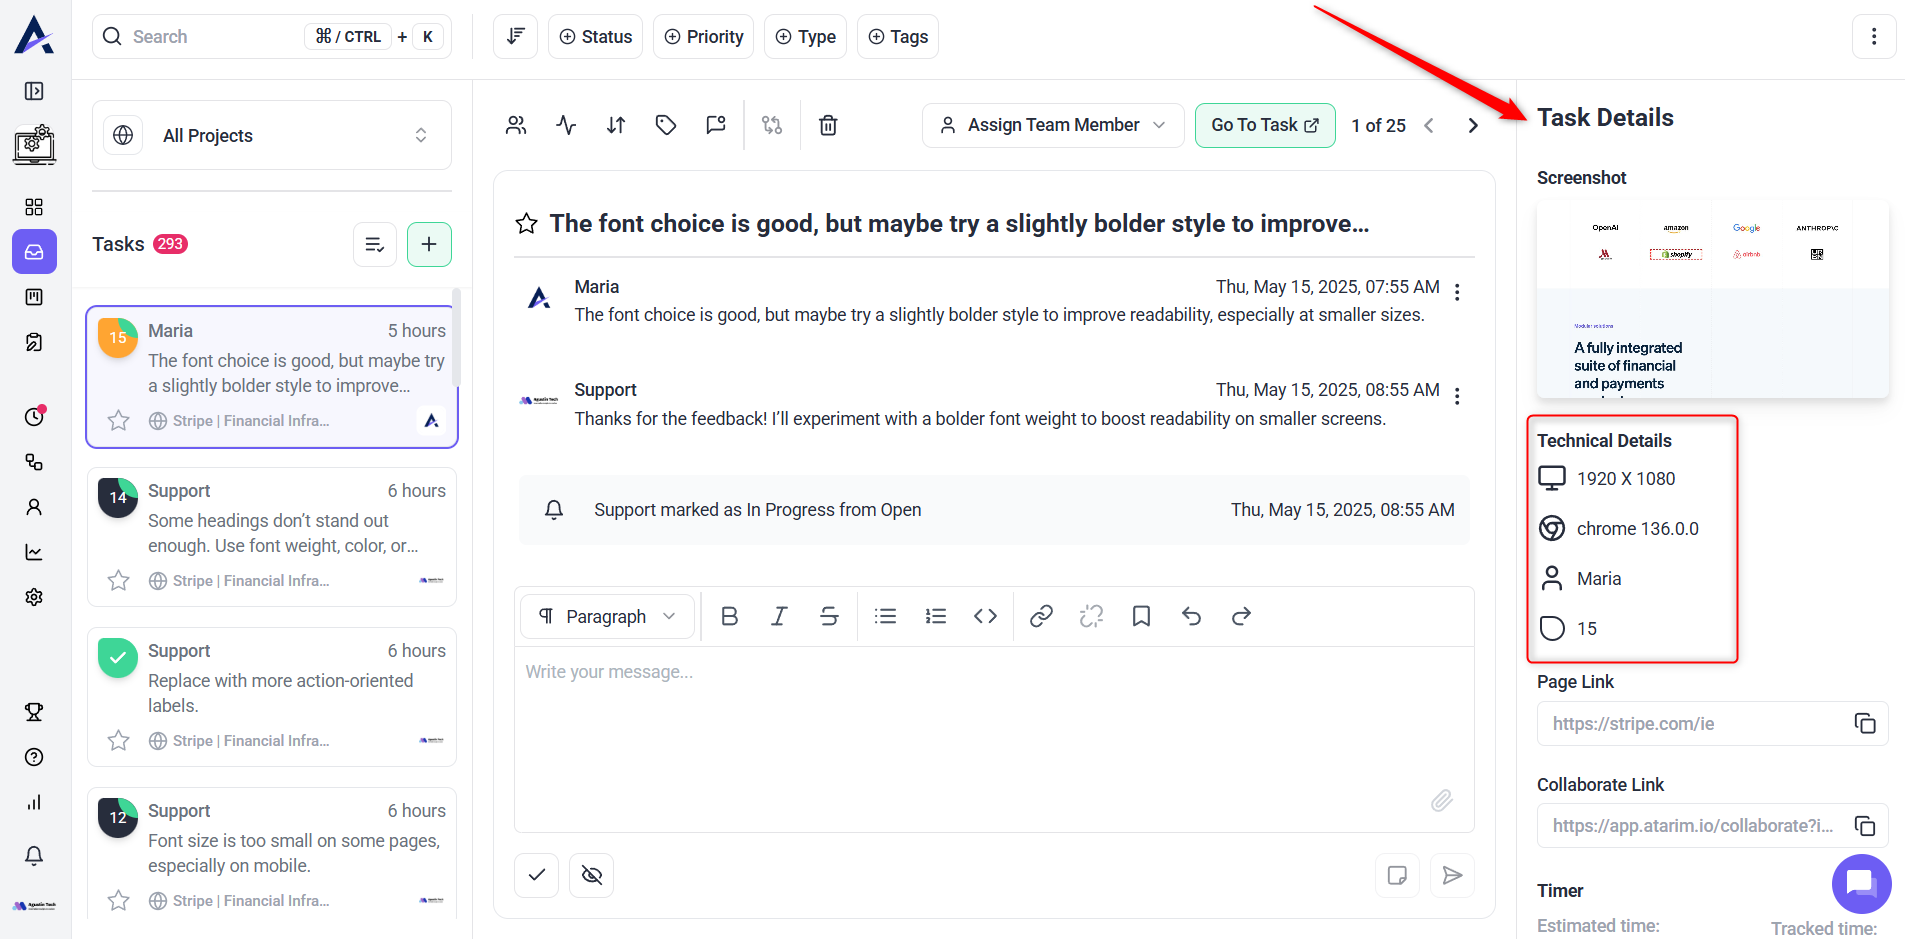
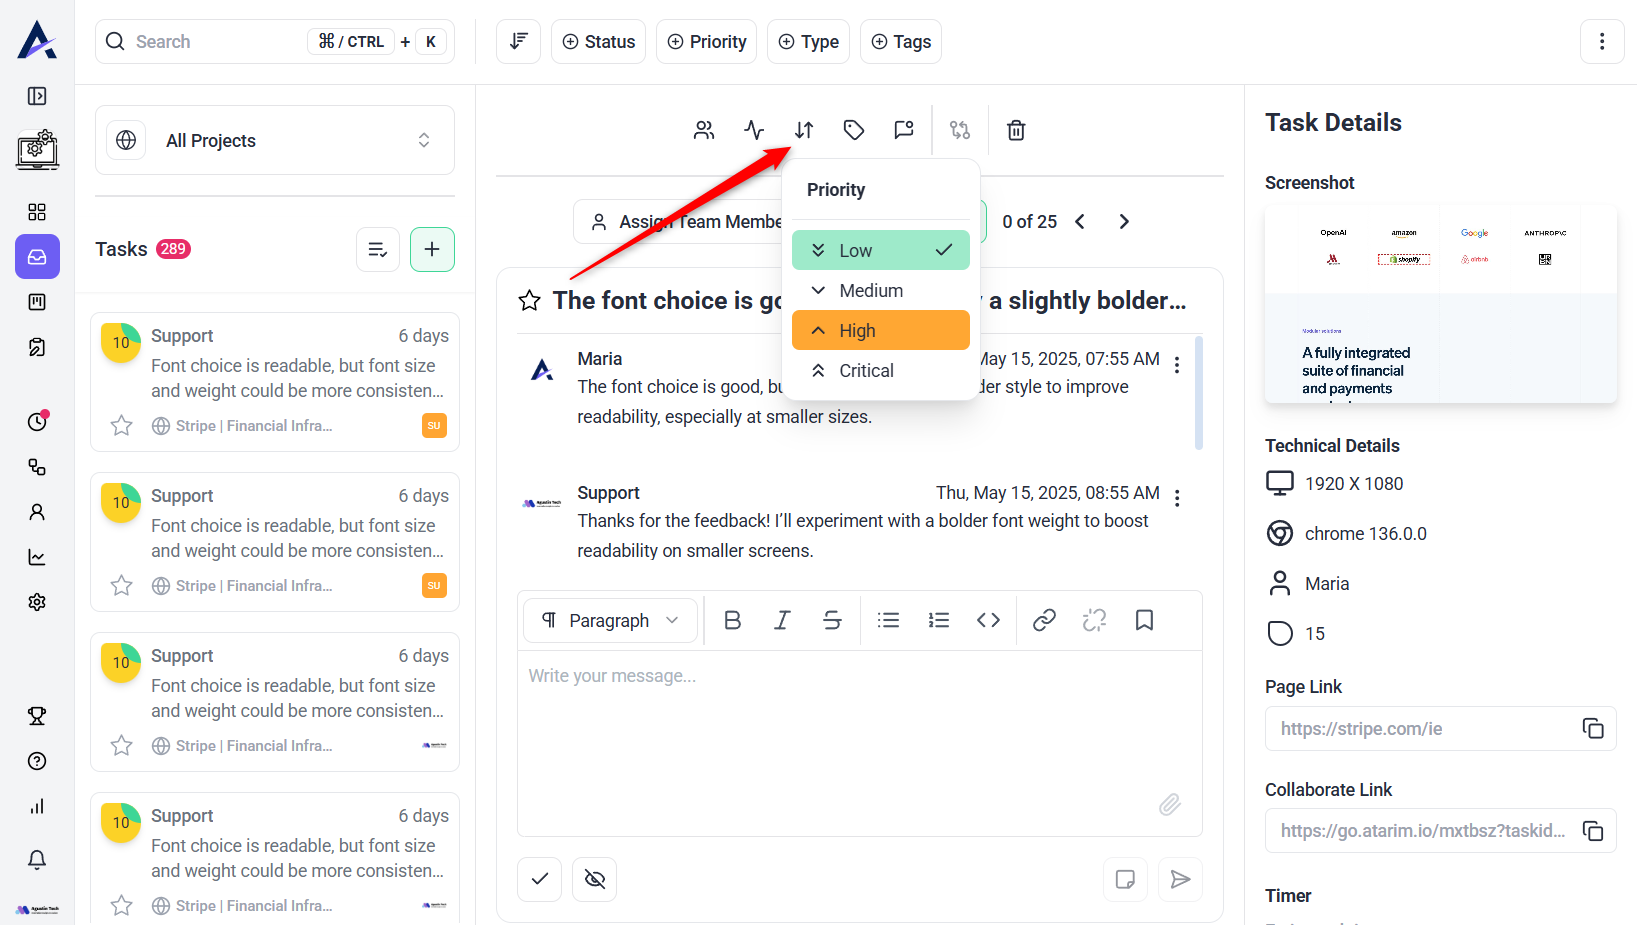
B. Viewing Screenshots & Tech Details
- Each task captures an automated screenshot at creation.
- Useful for debugging when clients report issues you cannot replicate.
- View technical details such as:
- Screen size of the task creator
- Browser used
- Additional debugging information
C. Changing Task Status & Urgency
- Click the status dropdown to update a task’s progress (e.g., Open, In Progress, Pending Review, Completed).
- Adjust urgency levels to prioritize critical issues.

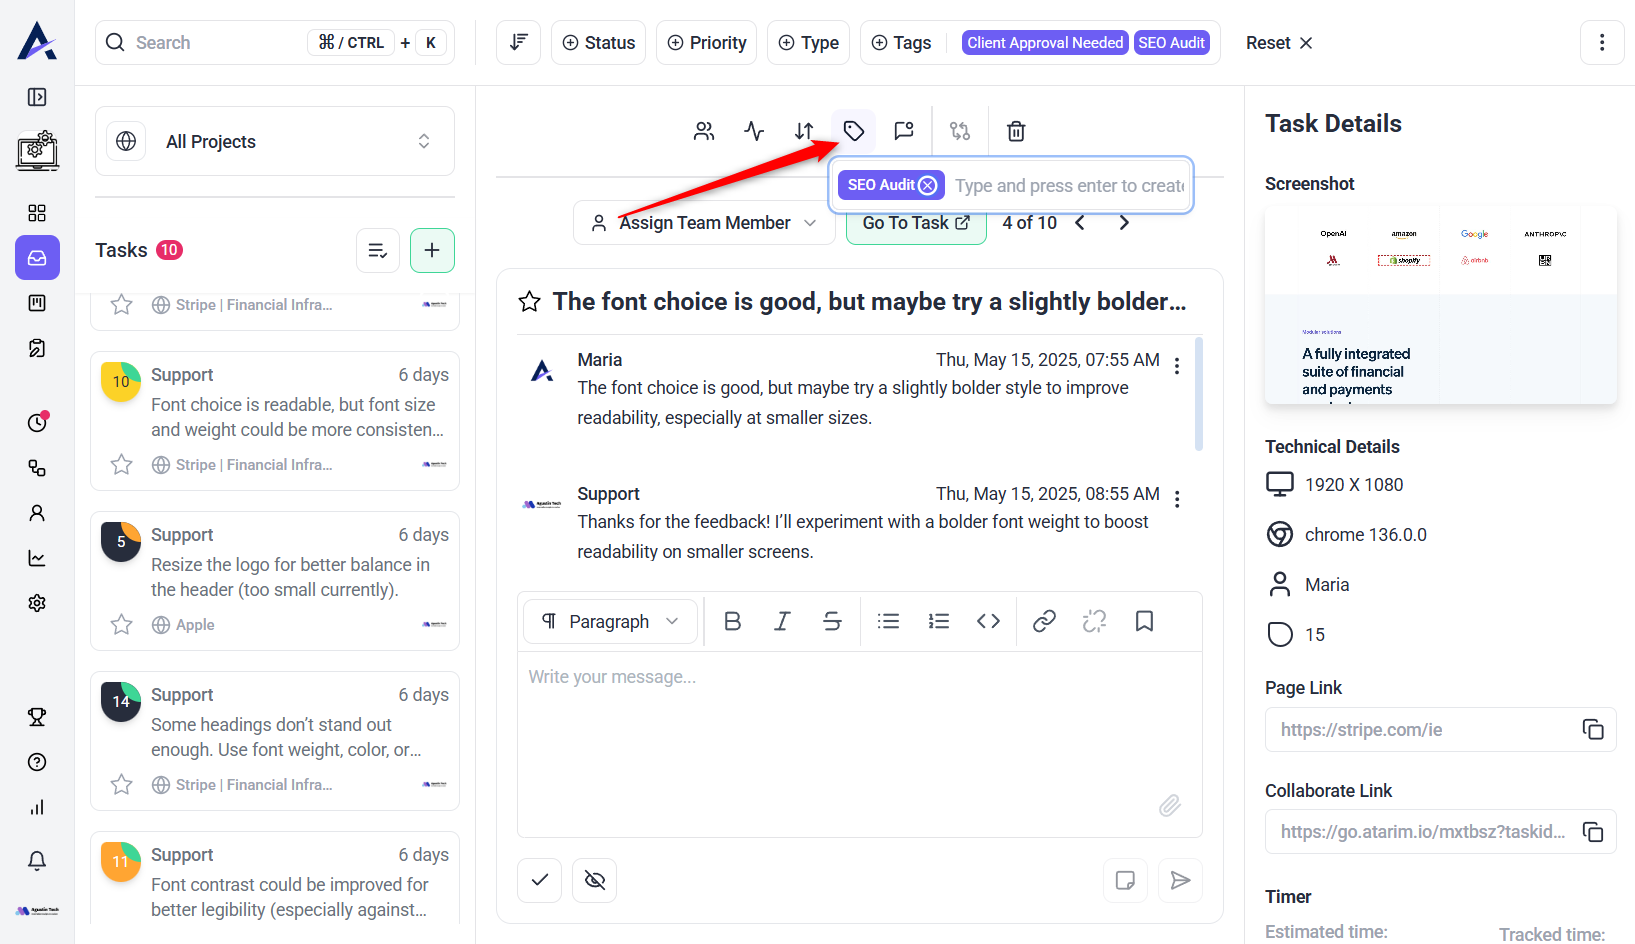
D. Using Tags & Notifications
- Add or remove tags to categorize tasks.
- Select users to notify (assigned users are auto-selected).
E. Deleting a Task
- Click the trash icon to delete a task permanently.

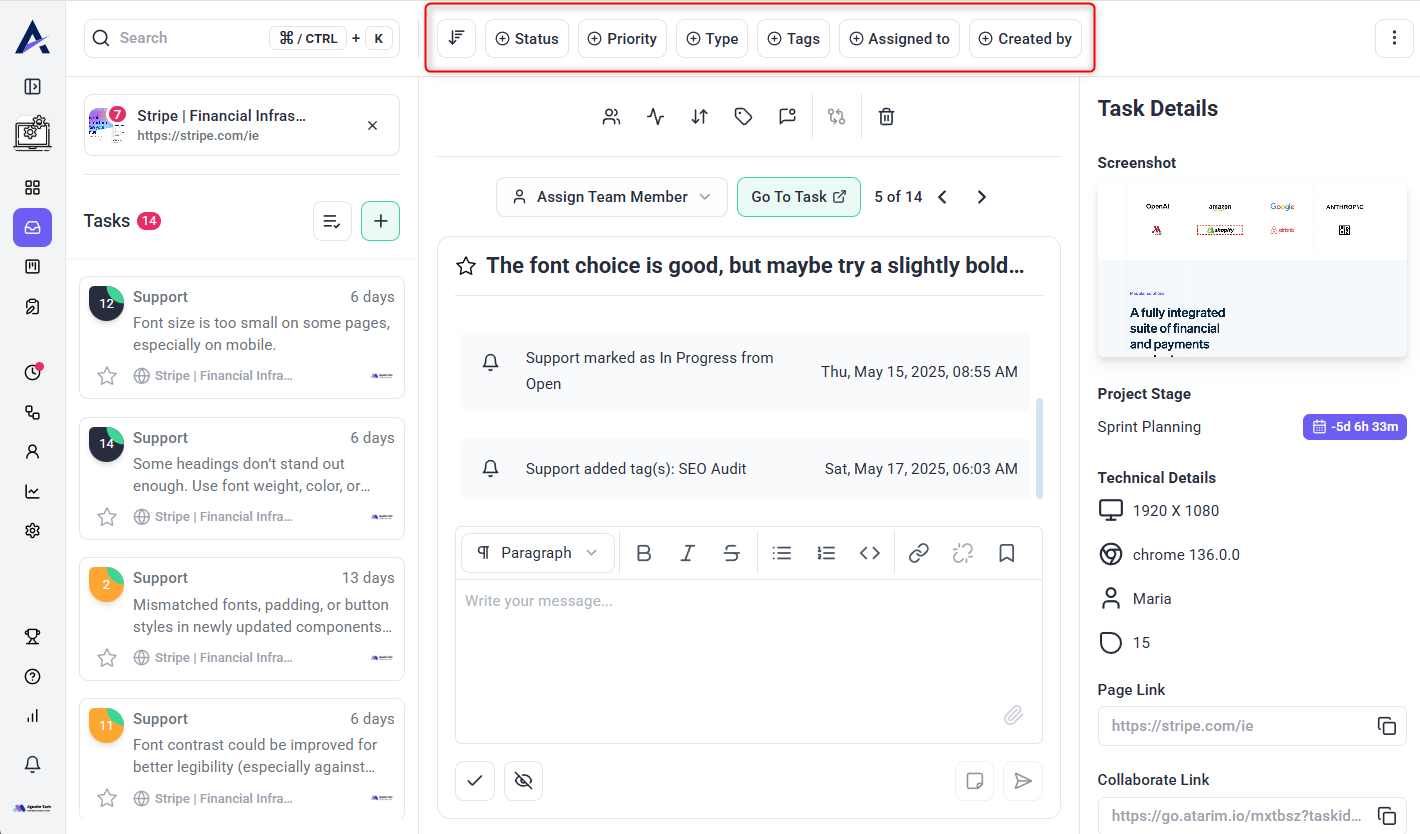
5. Filtering Tasks in the Inbox
Description:
Filtering helps you focus on specific tasks based on type, urgency, assigned users, and tags.
Instructions:
- Click the filter icon at the top of the task list.
- Select criteria such as:
- Task type (Admin, Page, Graphics.)
- Task status (Open, In Progress, Pending Review, Completed)
- Urgency (Low, Medium, High, Critical)
- Assigned users
- Tags
- Example: Filter tasks with High Urgency and the tag “Future Task” to focus on upcoming priorities.
Tip: Use filters to create a personalized view of tasks that need immediate attention.
FAQs
How do I search for a specific task?
Use the search bar at the top of the Inbox to find tasks by title, keyword, or project name.
Can I view completed tasks in the Task Inbox?
Yes, toggle “Show Completed Tasks” in the filter options to display them.
What happens when I delete a task?
Deleted tasks are permanently removed and cannot be recovered.