What Are Webhooks?
Webhooks are a way for applications to send data to one another automatically. When a specific event happens in Atarim—like a task being created—a webhook sends a message (an HTTP POST request) to a predefined URL (known as the webhook endpoint) or another tool you’ve configured whenever a trigger event happens.
Example Events That Can Trigger Webhooks:
- New Task Created
- Task Status Changed
- New Comment Added
- New Project Created
Webhooks are a standard format used by many websites and services, allowing developers to create custom integrations and automate workflows by writing their own code to receive and process these webhook payloads This will make it possible to automate processes and sync tools, even when those tools don’t have direct integrations.
Before You Start: Should You Use Webhooks?
In most cases, you don’t need to configure webhooks manually. Atarim offers Zapier, and Make.com integrations that handle this for you. These integrations allow you to connect Atarim with other tools directly, without the need for any manual webhook configuration.
We recommend using these pre-built integrations whenever possible, as they offer:
- Easier setup process
- Pre-configured actions and triggers
- Tested and maintained compatibility
- Potentially better performance and reliability
When to Use Manual Webhooks:
- You need a custom automation or connection
- Your tool isn’t supported natively
- You’re working in a custom-built system
Recommendation: If you’re looking to automate workflows involving Atarim, check the available integrations first. Only proceed with manual webhook configuration if you have specific needs that aren’t covered by the existing integrations.
If you do need to work with webhooks directly, let’s explore the two main types of webhooks supported by Atarim: Outgoing Webhooks (Pull) and Incoming Webhooks (Push).
By using both Outgoing and Incoming webhooks, you can create powerful, bi-directional integrations between Atarim and your other tools. This allows for the seamless automation of your workflows, ensuring that your team stays synchronized and productive across all platforms.
Section 1: Outgoing Webhooks (Trigger Data Out of Atarim)
What Are Outgoing Webhooks?
Also called “Pull” Webhooks, these are triggered when specific actions happen inside Atarim. They allow you to send data from Atarim to external systems like Zapier or Make.com to initiate actions elsewhere.
How to Set Up Outgoing Webhooks
Step 1: Start a New Automation in Your Platform
- Log into Zapier or Make.com.
- Create a new automation (Zap or Scenario).
- Select Webhooks as your Trigger App which will allow you to receive data from external sources such as Atarim.
- Choose “Retrieve Poll” as your trigger type/event which allows your automation tool to periodically check for new data from Atarim. This method is ideal for Atarim’s webhook system, ensuring that your automation captures all relevant events.
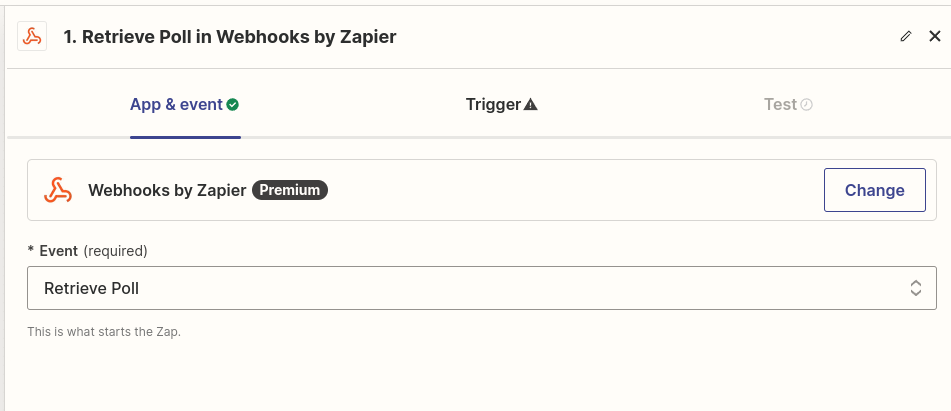
Tip: “Retrieve Poll” works best with Atarim’s event triggers because it regularly checks for updates.
Step 2: Enable the Webhook in Atarim
- Open your Atarim Dashboard.
- Go to Settings – Integrations.
- Scroll to the Webhooks section.
- Enable the event(s) you want (e.g., New Task Created).
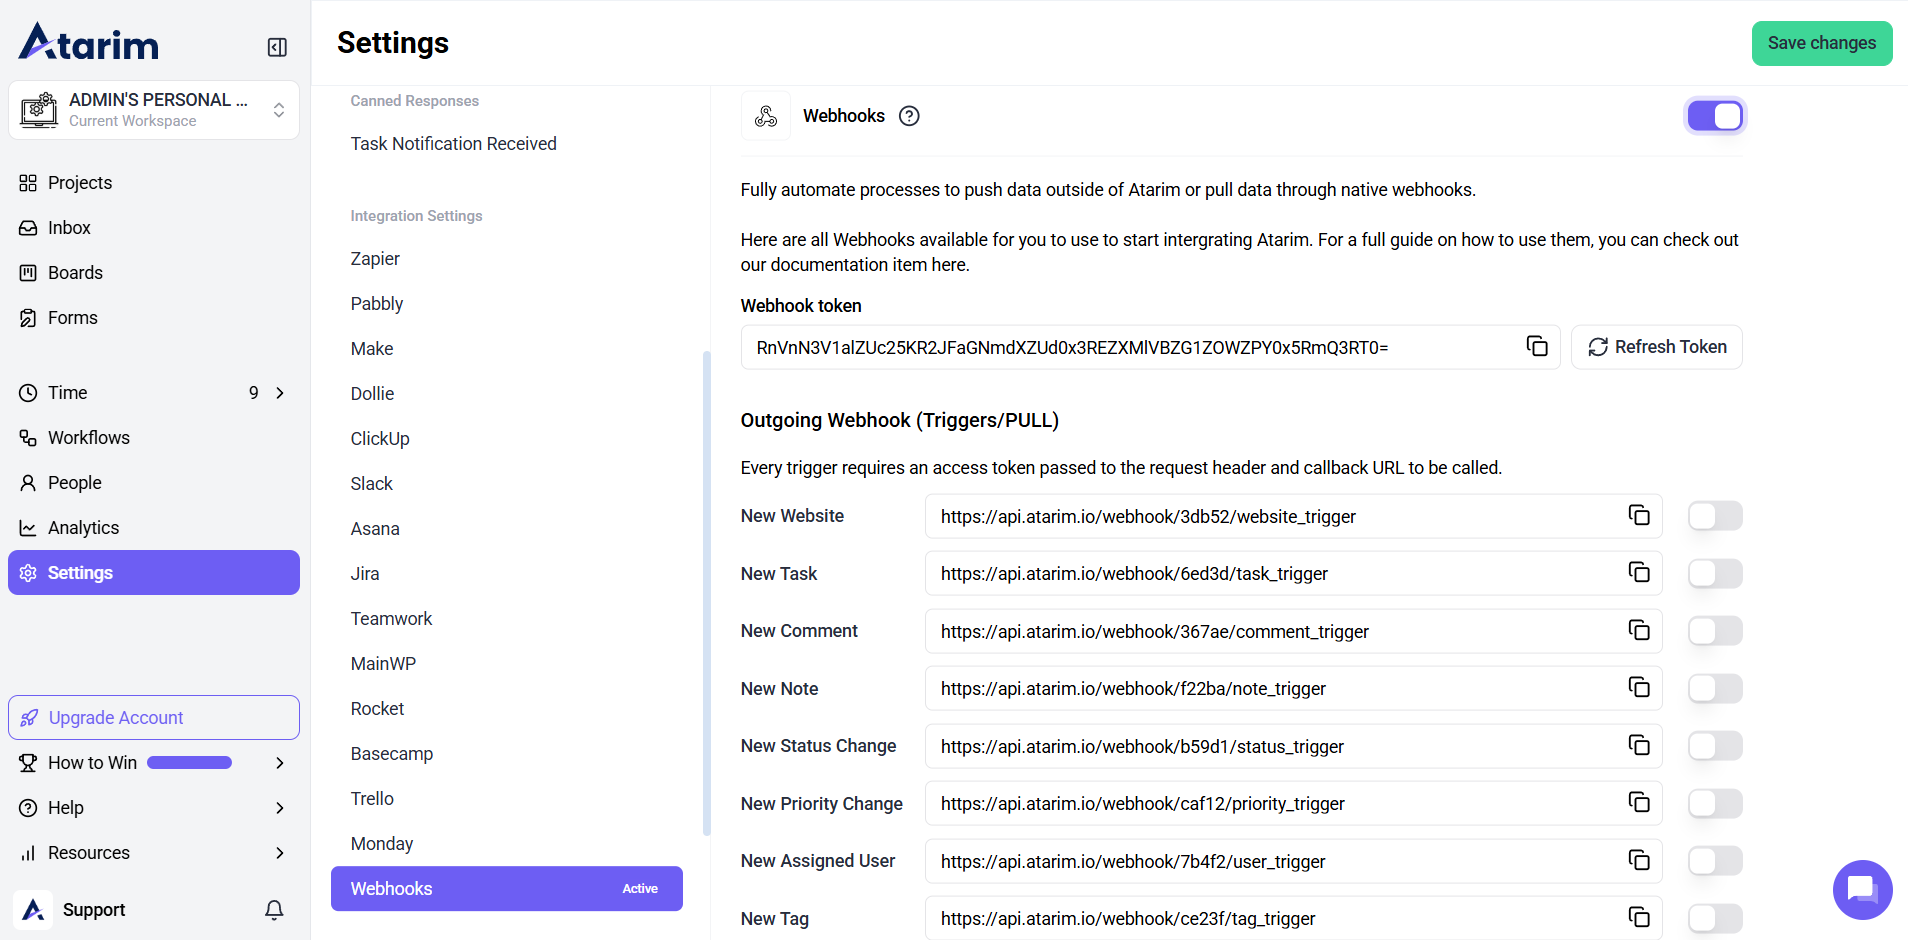
Tip: You can enable multiple events if needed. Start with one, then expand.
Step 3: Copy the Webhook URL
- Enable the event
- Copy this URL for use in your automation tool.
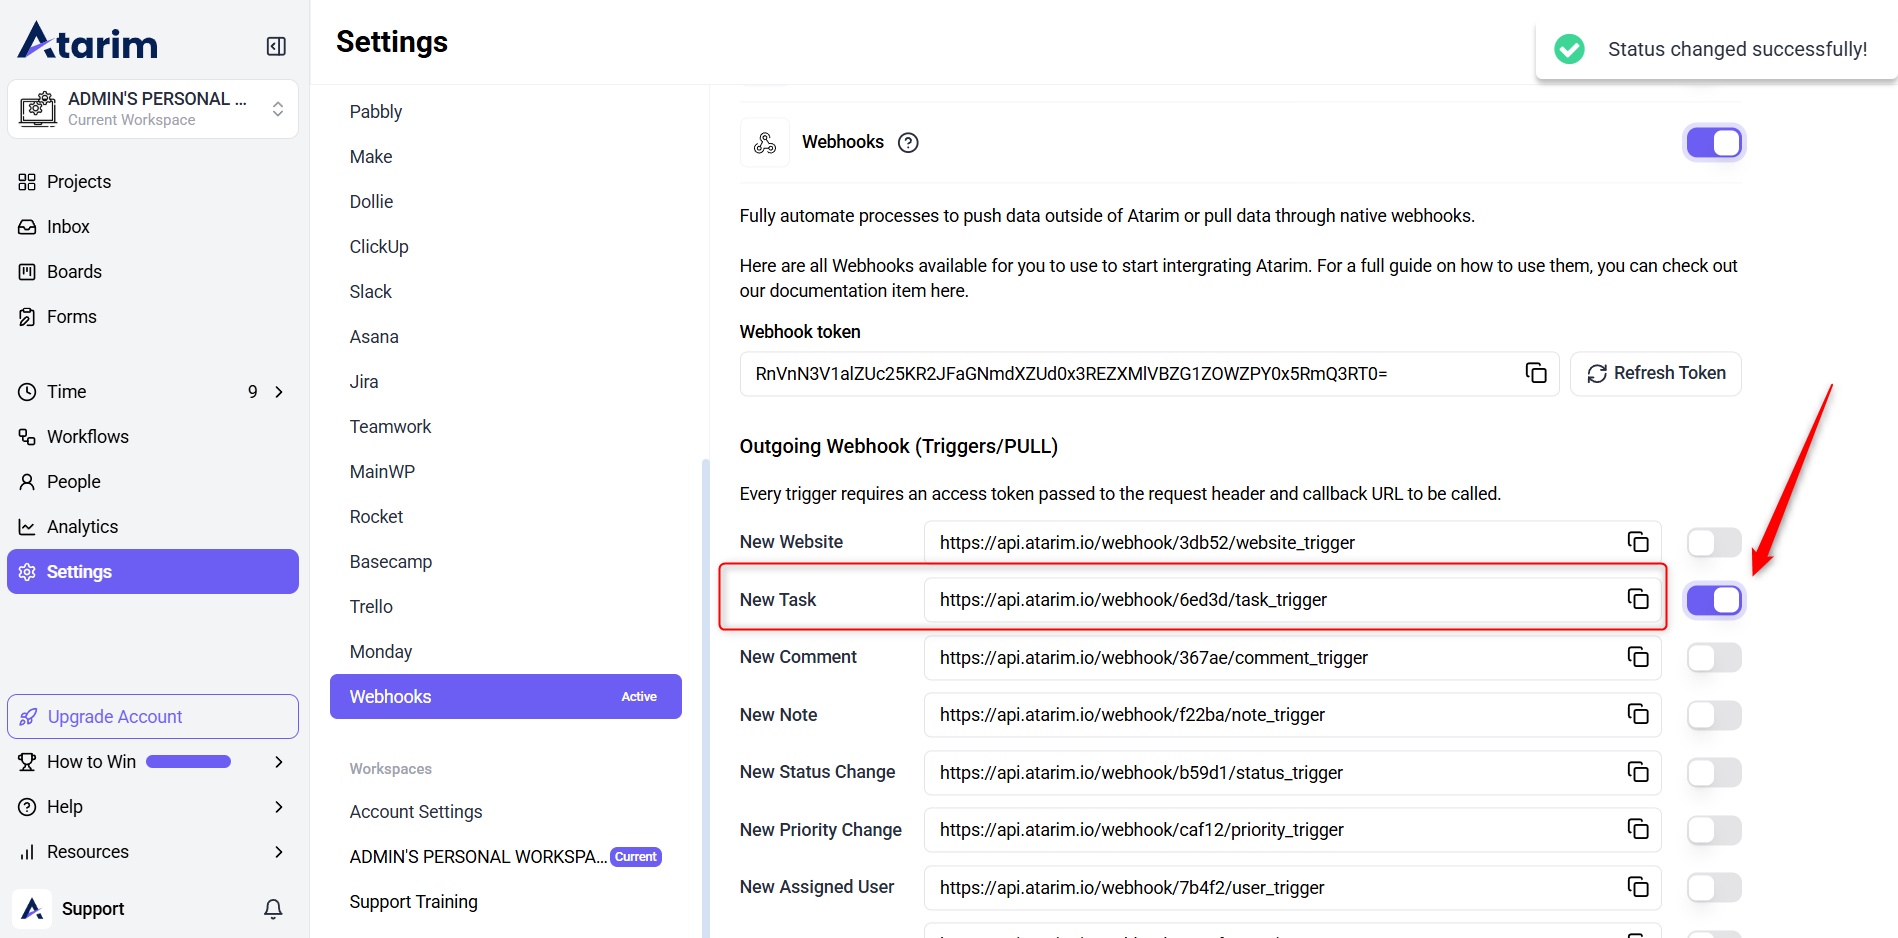
Tip: Keep a notepad open for pasting and organizing multiple webhook URLs.
Step 4: Paste the Webhook URL into Your Automation Tool
- In Zapier or Make.com, paste the copied URL into the field labeled “URL” or similar.
- In your automation tool’s webhook setup, you’ll likely see a field labeled either “Key” or “Response Key” – enter data into this field. This tells your automation tool to look for the data key in the JSON response from Atarim.

Tip: Always double-check for extra spaces when pasting URLs.
Warning: For security purposes, Atarim requires authentication for webhook requests and uses HTTP headers to authenticate each request.
Step 5: Set Up Authentication
- Add a new header with the name webhook-token and set its value to your unique Atarim webhook token, which you can find in your Atarim account settings.
- Save the webhook and start using it for creating automations.
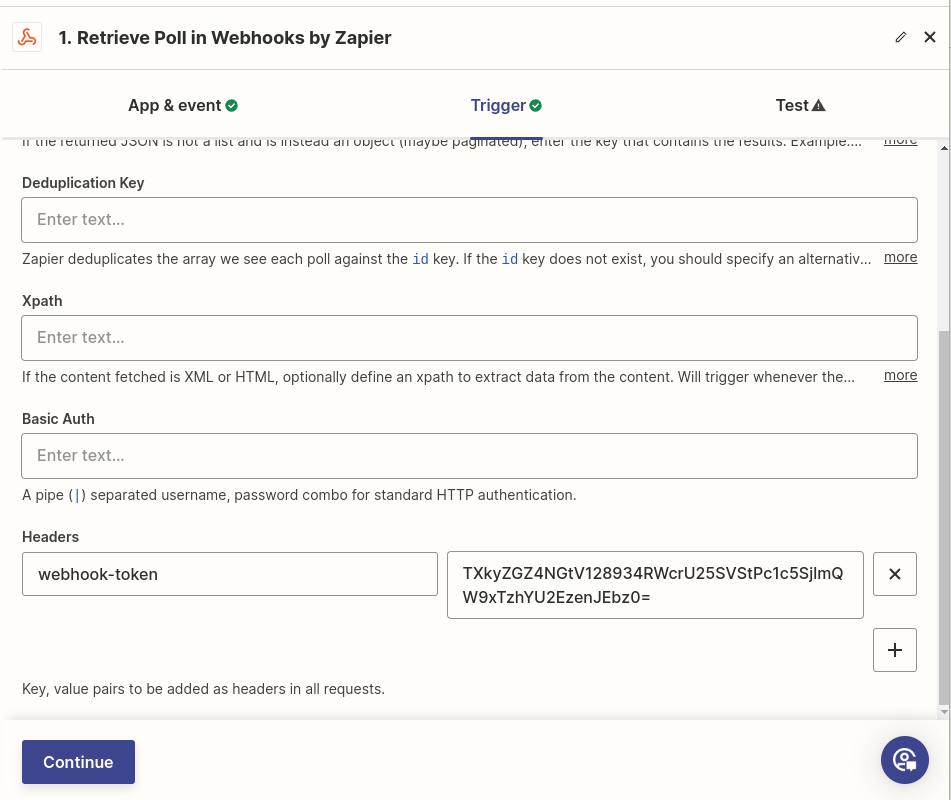
Tip: If the token is missing or incorrect, the webhook will fail silently. Test your trigger to confirm success.
Section 2: Incoming Webhooks (Push Data Into Atarim)
What Are Incoming Webhooks?
Incoming Webhooks, also known as “Actions” or “Push” webhooks, allow external services to send data and trigger actions into Atarim to trigger actions like creating a task or adding a comment. External tools or custom apps can send this data to Atarim using POST requests.
How to Set Up Incoming Webhooks
Step 1: Start from Your Automation Tool
- Log in to your chosen automation platform, such as Zapier or Make.com
- Navigate to the section for creating a new action within your automation workflow.
- Choose Webhooks as the Action App.
- Select POST as the method.
Tip: POST is required to send data—GET or PUT won’t work with Atarim actions.
Note: Within the Webhooks action options, you’ll see several methods for sending data. Select “POST” as your method, as this is the standard way to send data to create resources in Atarim.
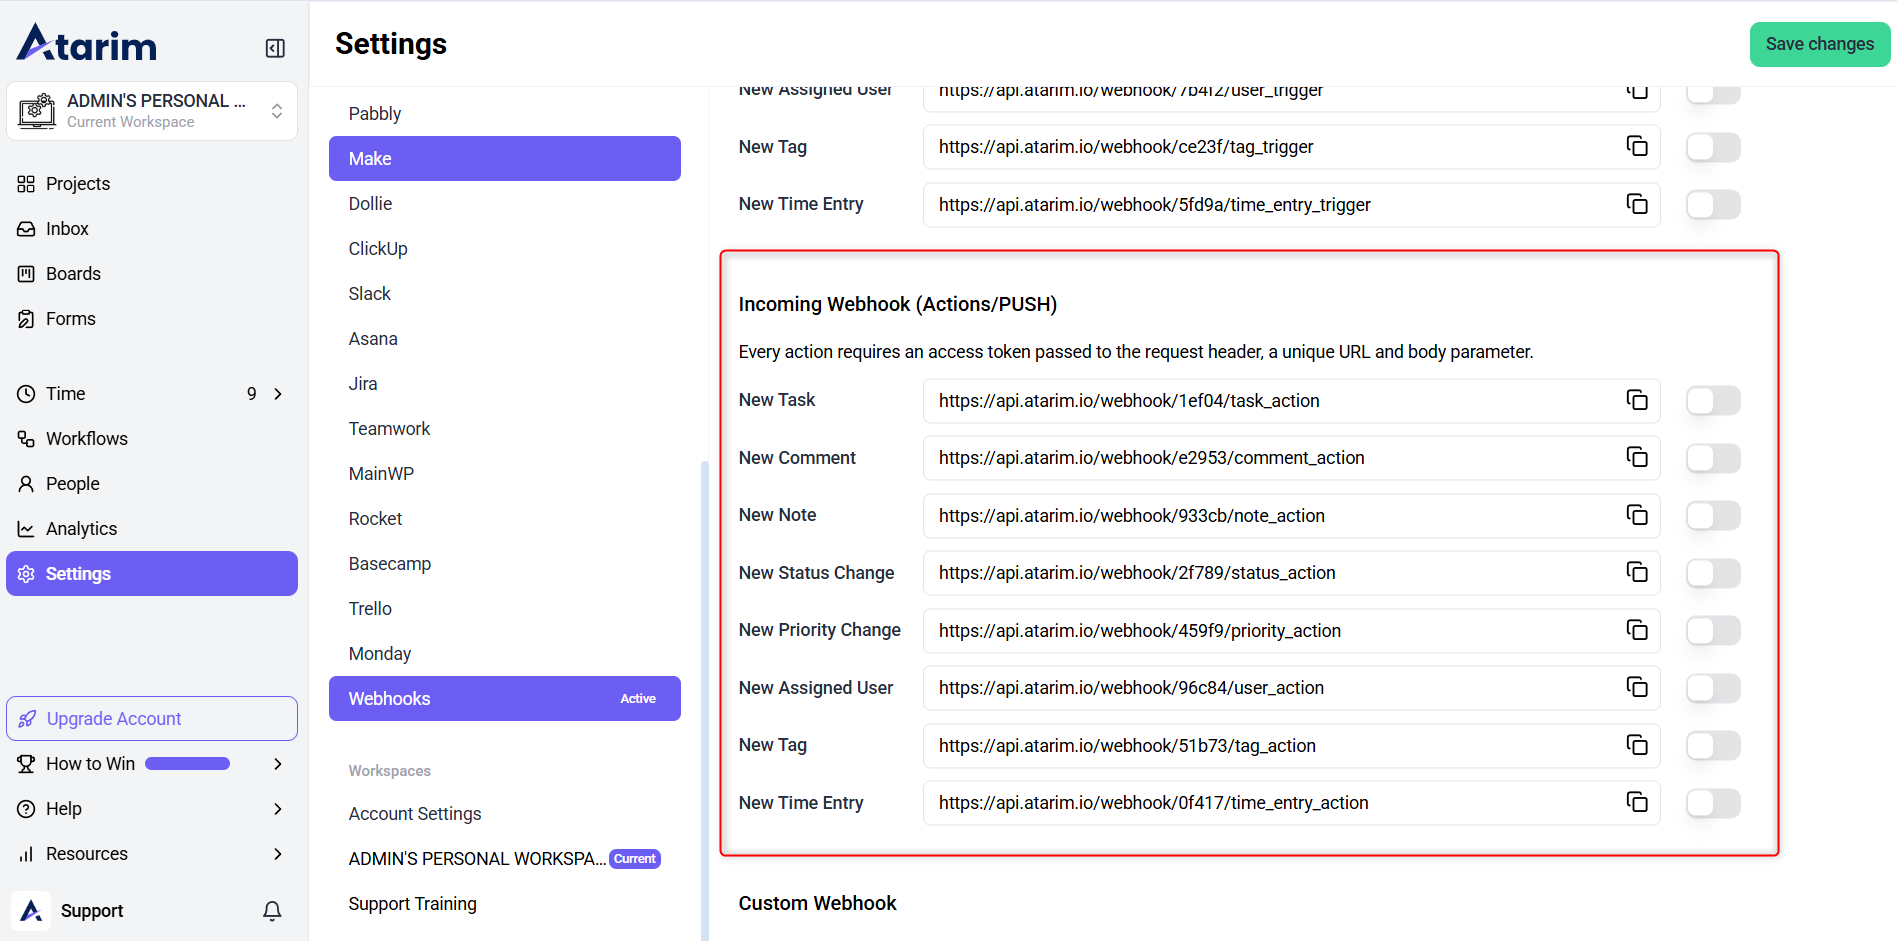
Step 2: Enable the Webhook in Atarim
- Go to Atarim Dashboard – Settings – Integrations – Webhooks.
- Enable the action you want (e.g., “Create New Task”).
Tip: If you’re testing multiple actions, label each webhook clearly in your automation tool.
Step 3: Copy the Webhook URL
- After enabling an action webhook, copy the generated URL.

Tip: Store this URL somewhere safe—it’s unique per action.
Step 4: Paste the URL in the Automation Tool
- Paste the copied URL into the URL field of your webhook setup.
Tip: Double-check that no trailing slashes are added automatically.
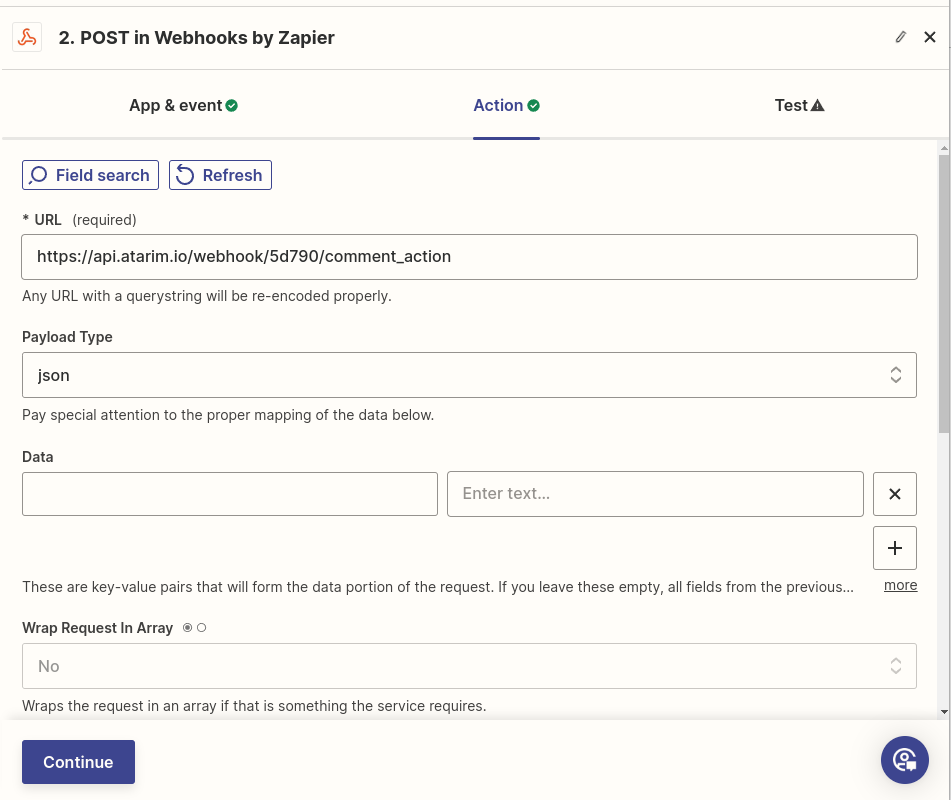
Step 5: Choose the Correct Payload Type
- Look for an option to set either the “Content Type” or “Payload Type“, and select the JSON or Form option, depending on what Atarim expects for the specific webhook you’re using
Use the chart below to choose the correct Content-Type:
| Action | Payload Type |
|---|---|
| New Task | JSON |
| New Comment | JSON |
| New Note | Form |
| New Status Change | JSON |
| New Priority Change | JSON |
| Assign User | Form |
| New Tag | JSON |
| New Time Entry | Form |
Tip: Choosing the wrong content type will result in rejected requests.
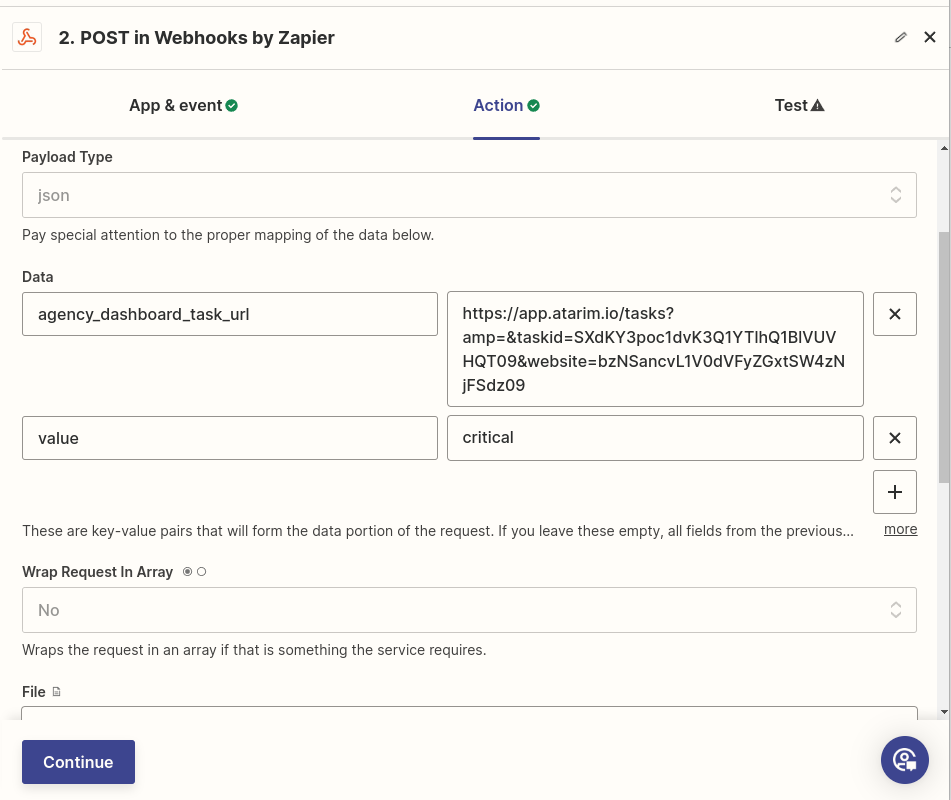
Step 6: Configure the Request Body
- In the “Body” or “Data” section of your webhook action setup, enter the required information for your chosen Atarim action, and format this data as either JSON or form data (matching your chosen payload type), including all necessary fields as specified in the Atarim webhook documentation for your selected action.
| S/N | Actions | Body parameter (Sample Data) | Payload Type |
|---|---|---|---|
| 1 | New Task | {“site”: “demo.wpfeedback.co”,”page”: “Brizy”,”urgency”: “low”,”status”: “open”,”message”: “testing general task creation using webhook actions”,”users”: “Support”} | JSON |
| 2 | New Comment | {“agency_dashboard_task_url”: “https://app.atarim.io/tasks?website=bzNSancvL1V0dVFyZGxtSW4zNjFSdz09&taskid=SXdKY3poc1dvK3Q1YTlhQ1BlVUVHQT09″,”complete_task”: “no”,”comment_content”: “webhook comment testing”} | JSON |
| 3 | New Status Change | {“agency_dashboard_task_url”: “https://app.atarim.io/tasks?website=bzNSancvL1V0dVFyZGxtSW4zNjFSdz09&taskid=SXdKY3poc1dvK3Q1YTlhQ1BlVUVHQT09″,”value”: “open”} | JSON |
| 4 | New Priority Change | {“agency_dashboard_task_url”: “https://app.atarim.io/tasks?website=bzNSancvL1V0dVFyZGxtSW4zNjFSdz09&taskid=SXdKY3poc1dvK3Q1YTlhQ1BlVUVHQT09″,”value”: “critical”} | JSON |
| 5 | New Tag | {“agency_dashboard_task_url”: “https://app.atarim.io/tasks?website=bzNSancvL1V0dVFyZGxtSW4zNjFSdz09&taskid=SXdKY3poc1dvK3Q1YTlhQ1BlVUVHQT09″,”value”: “testing tag”} | JSON |
| 6 | Assign User | {“agency_dashboard_task_url”: “https://app.atarim.io/tasks?website=bzNSancvL1V0dVFyZGxtSW4zNjFSdz09&taskid=SXdKY3poc1dvK3Q1YTlhQ1BlVUVHQT09″,”users”: “Tyler”} | |
| 7 | New Time Entry | {“agency_dashboard_task_url”: “https://app.atarim.io/tasks?website=bzNSancvL1V0dVFyZGxtSW4zNjFSdz09&taskid=SXdKY3poc1dvK3Q1YTlhQ1BlVUVHQT09″,”user”: “Vito Peleg”,”start_time”: “22:07″,”end_time”: “23:07″,”billable”: “yes”,”description”: “Testing add time entry for webhook”,”complete_task”: “yes”} | |
| 8 | New Note | {“agency_dashboard_task_url”: “https://app.atarim.io/tasks?website=bzNSancvL1V0dVFyZGxtSW4zNjFSdz09&taskid=SXdKY3poc1dvK3Q1YTlhQ1BlVUVHQT09″,”comment_content”: “webhook note tested”,”complete_task”: “no”} |
Tip: For form-encoded requests, enter each key-value pair separately in your tool.
Note: The exact steps will vary from tool to tool, but on Zapier, you need to add key value pairs separately.
Step 7: Add Authentication Header
- Look for a section in your automation tool where you can add custom headers to your webhook request.
- You need to add a new header with the name webhook-token and set its value to your Atarim webhook token, which you can find in your Atarim account settings.
- Add a header:
- Key:
webhook-token - Value: Your Atarim token
- Key:
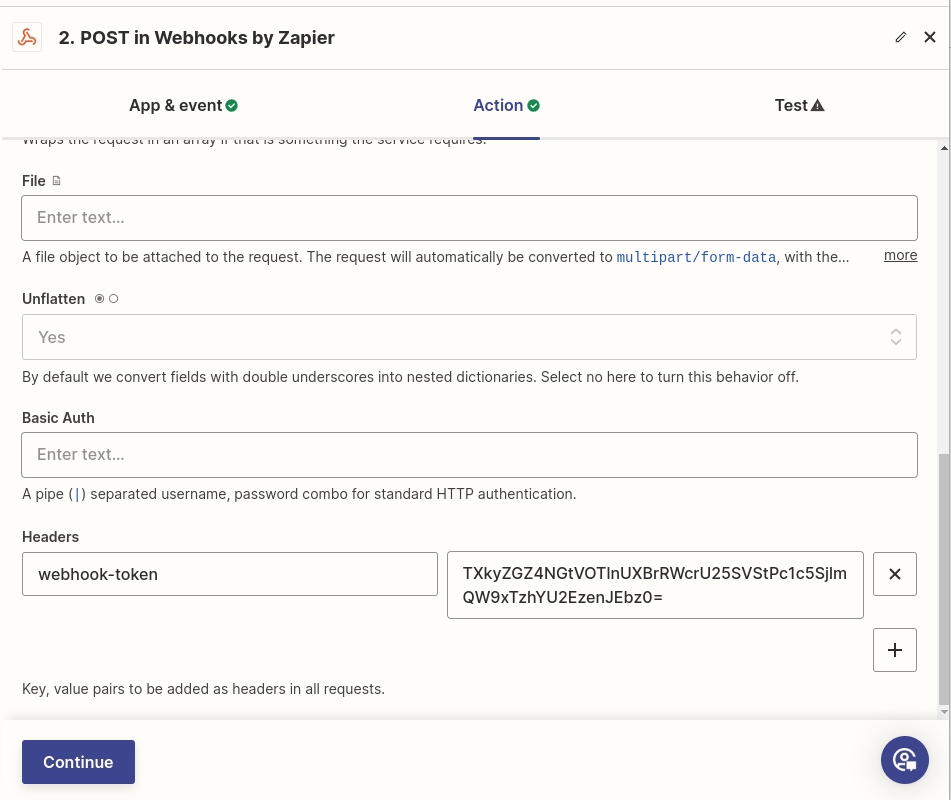
Tip: Without this, your request will not be accepted by Atarim.
Step 8: Configure Format Settings (Zapier)
- Wrap request in array: No
- Unflatten: Yes
Tip: These settings ensure your JSON or form payload is properly parsed by Atarim.
Notes for Actions (Incoming Webhook Body Parameters)
When setting up your webhook action, pay close attention to these parameters:
- complete_task: This parameter specifies whether a task should be marked as complete after the action is performed. It can have one of two values:
- yes: The task will be marked as complete.
- no: The task’s completion status will not be changed.
- billable: This parameter is used for time entries to indicate whether the logged time should be billed to the client. It can have one of two values:
- yes: The time entry will be marked as billable.
- no: The time entry will be marked as non-billable.
- value (for status changes): This parameter is used to specify the new status of a task. It must be one of the following:
- open
- in-progress
- pending-review
- complete
- value (for priority changes): This parameter is used to specify the new priority level of a task. It must be one of the following:
- low
- medium
- high
- critical
FAQs
Go to Dashboard > Settings > Account Settings > Webhook Token.
Yes. Use “Test Webhook” in Zapier or manually send a sample payload to confirm it’s working.
A: Atarim will reject the request. Always check the payload type (JSON or Form) in the webhook documentation.
Not directly. You’ll need to set up individual webhook URLs for each action
Yes, as long as the tool supports incoming and outgoing webhooks with authentication and custom headers.
No, Atarim’s integrations with Zapier and Make.com make it easy to configure without coding.
Yes, Zapier & Make.com allow you to create multi-step automations.