Step-by-Step Guide
1. Accessing the Analytics
The first step in using Atarim is accessing your analytics. This is where all your project overviews and tasks are displayed.
Instructions:
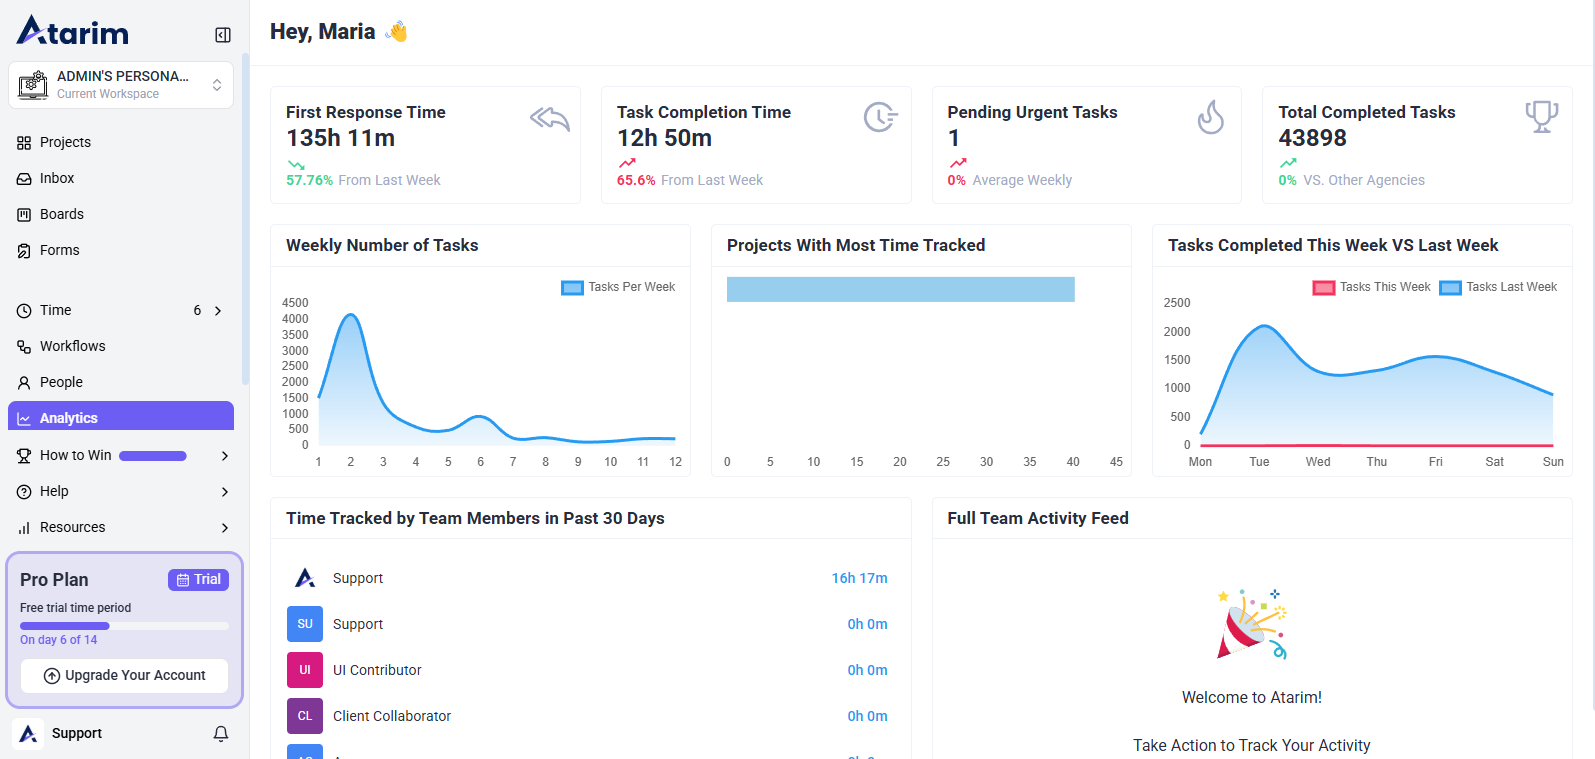
Note: The Dashboard will display your active projects, tasks, notifications, and other important information.
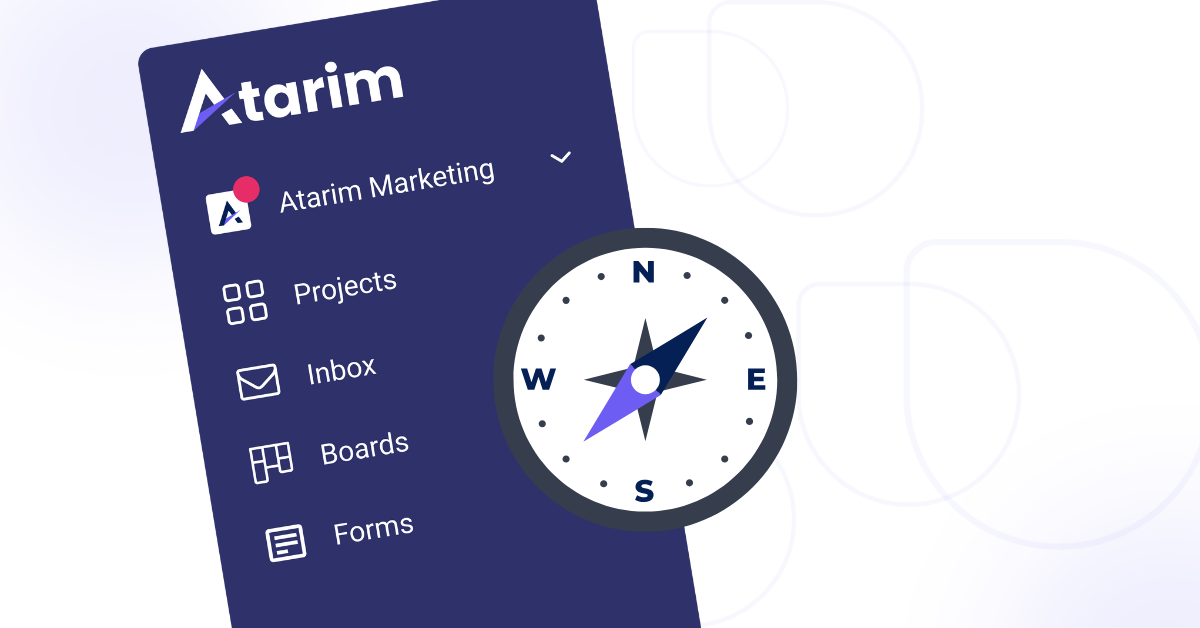
2. Understanding the Main Menu
The main menu on the left-hand side provides access to your workspaces, notifications, tasks, and settings, etc.
The menu includes:
- Projects: Overview of all your active projects.
- Inbox: Central hub for all task-related messages.
- Boards: Visual task management tools to track project progress.
- Time Entries: Logs the time spent on specific tasks.
- Workflows: Automate repetitive processes. Trigger task assignments, status updates, notifications, and more based on specific actions or events.
- Forms: Create and manage forms to collect structured feedback, perform QA submissions, or onboard clients. Share via direct link or embed in workflows.
- Settings: Customize your account and notifications.

3. Using the Project Overview
The Project Overview section provides a high-level summary of all ongoing projects. For each project, you’ll see key details such as the project’s home page thumbnail, URL, assigned team members, total open tasks, and access to project settings.
Instructions:
- Click on the Projects menu to view all your active projects.
- In the Projects Overview, each project is displayed as a block that includes:
- A thumbnail of the project’s home page.
- The project’s URL.
- A list of assigned team members.
- The total number of open tasks.
- A project settings icon to manage project-specific options.
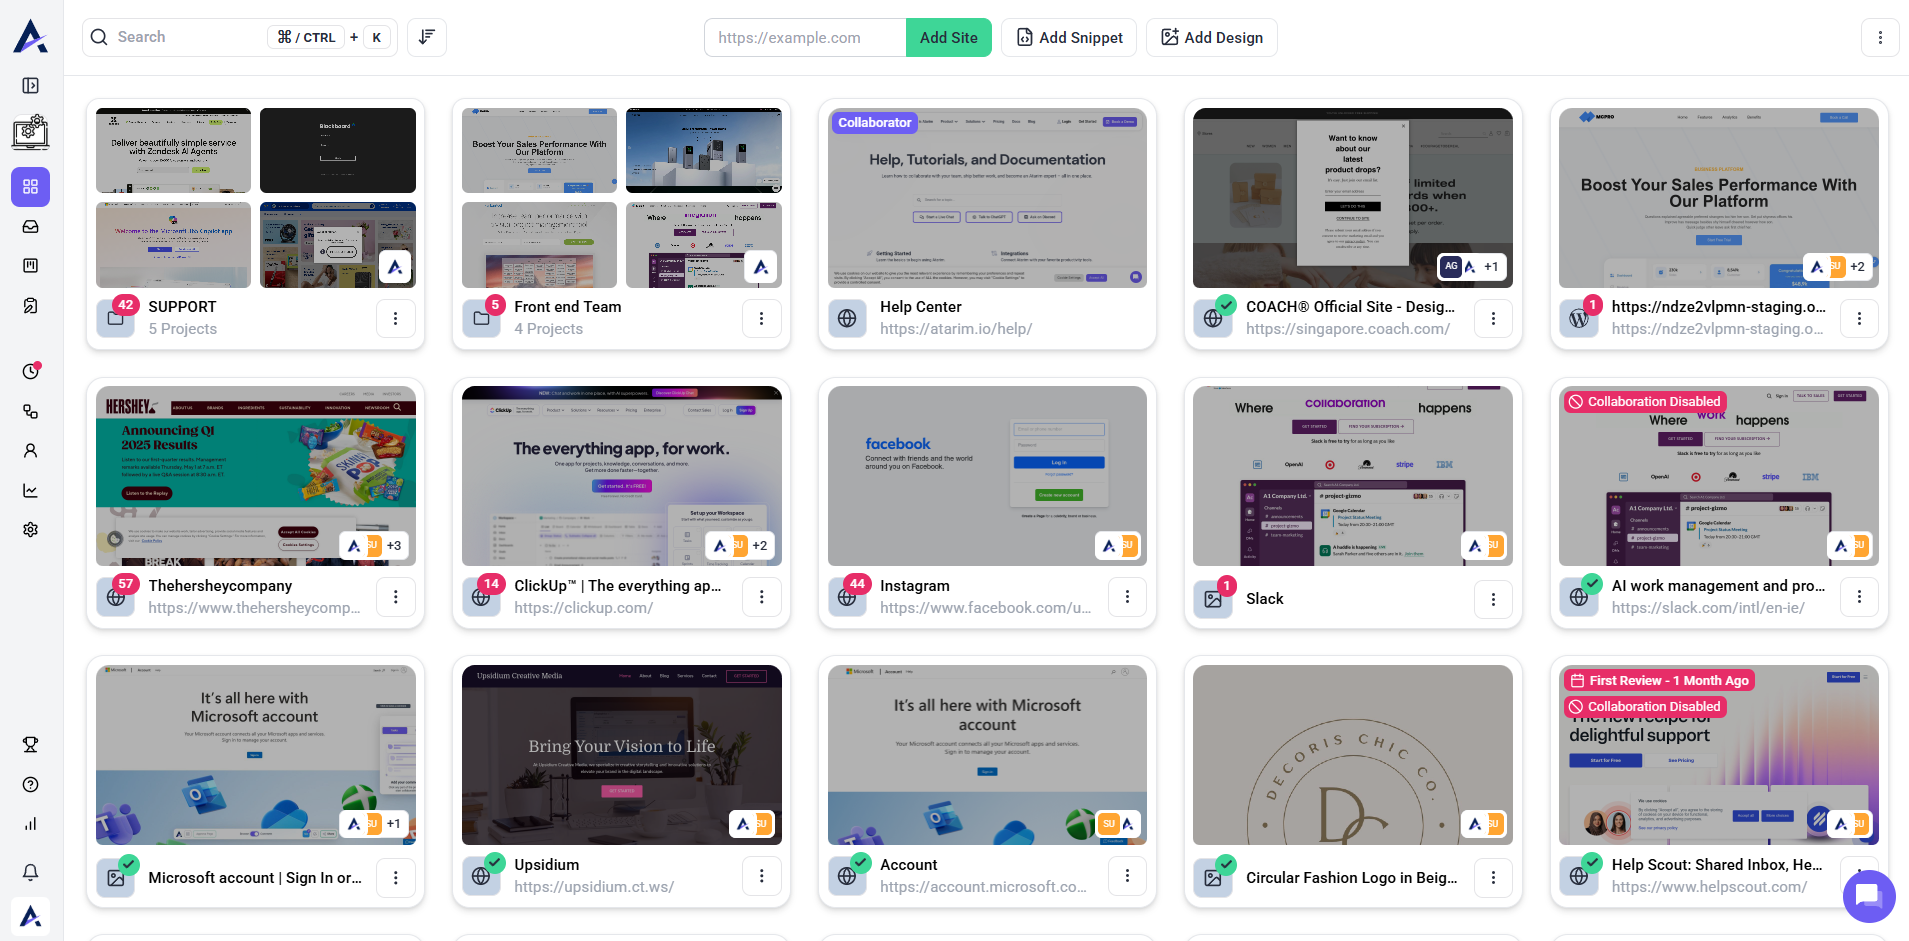
Tip: Use the project settings icon to quickly access configuration options for each project.
4. Managing Notifications
Atarim sends notifications to keep you updated on task progress and feedback. You can access these notifications directly from the dashboard.
Instructions:
- Notifications are located in the bottom left corner of the dashboard menu panel.
- Click the bell icon to view recent notifications about task updates, comments, or client feedback.
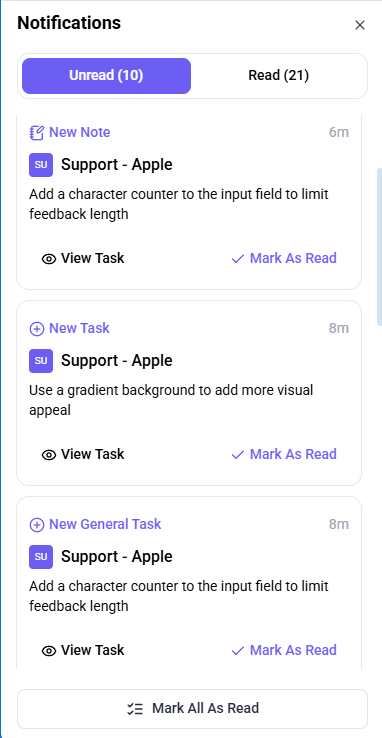
Recommendation: Make sure to assign the appropriate team member to critical tasks or feedback to ensure they stay on top of project updates.
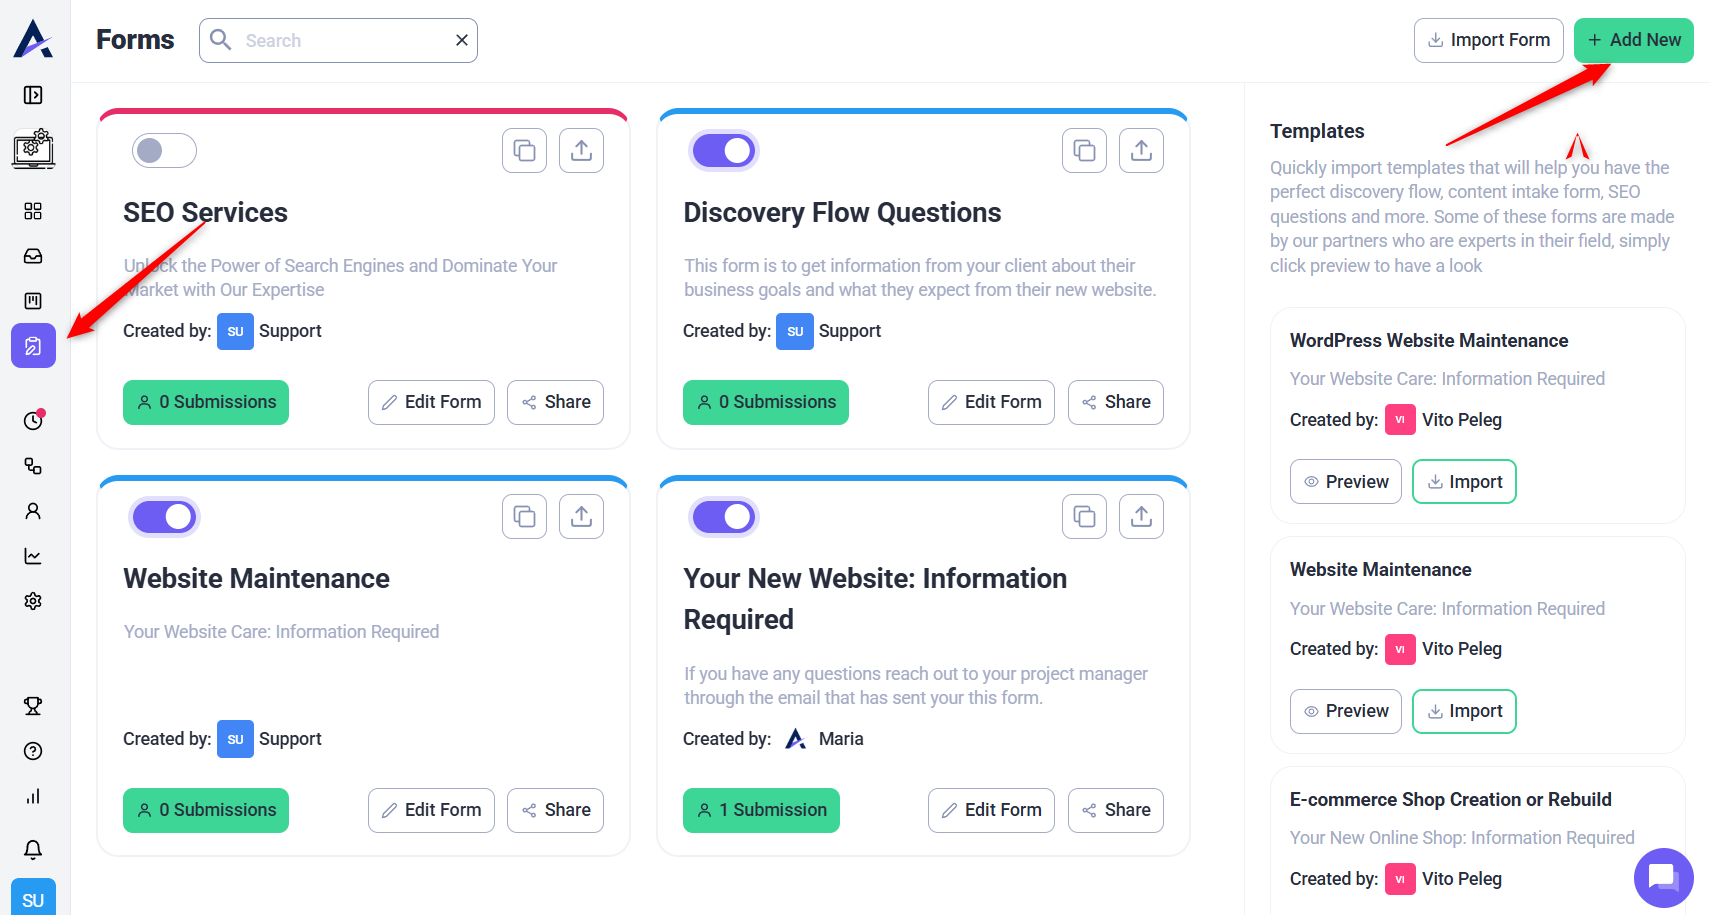
5. Navigating Forms
Description:
Forms in Atarim are used to collect structured feedback or task information from clients, stakeholders, or teammates. Learn more on how to Customize Forms to Fit Your Workflow Needs.
Instructions:
- Click “Forms“ from the left-hand menu.
- Create a new form or open an existing one.
- Customize your form using available input fields (e.g., text, dropdowns, file uploads).
- Share the form via a link or embed in a client workflow.
Use Case Examples:
- Pre-launch checklists
- Client onboarding questions
- Internal QA submission templates
Recommendation: Use forms to standardize recurring intake processes across projects.
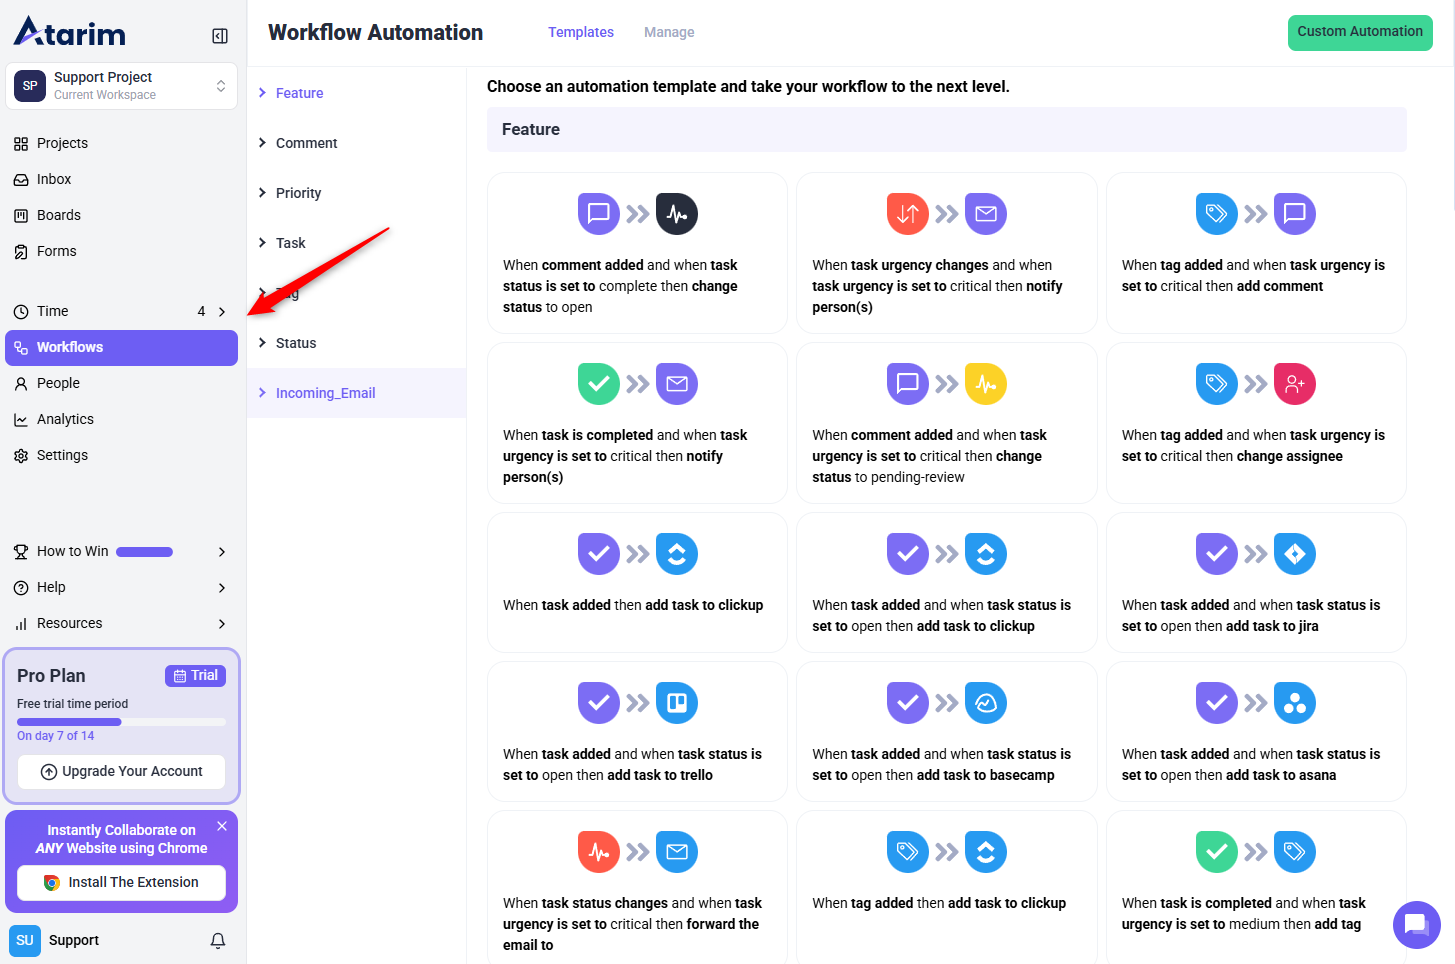
6. Automating with Workflows
Description:
Workflows allow you to automate task management, form routing, and notifications across your workspace. Learn more on How to Create a Workflow (Automation)
Instructions:
- Click “Workflows“ from the main menu.
- Choose or Select “Custom Workflow”.
- Define a trigger (e.g., “Form submitted”, “New task created”).
- Add actions such as:
- Notify a team member
- Assign a task
- Move to a specific board column
- Send an email
Tip: Use workflows to eliminate manual follow-ups and reduce human error.
FAQs
To update the project thumbnail, click on the project settings icon in the Project Overview section. Then, select Change Project Settings and click the Refresh Image button to update the thumbnail.
In the Project Overview, each project block displays a list of assigned team members. You can also view and manage project team assignments by clicking on the project settings icon.