How to Customize Your Dashboard Settings in Atarim
General Settings
1. Accessing the Dashboard Settings
Description
All customization options are available under Dashboard Settings.
Instructions
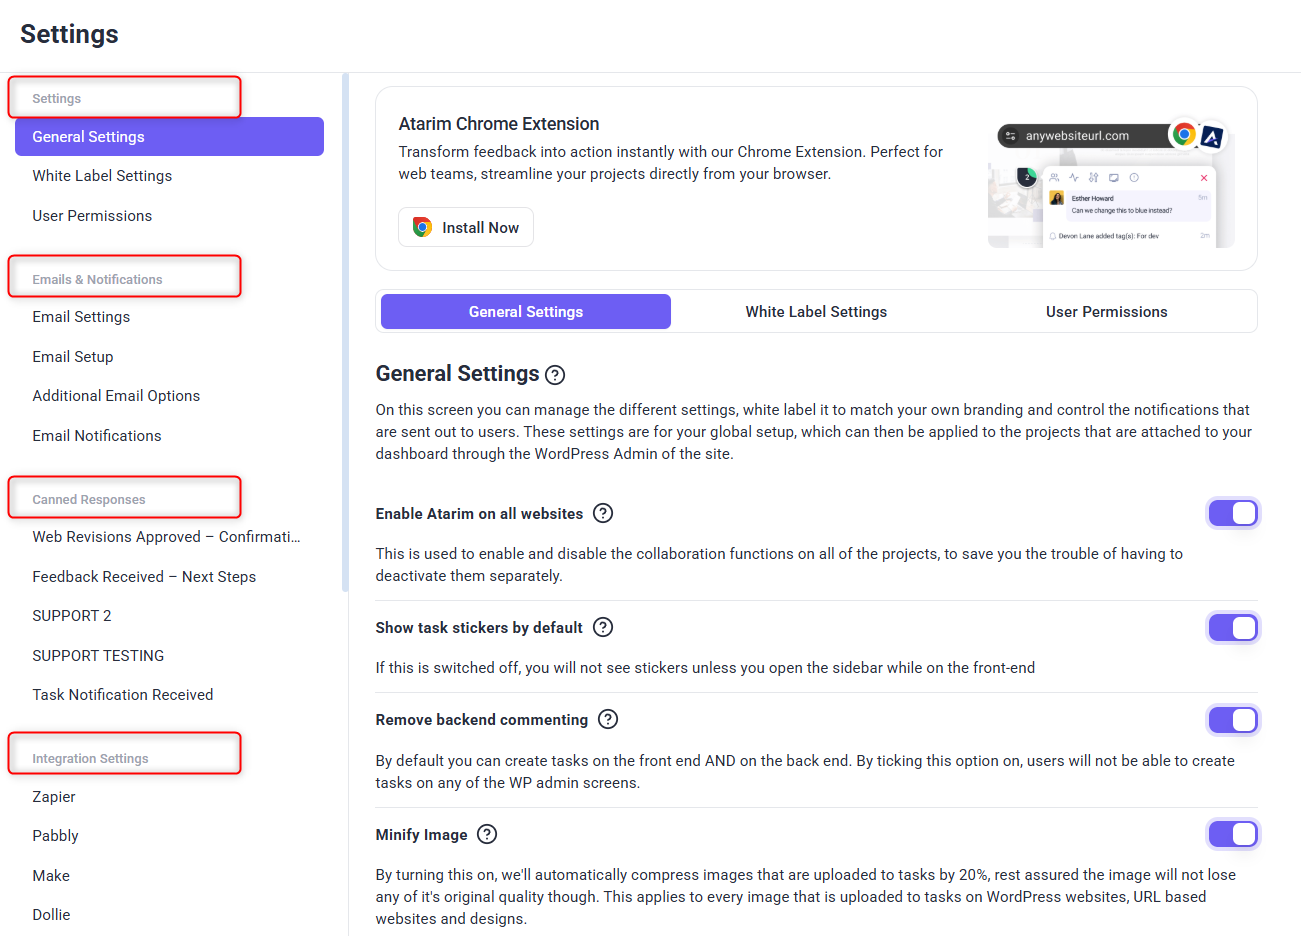
- Click on the Settings icon in the left navigation bar.
- You will find multiple sections:
- Client Interface – General settings, white-label options, and user permissions.
- Emails & Notifications – Inbox settings and alerts.
- Canned Responses – Predefined replies for quick responses.
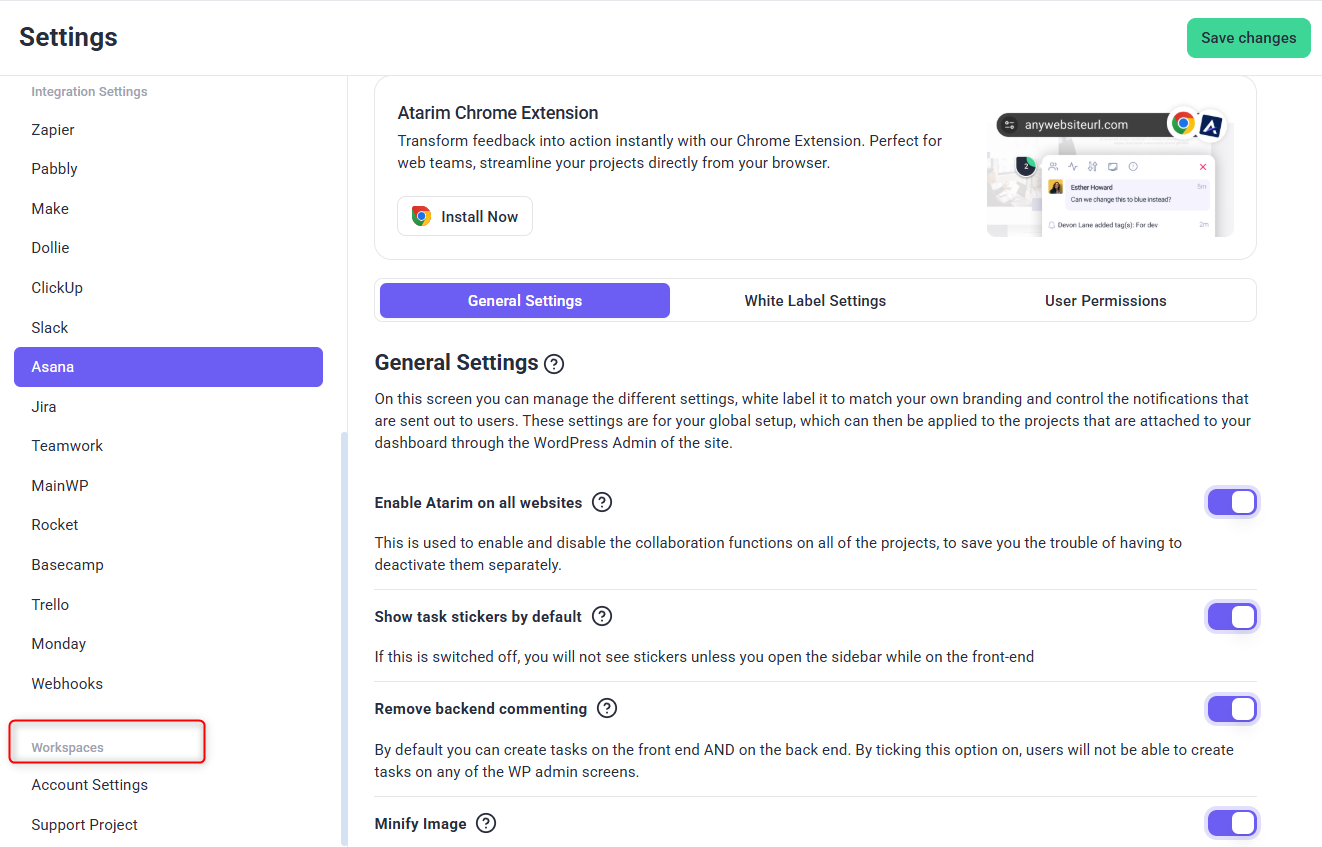
- Integration Settings – Manage API connections with external tools.
- Workspaces – Organize your team and projects.
Note: Some settings are only available for users with admin-level access.
2. Configuring Client Interface Settings
Description
Customize how Atarim functions and appears for users and clients.
Instructions
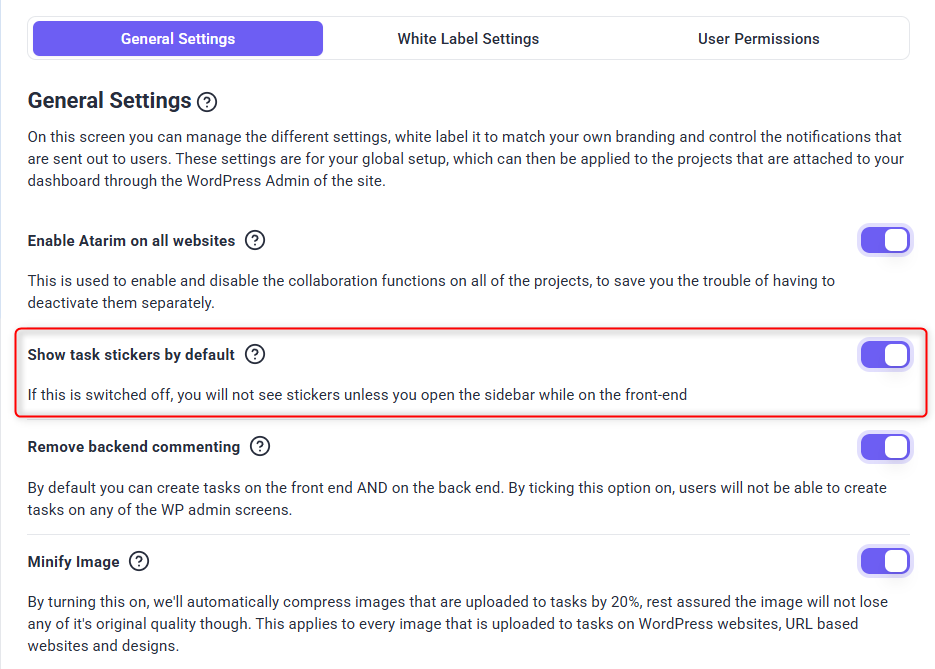
- Navigate to Settings > General Settings
- Toggle Atarim On/Off for all WordPress websites with global settings enabled.

- Enable or disable stickers as default
3. Managing Backend Commenting
Description:
Backend commenting allows users to leave feedback directly in the WordPress dashboard. Agencies may prefer to disable this feature to maintain a distraction-free environment.
Instructions to Disable Backend Commenting:
- Navigate to Settings > Client Interface > General Settings.
- Locate the Backend Commenting toggle.
- Turn the toggle off to restrict comments to frontend pages only.
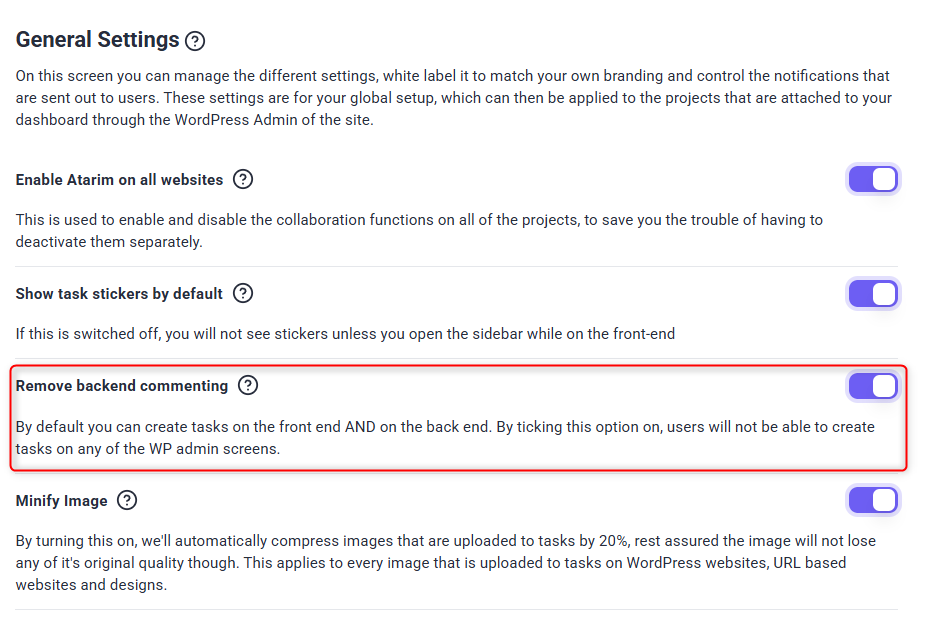
Tip: Disabling backend commenting can streamline collaboration by keeping discussions focused on visible web elements.
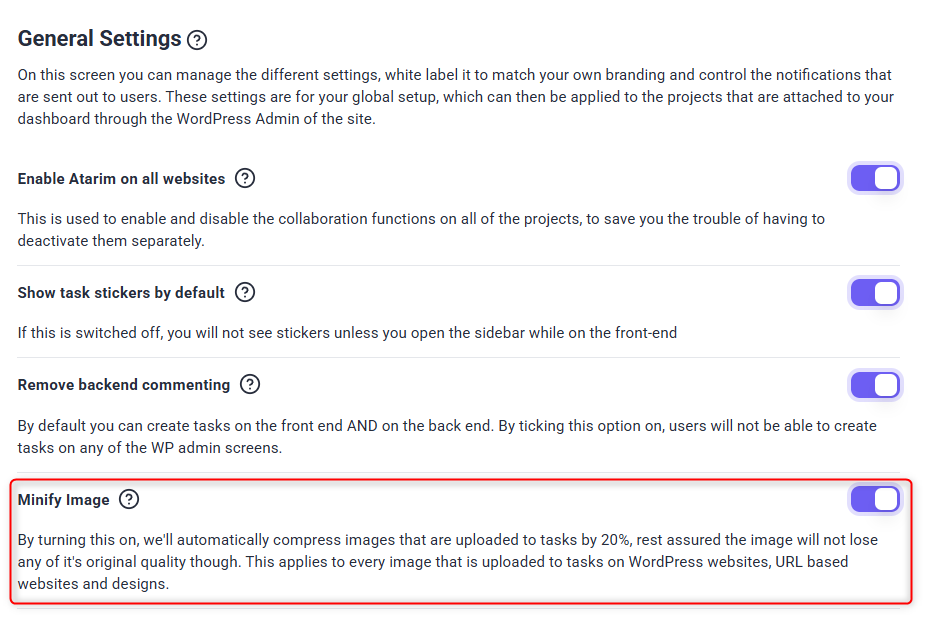
4. Enabling the Minify Image Feature
Description:
The Minify Image feature automatically compresses images before uploading them to the WordPress media library, optimizing website performance.
Instructions:
- Go to Settings > General Settings
- Scroll to the Minify Image section and toggle the feature on.
- Once enabled, Atarim will automatically compress images uploaded via the collaboration tool.
Benefits:
- Improves website loading speed.
- Reduces server storage usage.
- Ensures a streamlined workflow—no need for manual compression.
5. Enabling Two-Factor Authentication (2FA) for Security
Description:
Two-Factor Authentication (2FA) adds an extra layer of security to your Atarim workspace by requiring a one-time passcode upon login.
Instructions to Enable 2FA:
- Navigate to People> Select the User
- Locate the Two-Factor Authentication option.
- Click the toggle to enable 2FA.
- A six-digit verification code will be sent to your registered email.
- Enter the code in the verification field and click Confirm.
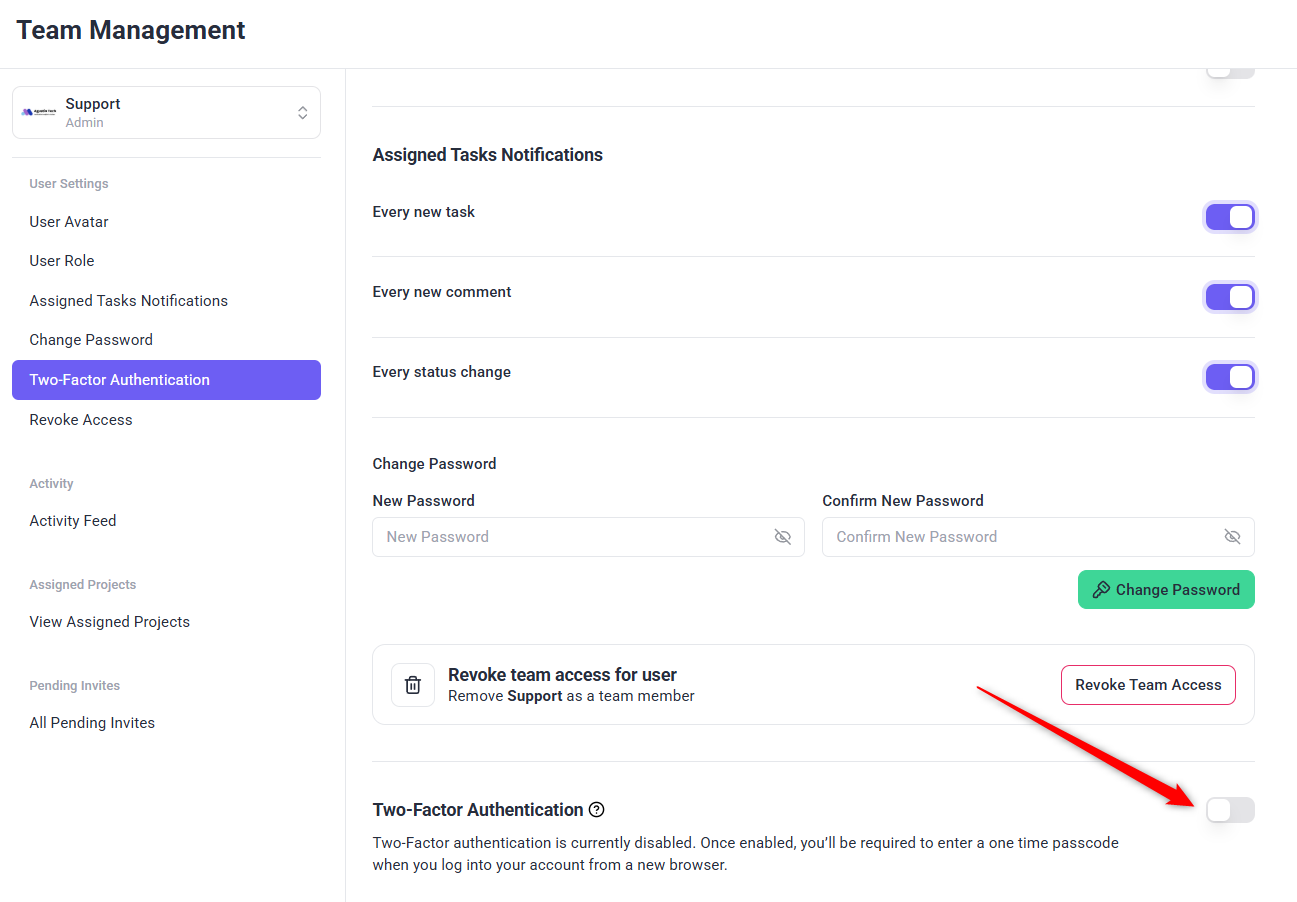
Note: Once enabled, 2FA will be required for logging in from new browsers.
White Label Settings
1. Accessing White Label Settings
Description:
To start white-labeling your Atarim workspace, access the White Label settings from the dashboard.
Instructions:
- Log in to your Atarim Dashboard.
- Click on Settings in the navigation bar.
- Select White Label Settings from the settings menu.
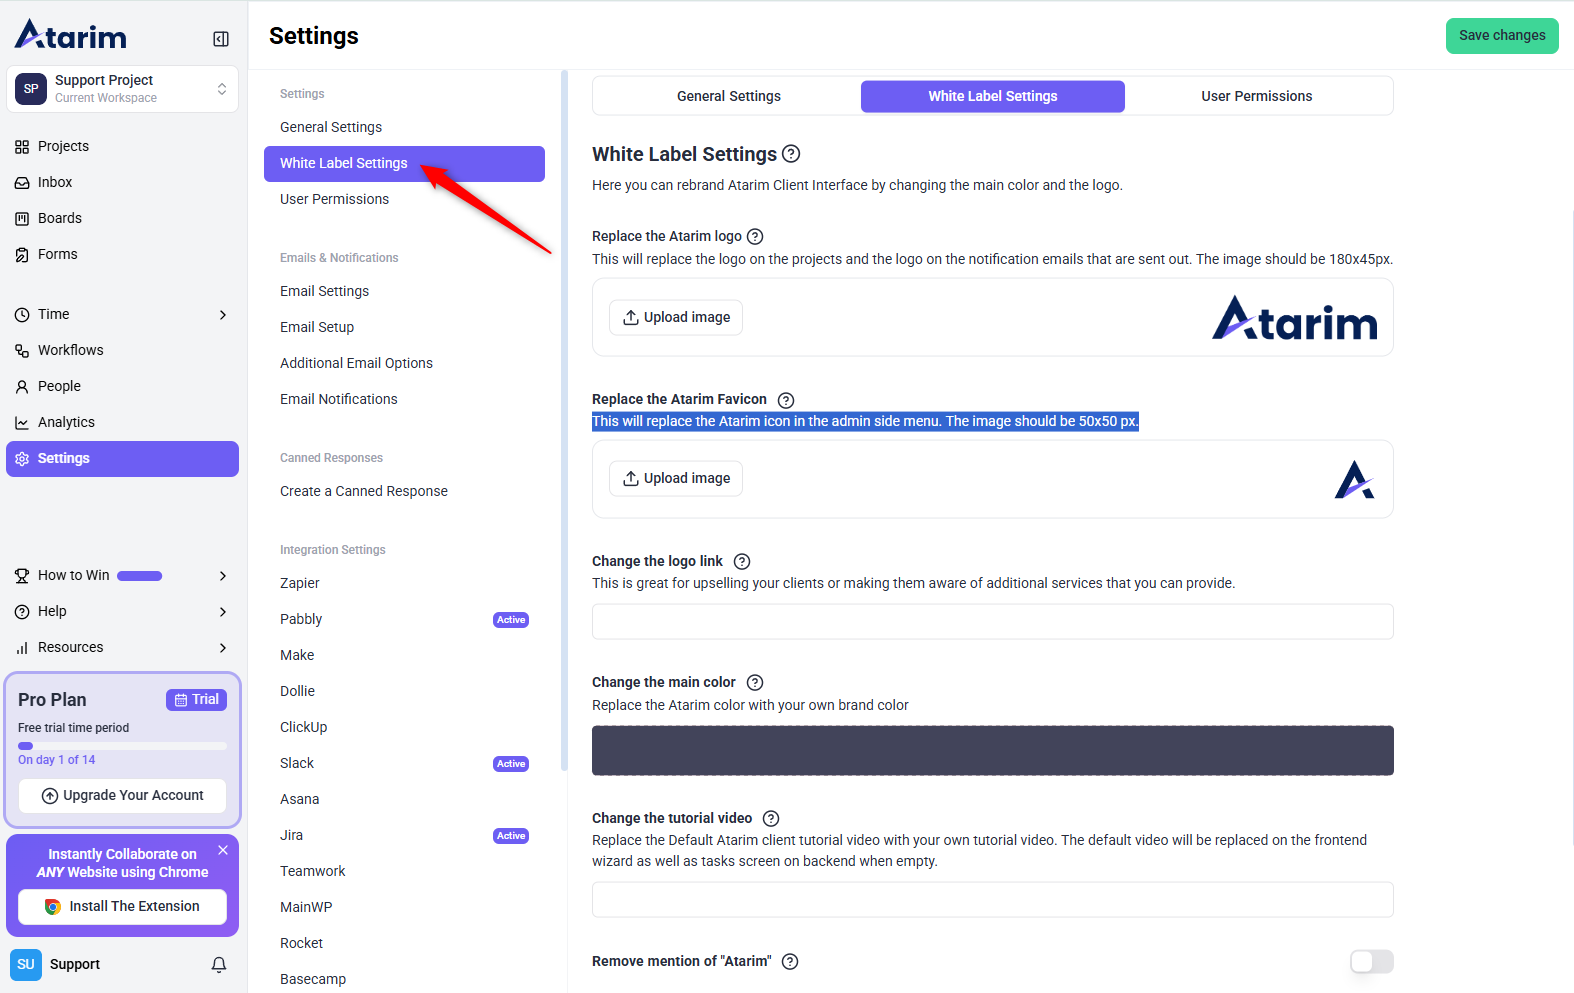
2. Uploading Your Custom Logo
Description:
Replace Atarim’s logo with your own branding to ensure a professional look across the platform.
Instructions:
- Navigate to Settings > White Label.
- Locate the Custom Logo upload section.
- Click Upload and select your logo file (Recommended: 180x45px PNG).
- Save changes to apply the new logo.
Where the logo appears:
- Inside the WordPress Plugin Settings (when Global Settings are enabled).
- On the Login Pop-up inside the plugin.
- The Bottom Bar of the WordPress interface and websites added via URL.
- At the top of email notifications sent via Atarim.
- On time entries export files.
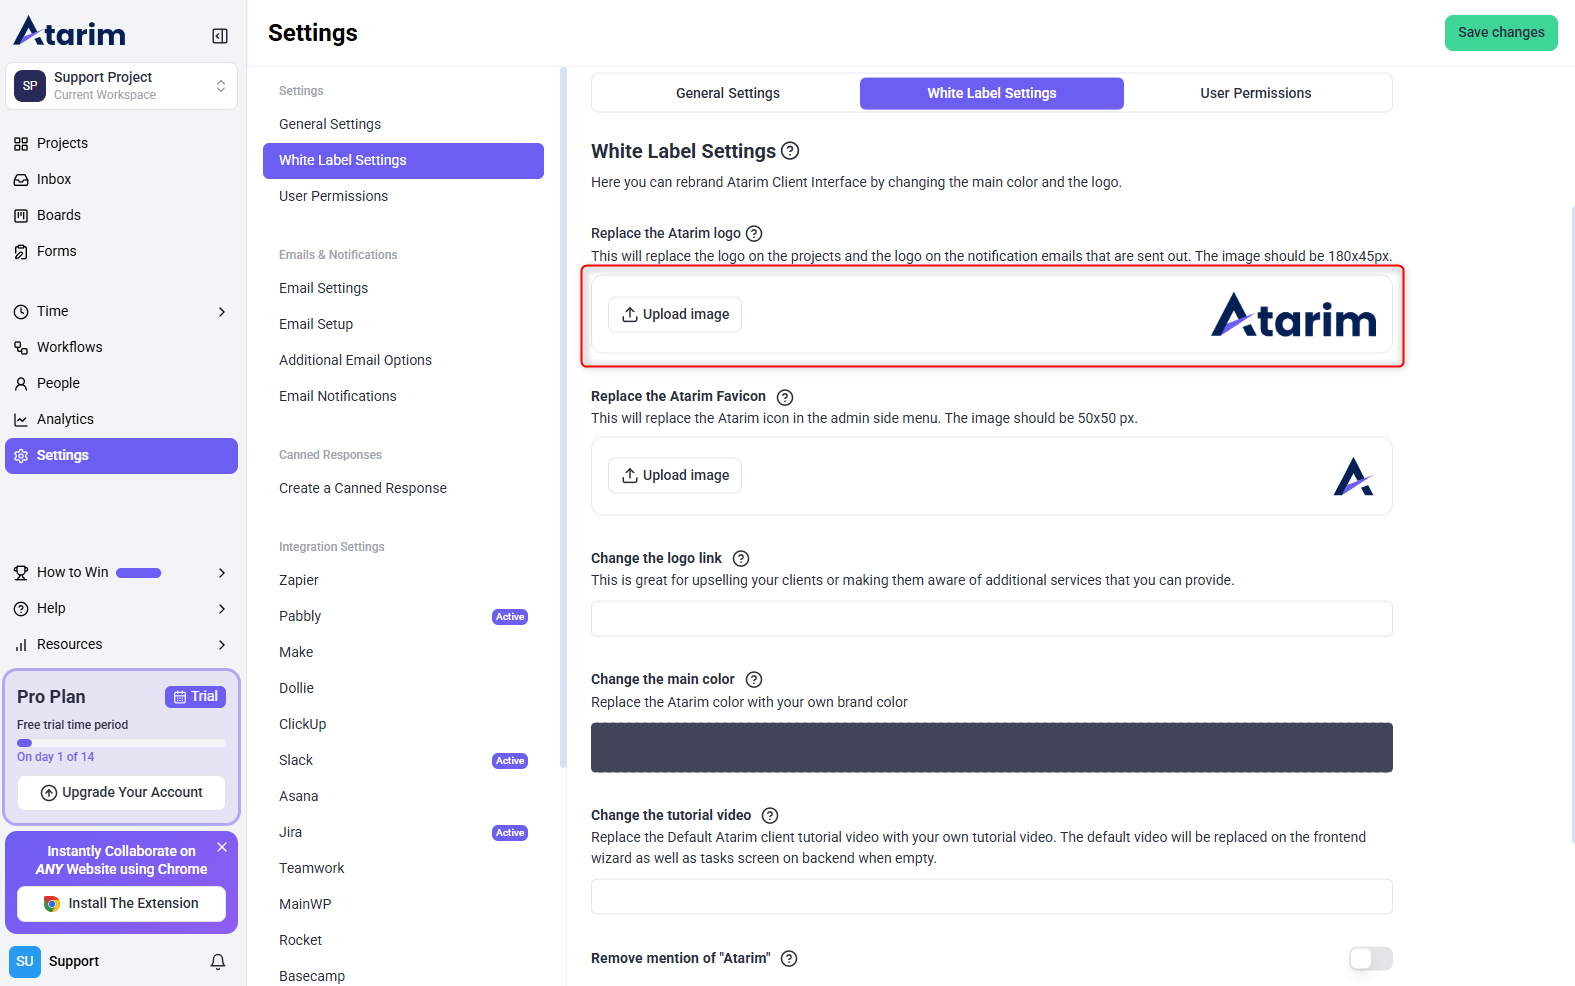
Tip: Make sure your logo has a transparent background for the best display quality.
3. Uploading a Custom Favicon
Description:
The favicon is the small icon displayed in browser tabs. Customizing this ensures brand consistency.
Instructions:
- In the White Label settings, find the Favicon Upload section.
- Click Upload and select your favicon file (recommended size: 32x32px PNG or ICO format).
- Save changes to apply the favicon update.
Where the favicon appears:
- On the widget icon when Compact Mode is enabled inside the plugin.
- On the widget icon when the Bottom Bar is collapsed.

Tip: Keep the favicon simple and recognizable, as it appears in small sizes.
4. Customizing the Color Theme
Description:
Customize Atarim’s primary color to match your brand’s identity for a seamless experience.
Instructions:
- Scroll to the Color Theme section in the White Label settings.
- Choose a primary color that represents your brand.
- Save changes to apply the color update.
Where the color theme applies:
- The Front-end and Back-end of WordPress websites (when Global Settings are enabled).
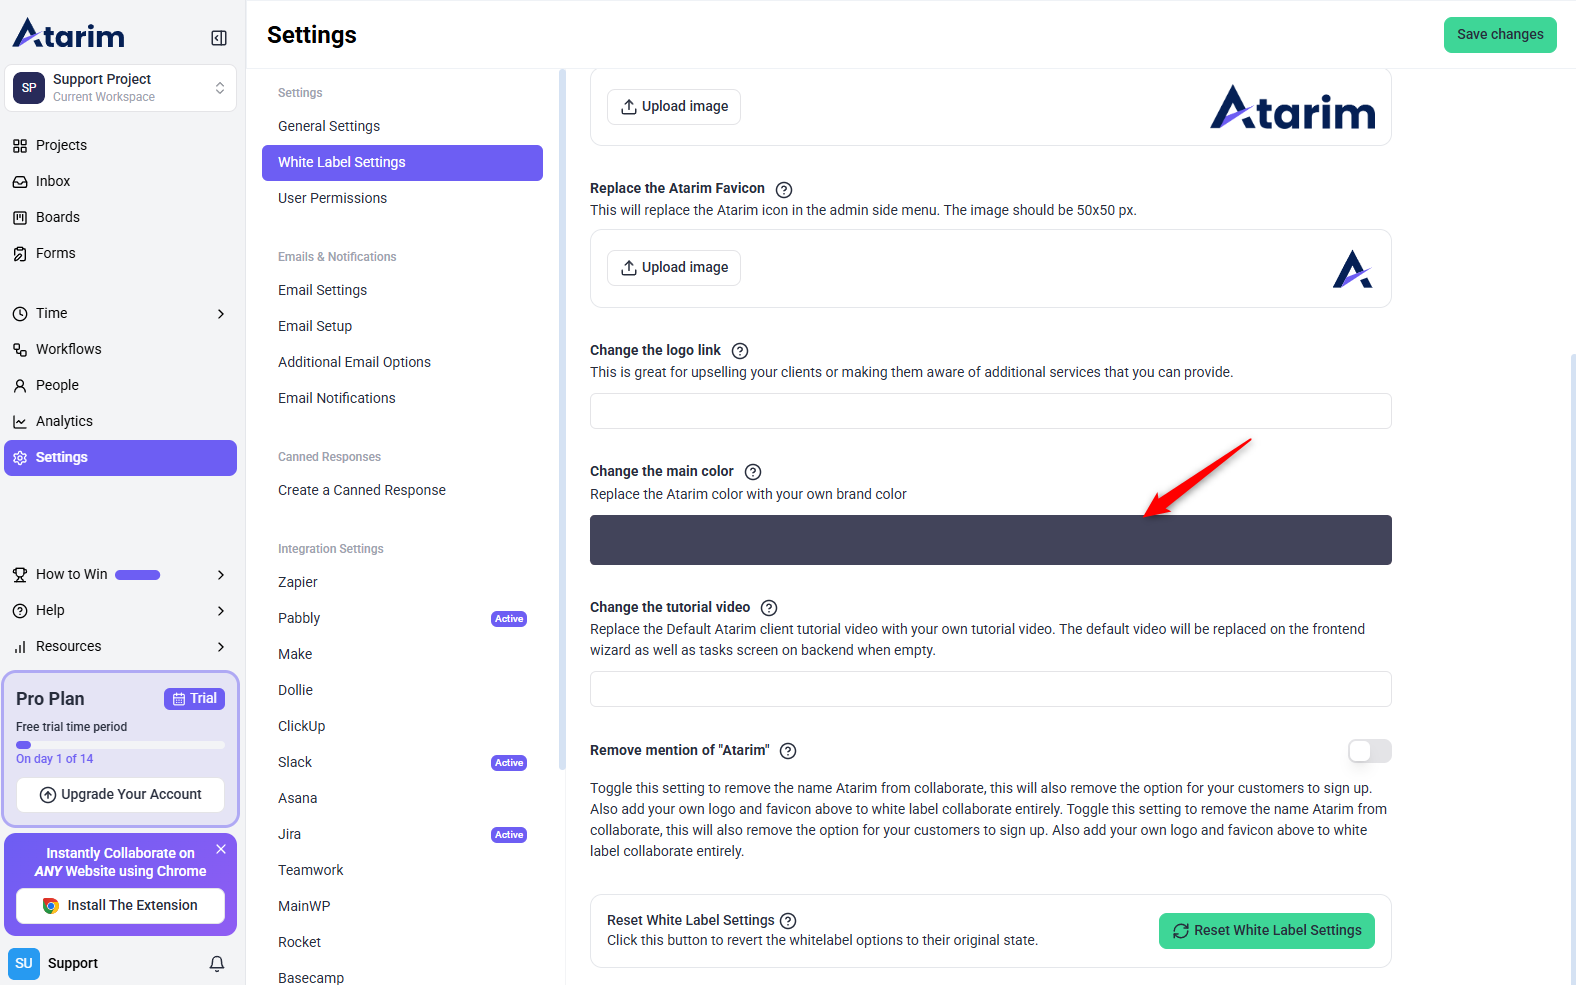
Note: This customization does not apply to websites added via URL—it only works for WordPress-based projects.
5. Changing the Tutorial Video (Optional)
Description:
Atarim provides a tutorial video for first-time users. You can replace this with a custom-branded tutorial to guide your clients.
Instructions:
- Scroll to the Tutorial Video section in the White Label settings.
- Enter the URL of your tutorial video (YouTube link or direct video URL).
- Save changes to update the tutorial video.
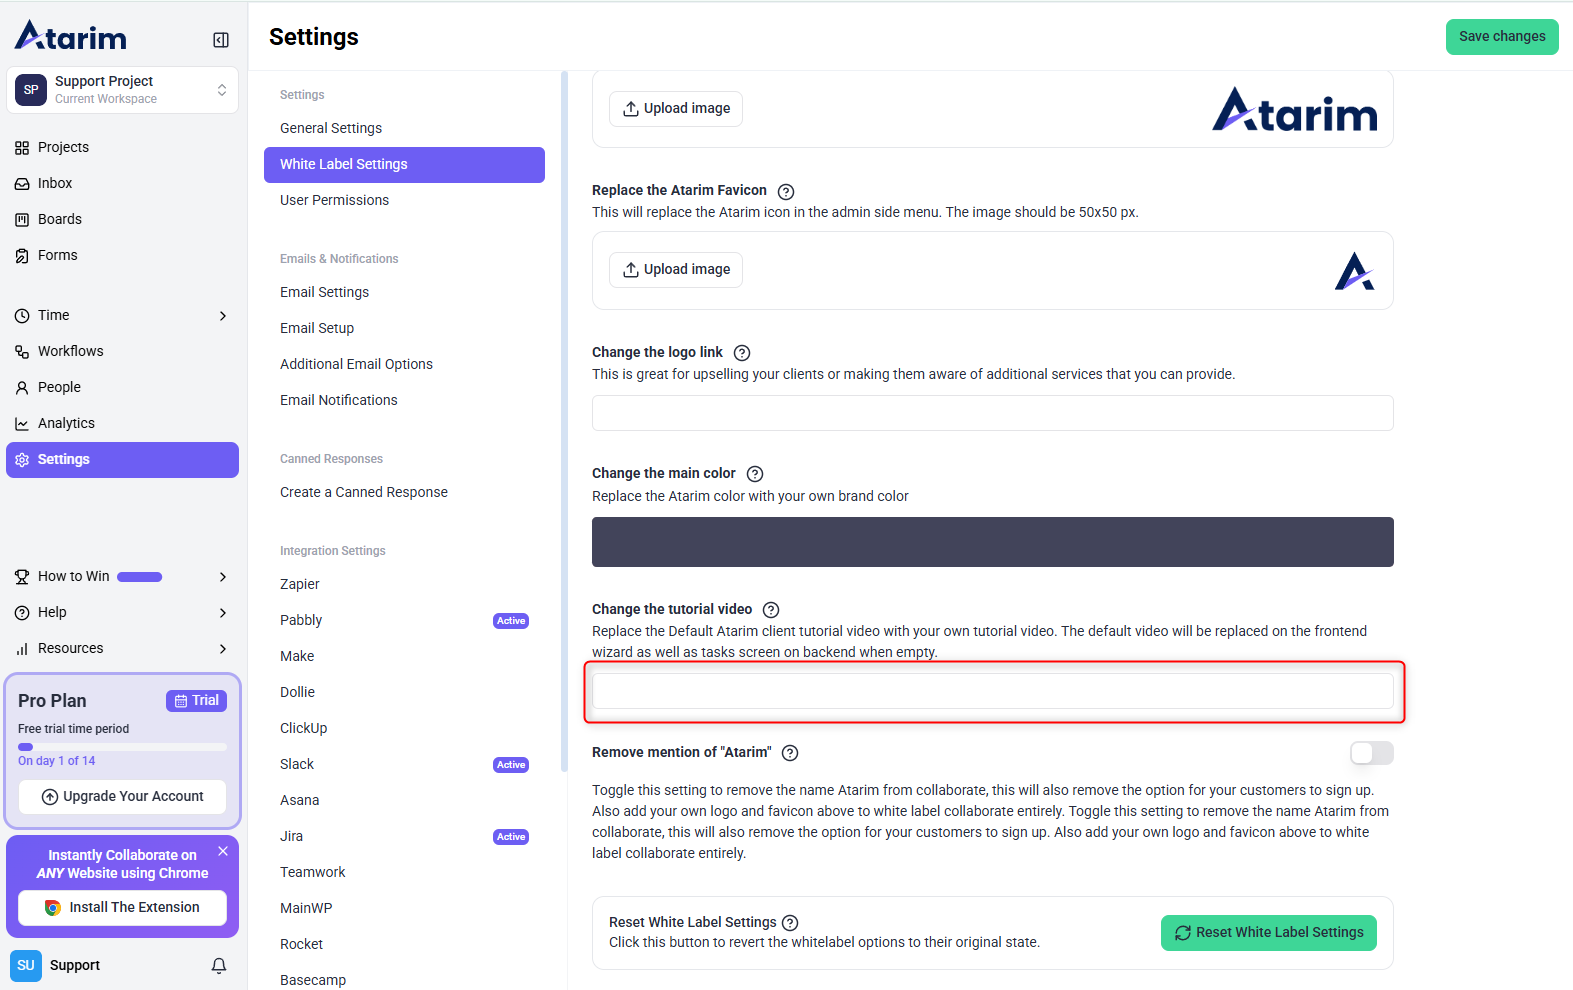
Tip: A custom tutorial video helps introduce clients to your workflow and branding while using Atarim.
6. Removing Atarim Mentions from your project
Description:
For a fully white-labeled experience, you can replace all mentions of Atarim within your project.
Instructions:
- In the White Label Settings, scroll to the Plugin Branding section.
- Enable the Rename Plugin option.
- Enter a new name (e.g., “Collaborate”).
- Save changes to apply the update.
What changes:
- The Atarim name inside your project will be replaced.
- Clients will see your custom name instead of Atarim.
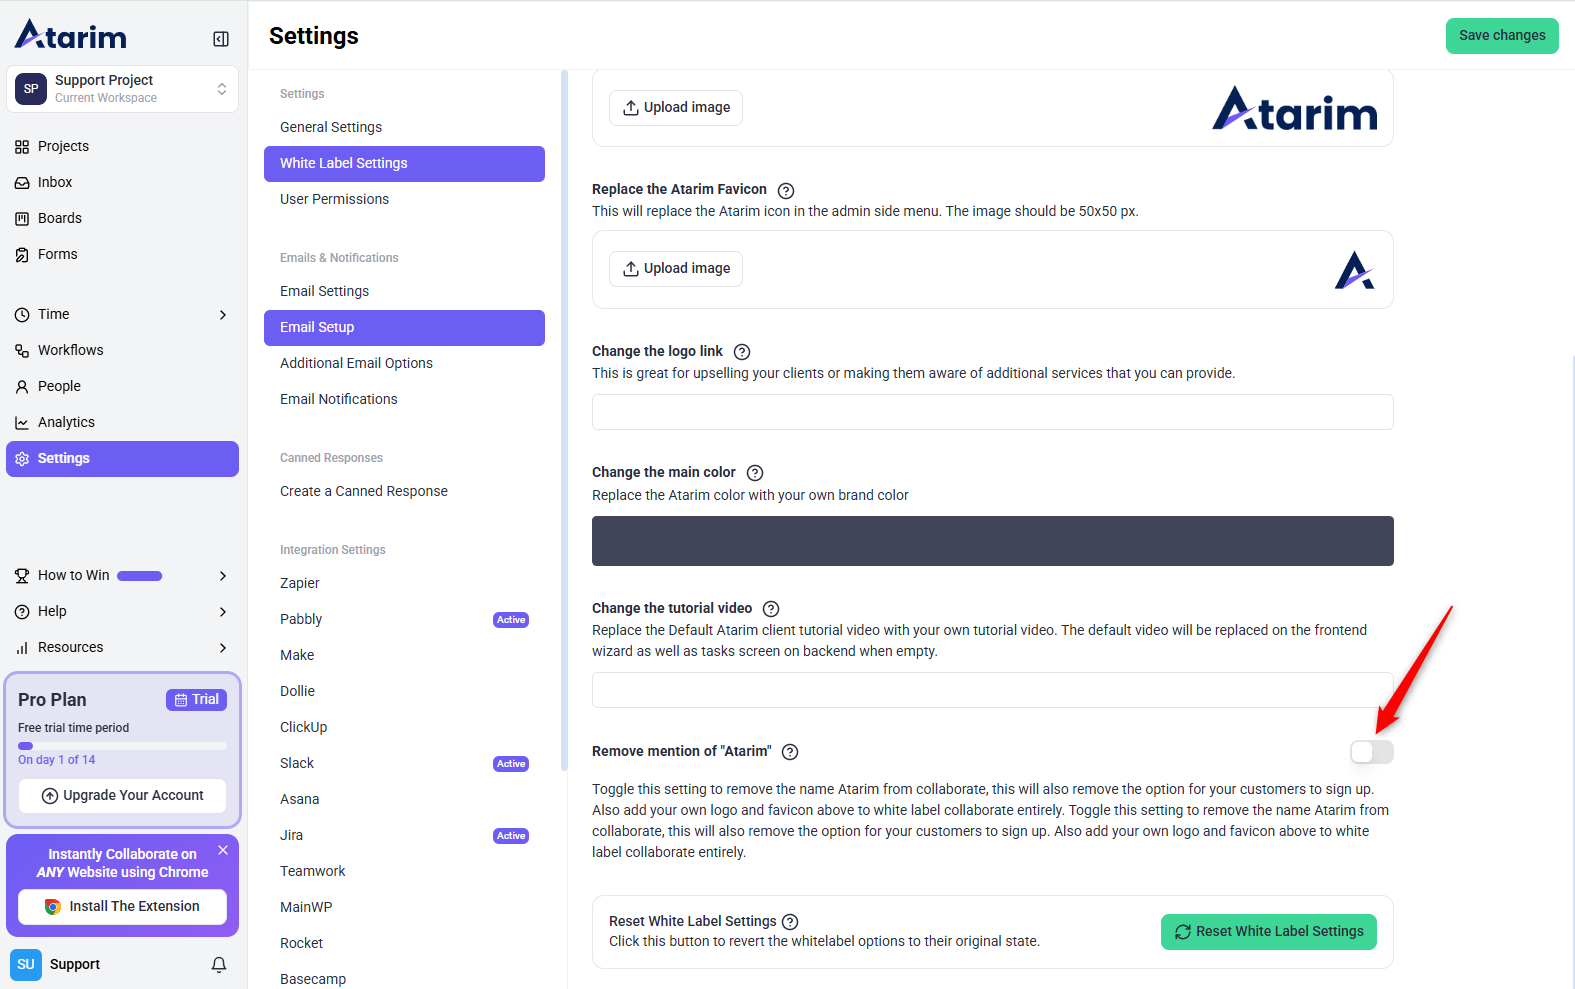
Note: You can always reset white label settings back to default if needed.
Setting Up User Permissions
Description:
Control which actions users can take inside the WordPress Plugin. Permissions are assigned per user role.
Instructions:
- Go to Settings > User Permissions.
- Review the permissions table:
- Add User – Allows adding team members to projects.
- Priority – Enables task prioritization.
- Status – Allows users to modify task statuses.
- Delete – Grants permission to remove tasks.
- Enable/Disable specific permissions based on role requirements.
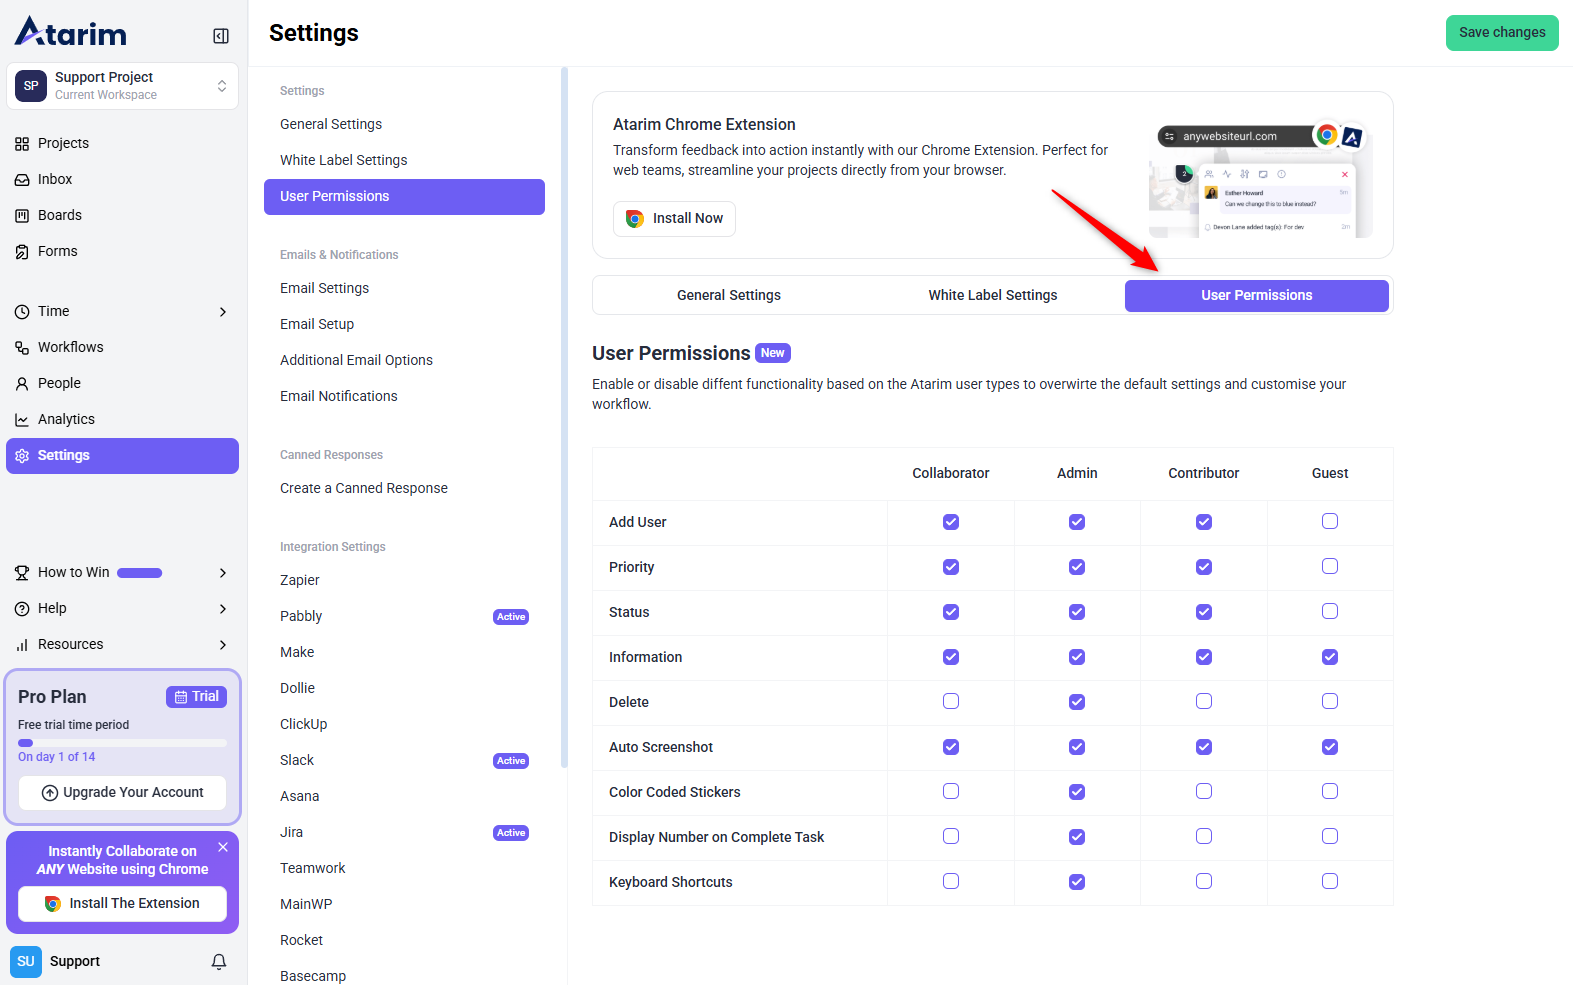
Note: These settings apply only to WordPress websites with global settings turned on.
Emails & Notifications
Description:
Customize email notifications to receive updates about project activities, client feedback, and task changes.
Instructions:
- Navigate to Settings > Emails & Notifications.
- Configure the following options:
- Email Inbox Setup – Connect an external inbox for incoming project updates.
- Email Notifications – Enable or disable alerts for new comments, task assignments, and project milestones.
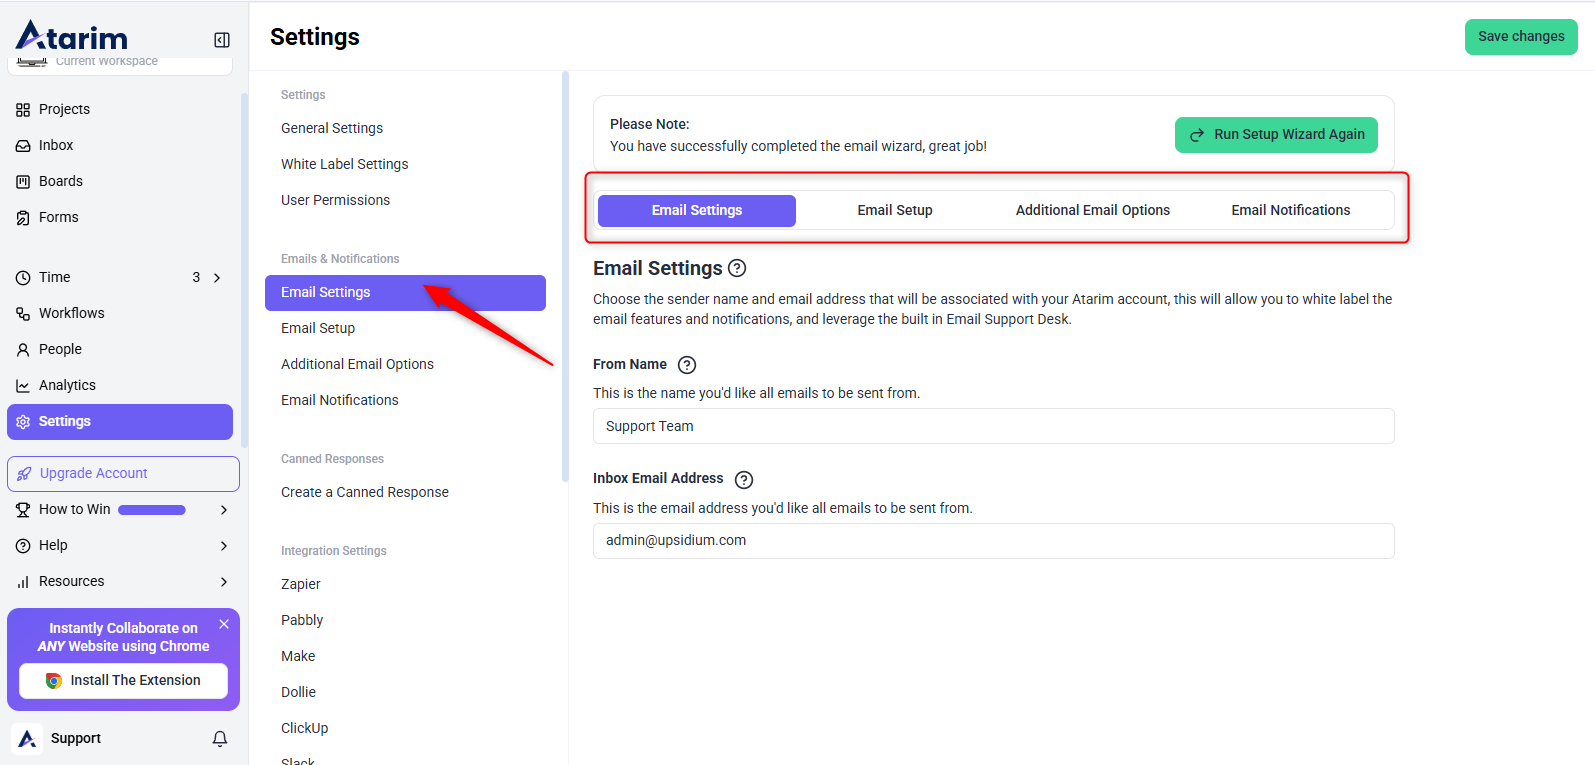
Tip: If you manage multiple clients, enable notifications for task completions to track project progress efficiently.
For more details on how to set this up, please refer to this article.
Configuring Integrations
Description:
Connect Atarim with third-party tools like Asana, Slack, and Jira for enhanced workflow automation.
Instructions:
- Go to Settings > Integrations.
- Toggle the desired integration on (e.g., MainWP, ClickUp, Zapier).
- Follow the prompts to complete the setup for each integration.
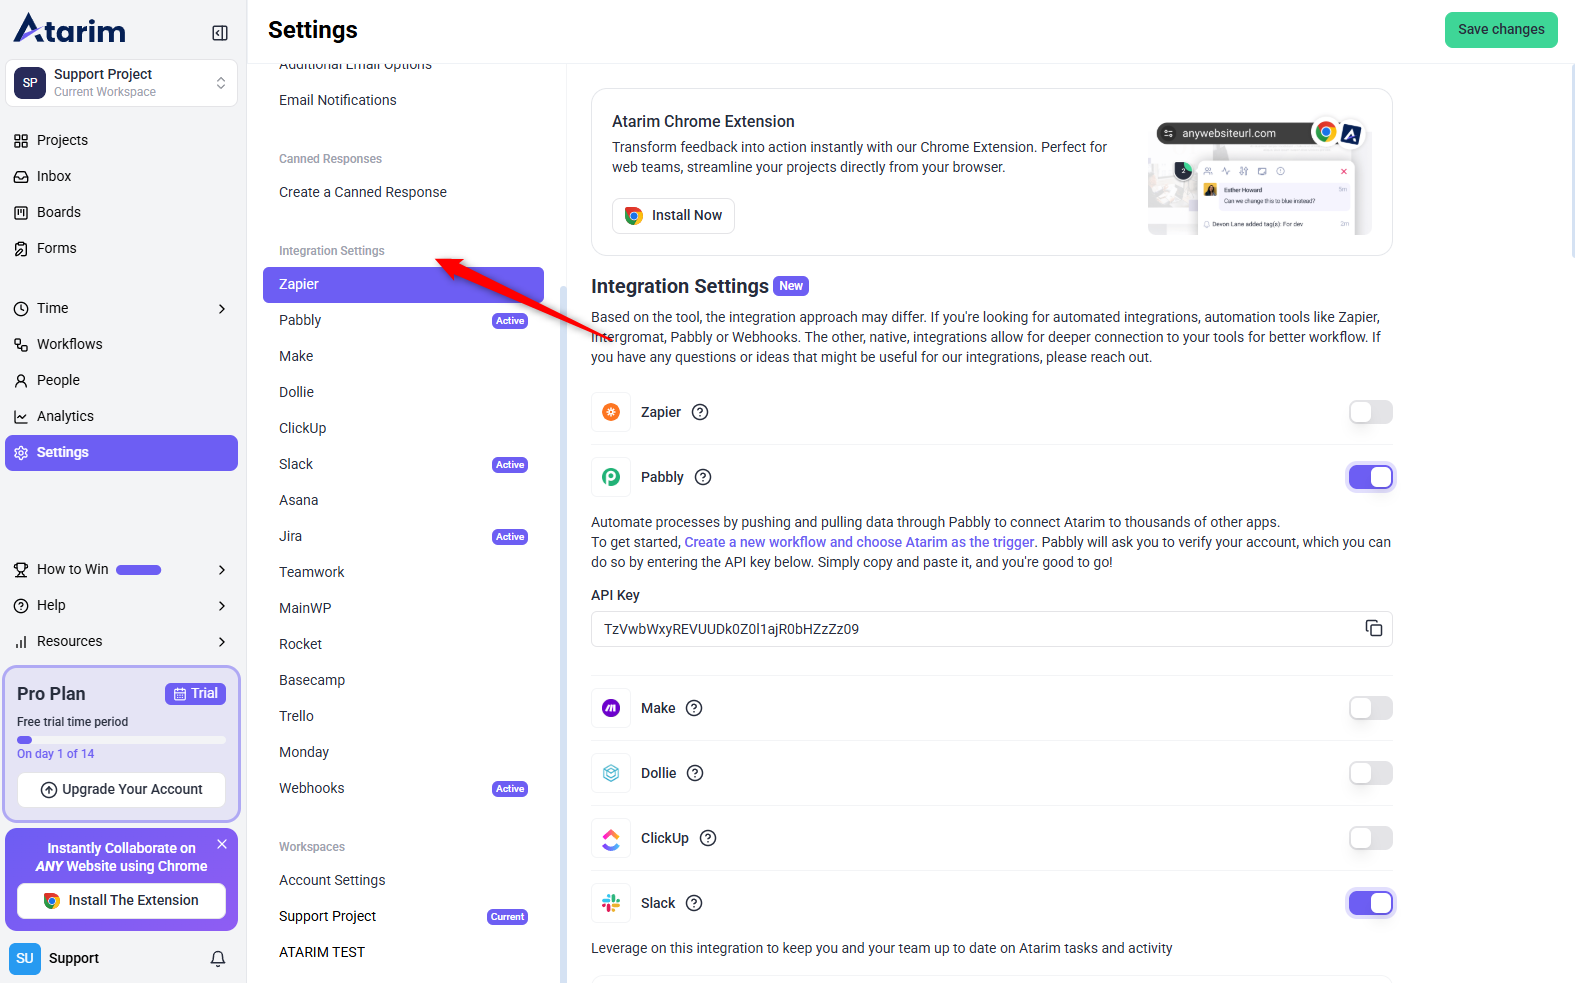
Tip: Use Zapier, Make, or Pabbly for automation workflows across different platforms.
For more details on setting up each integration, please refer to these articles.
- MainWP
- Asana
- Jira
- Slack
- Webhooks
- Integrating Dollie
- Make
- Pabbly
- Zapier
- Monday.com
- ClickUp
- Basecamp
- Trello
- Teamwork
- Rocket.net
- Slack
FAQs
Yes! You can customize notification settings under Emails & Notifications.
Resetting White Label settings will revert all branding changes back to Atarim’s default.
No, integrations are configured per workspace, allowing different setups for each.
Yes, but you need to configure white label settings for each workspace separately.
Users with that role will no longer see or interact with the related feature in Atarim.