Step-by-Step Guide
1. Connecting Your Jira Account
Start by enabling the Jira integration in Atarim and authenticating your account.
Instructions:
- Log in to your Atarim Dashboard.
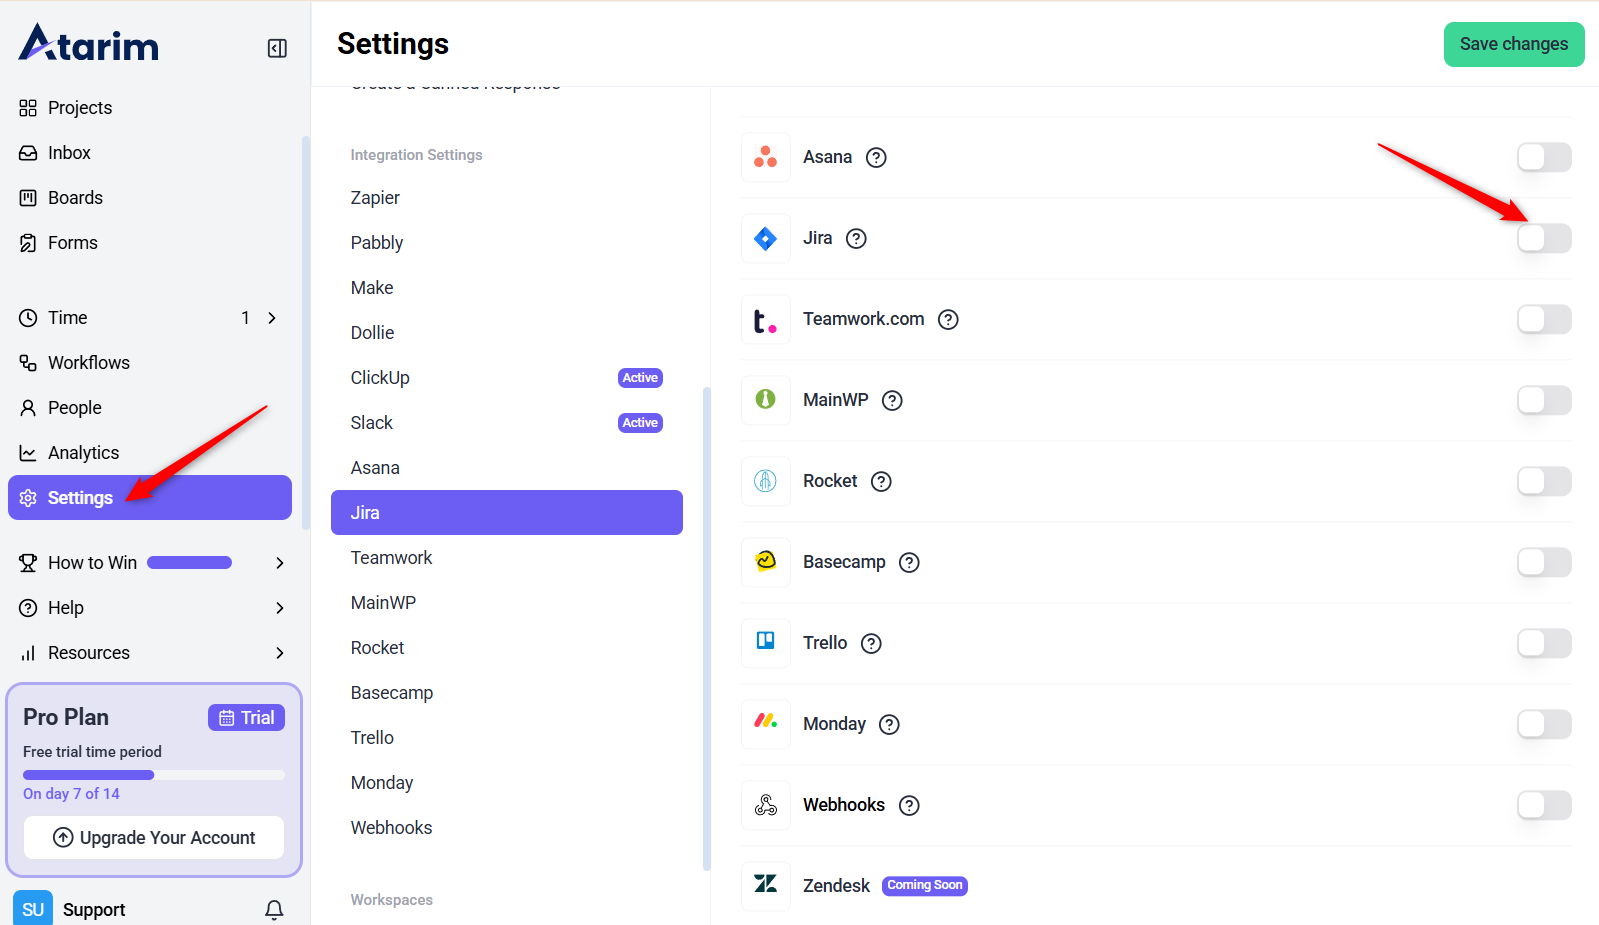
- Navigate to the Settings screen and select the Integrations tab.
- Locate the Jira integration in the list of supported platforms and toggle the switch to enable it.
- Click the Connect with Jira Account button.
- If prompted, log in to your Jira account using your credentials.
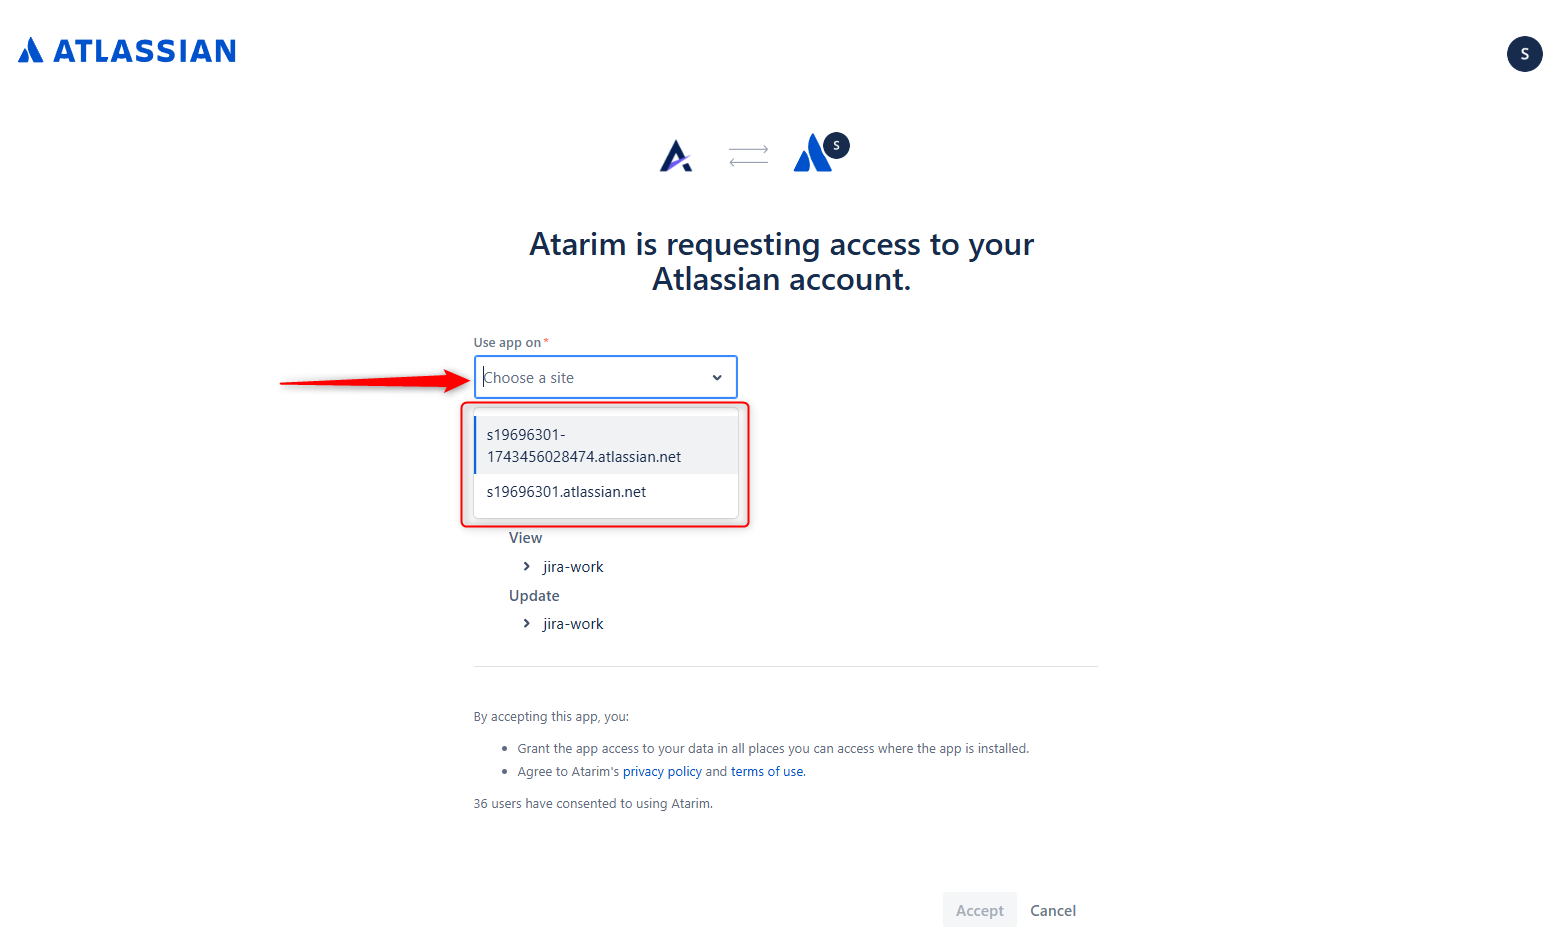
- Choose the correct site
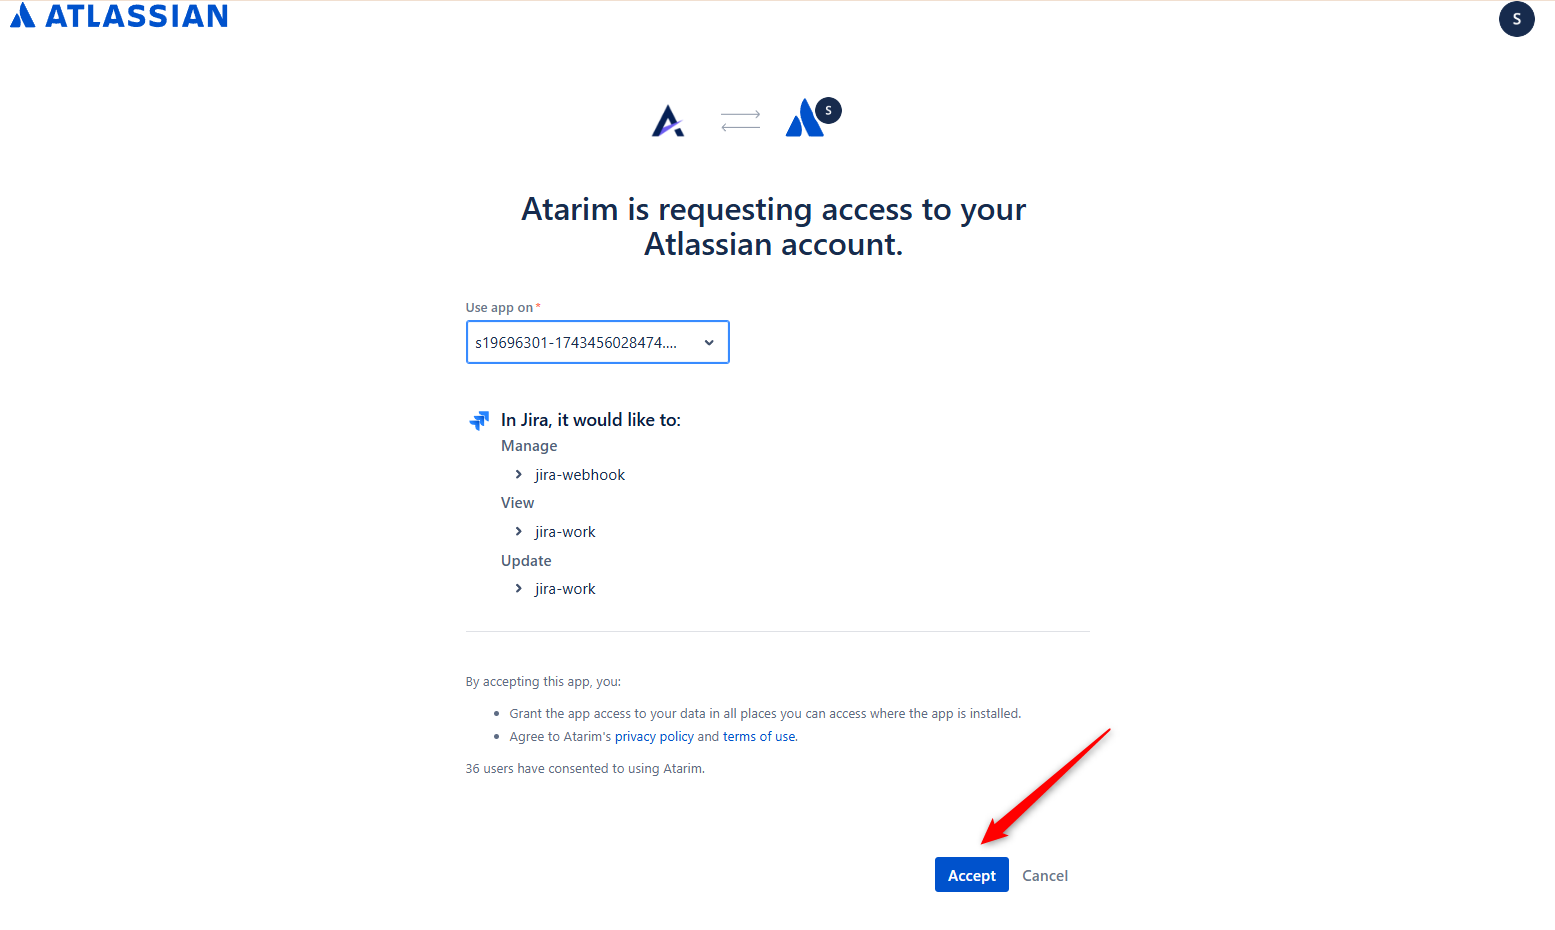
- On the permission screen, click Accept to grant Atarim access to your Jira workspace.
- After granting permissions, you’ll be redirected back to Atarim with a confirmation that your Jira account is now connected.
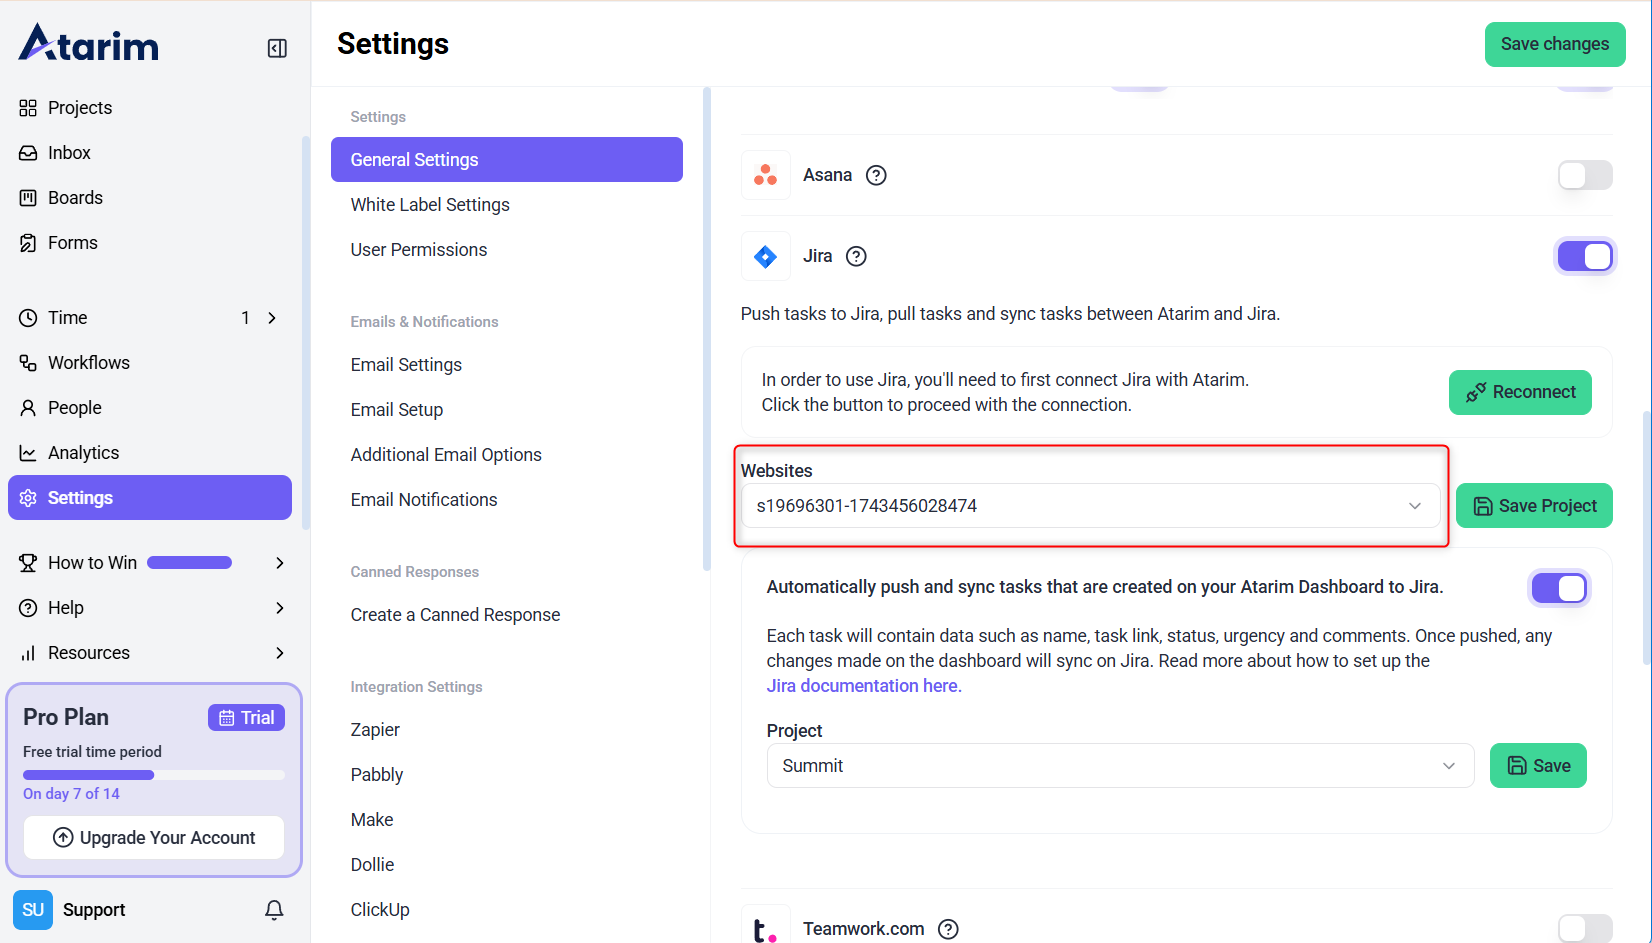
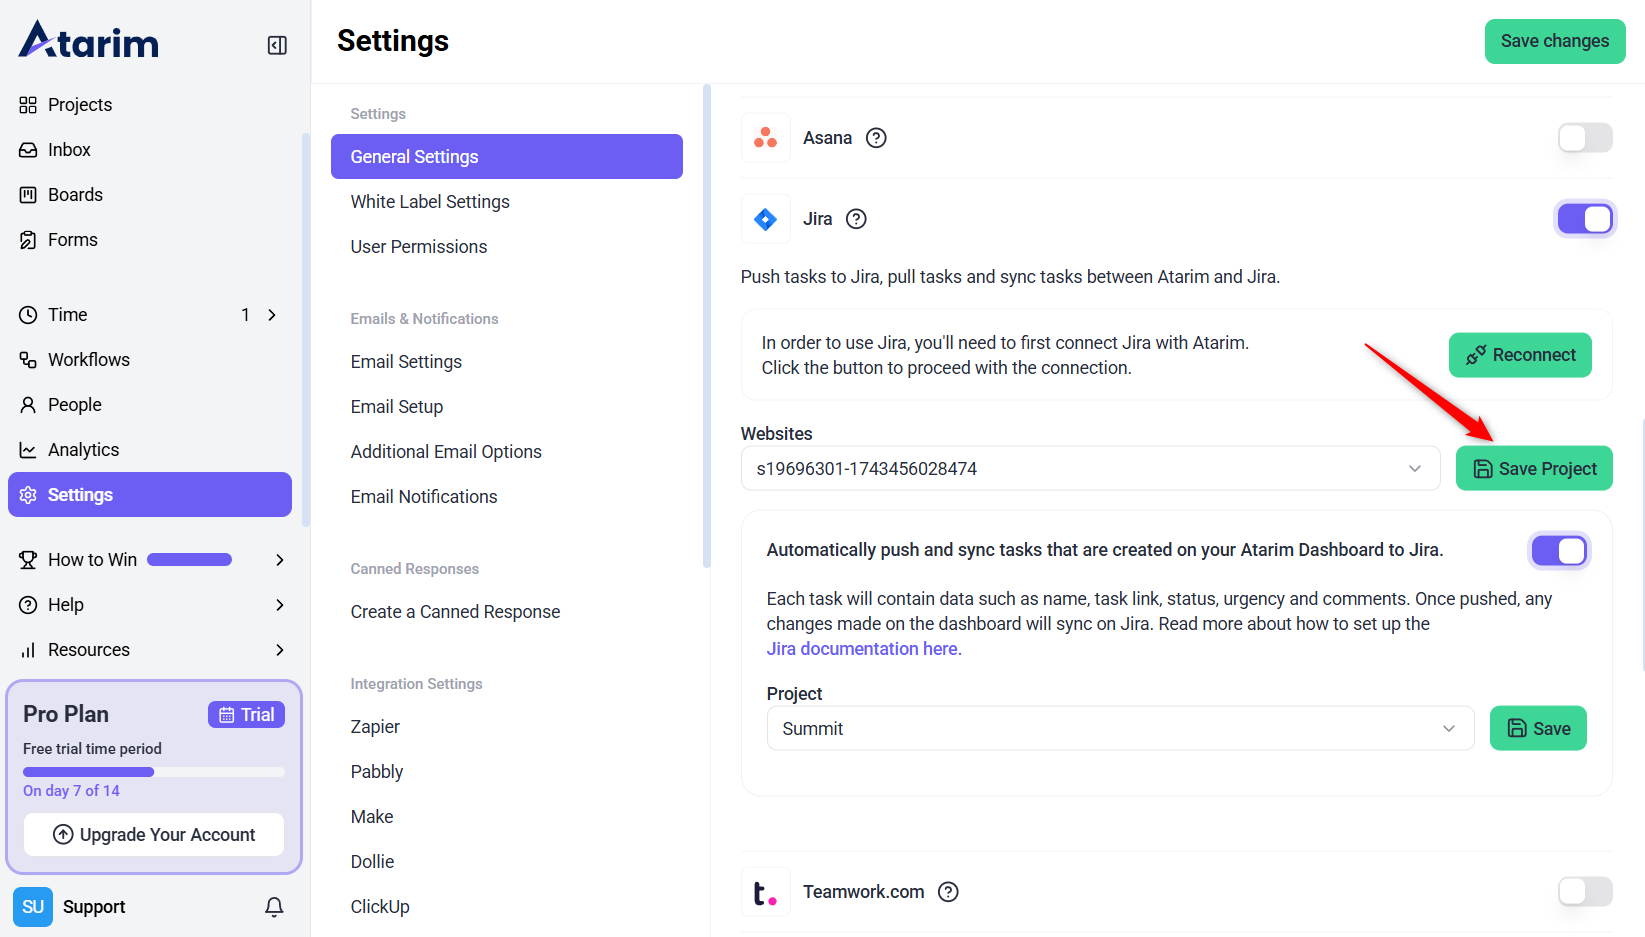
- Choose the website in Atarim that corresponds to your Jira project.
- Click on Save Project.
Tip: If you see a Reconnect button in Jira settings, the connection is successful.
2. Automatically Pushing Tasks to Jira
Automatically send tasks created in Atarim to a designated Jira project for seamless collaboration.
Instructions:
- In the Jira Integration Settings, toggle the option to enable Automatic Task Pushing.
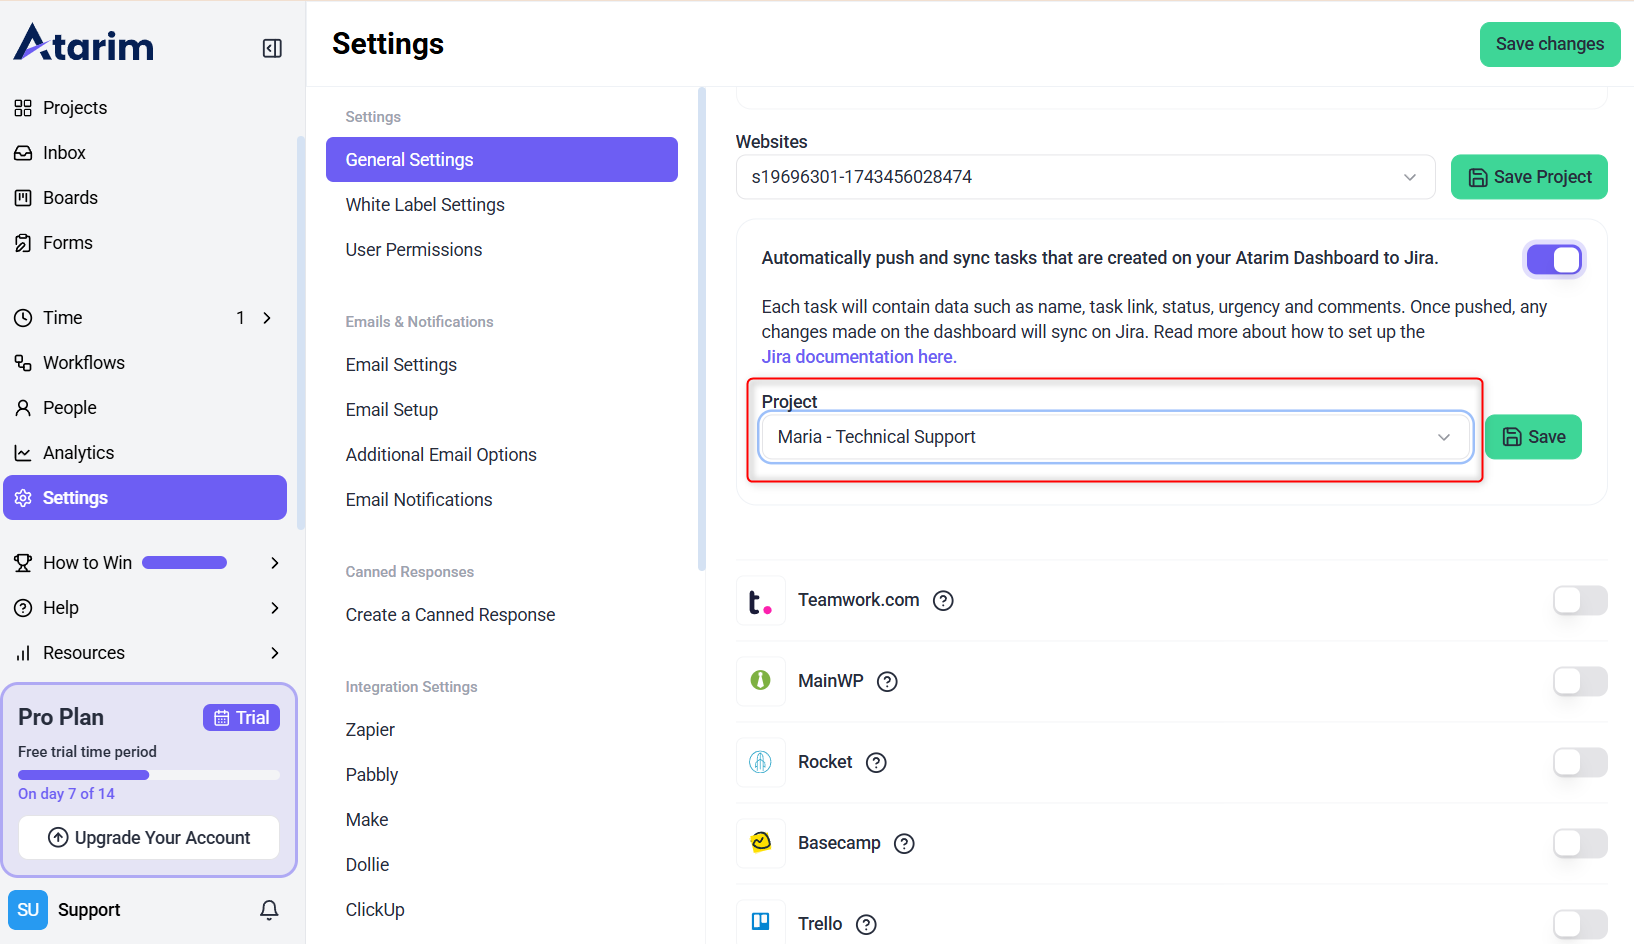
- Select the Jira project where tasks from Atarim should be sent.
- Click Save to finalize your configuration.
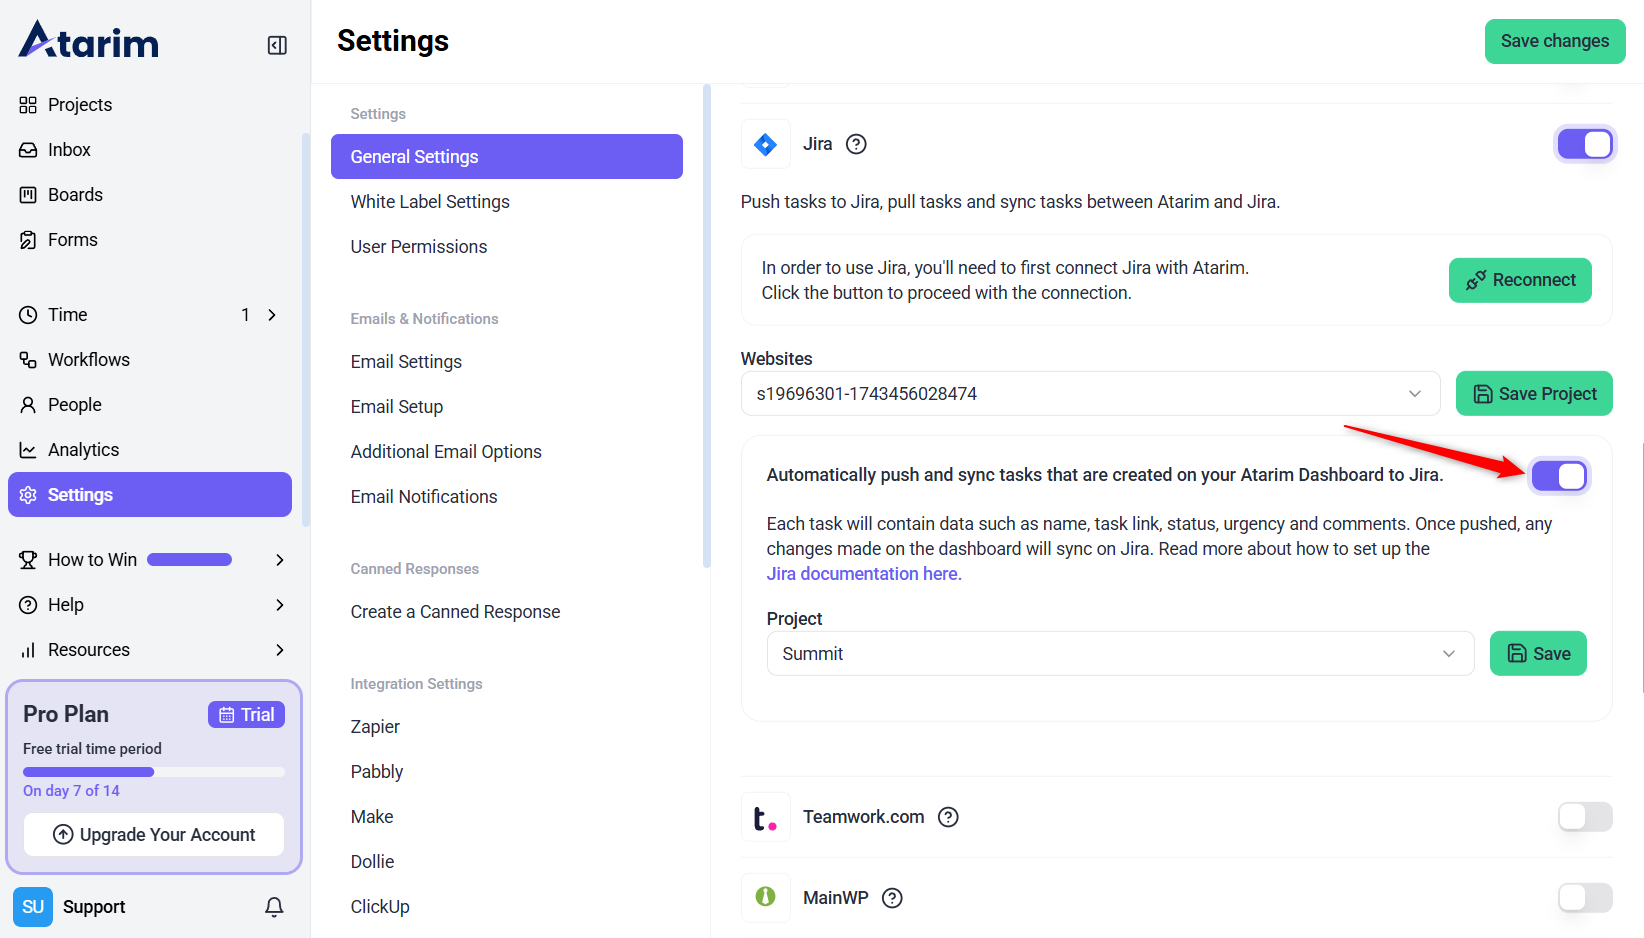
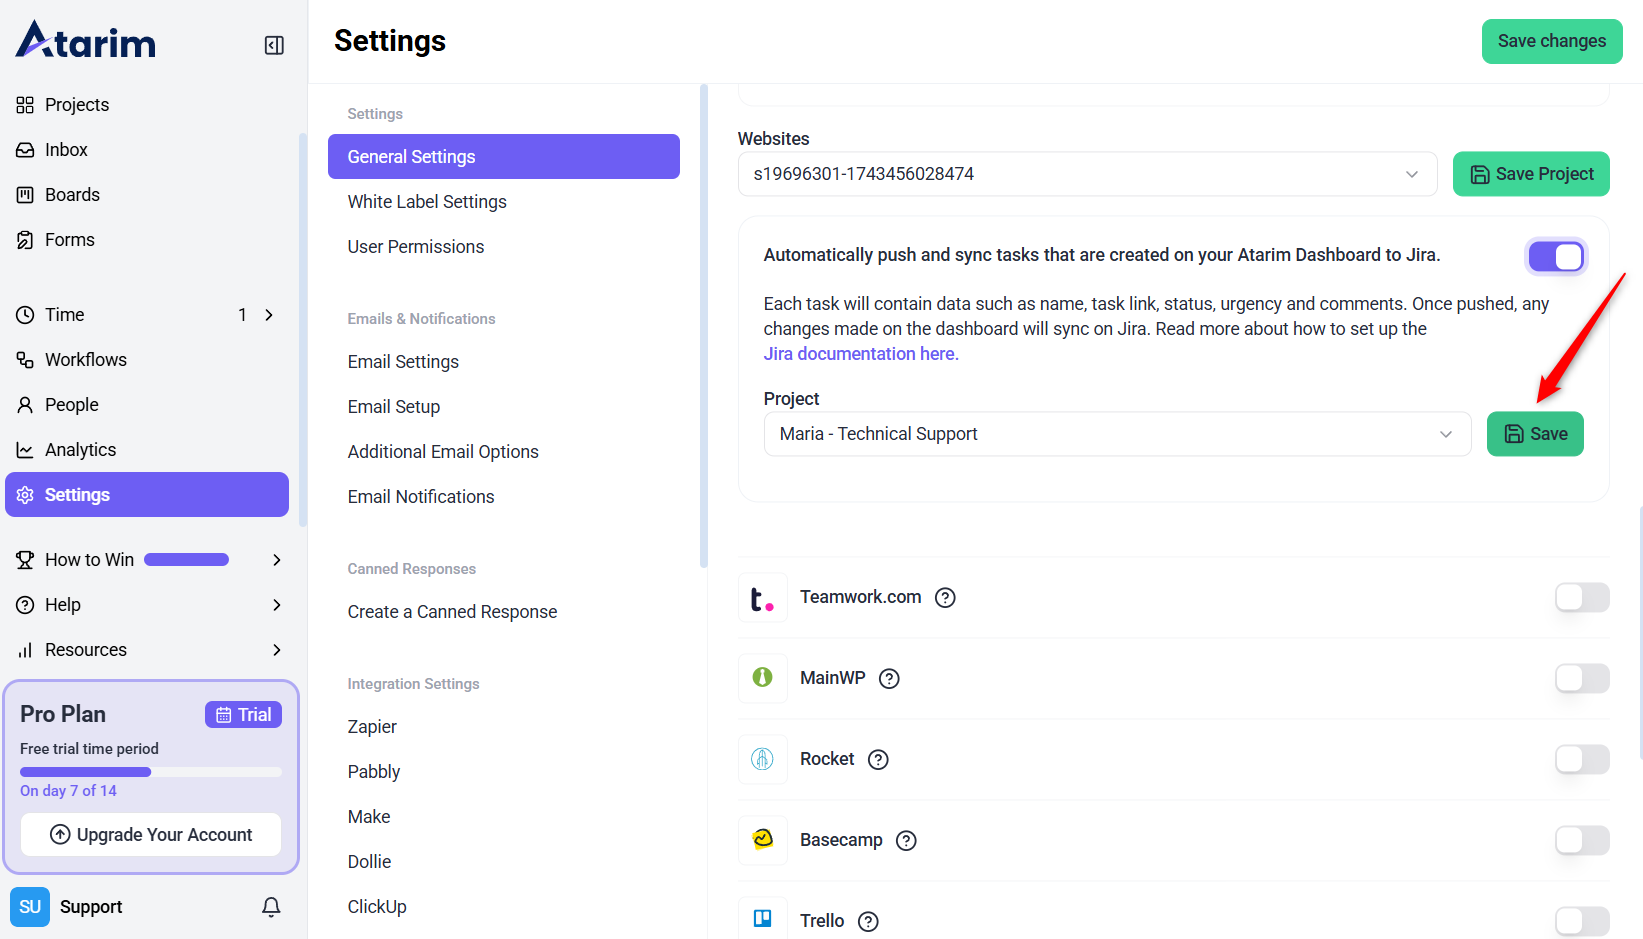
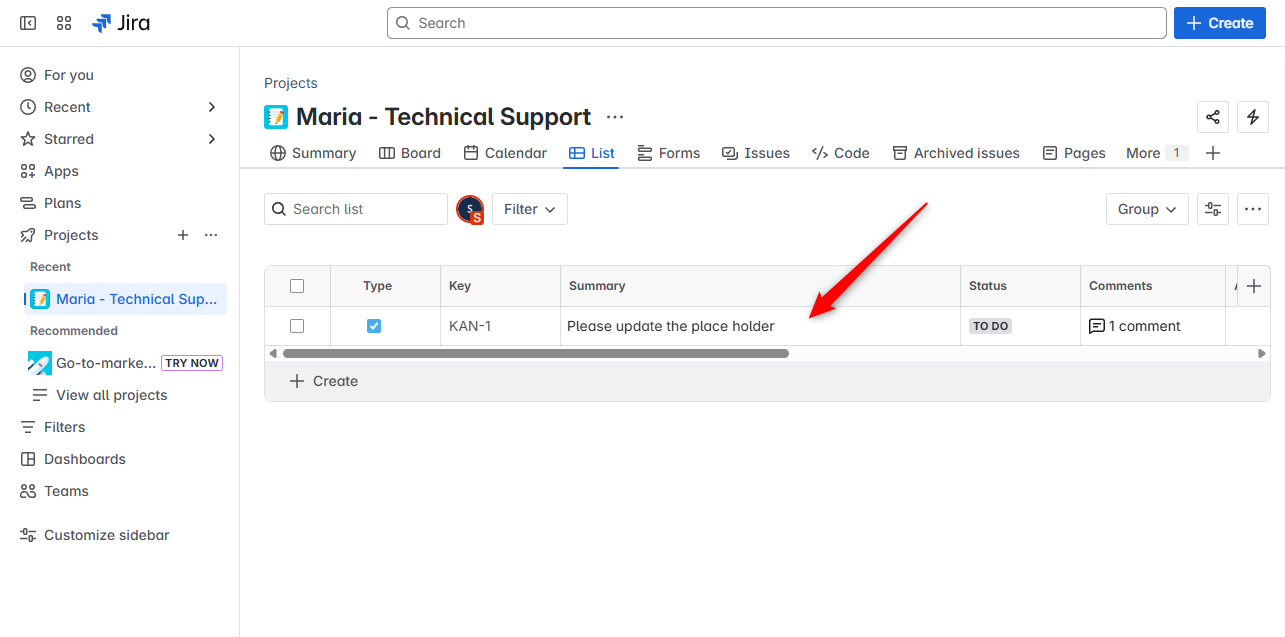
Tip: Tasks pushed to Jira will retain the name, task link, status, urgency, comments, and image capture.
3. Configure Workflow Automations
Enhance efficiency by automating task management between Atarim and Jira.
- Click on Workflows in the Atarim Dashboard.
- Browse available automation templates or click the Custom Automation button to define custom workflows.
- Set triggers such as task creation or updates in Atarim to automatically push tasks to the mapped Jira project.
- Click Create Automation.
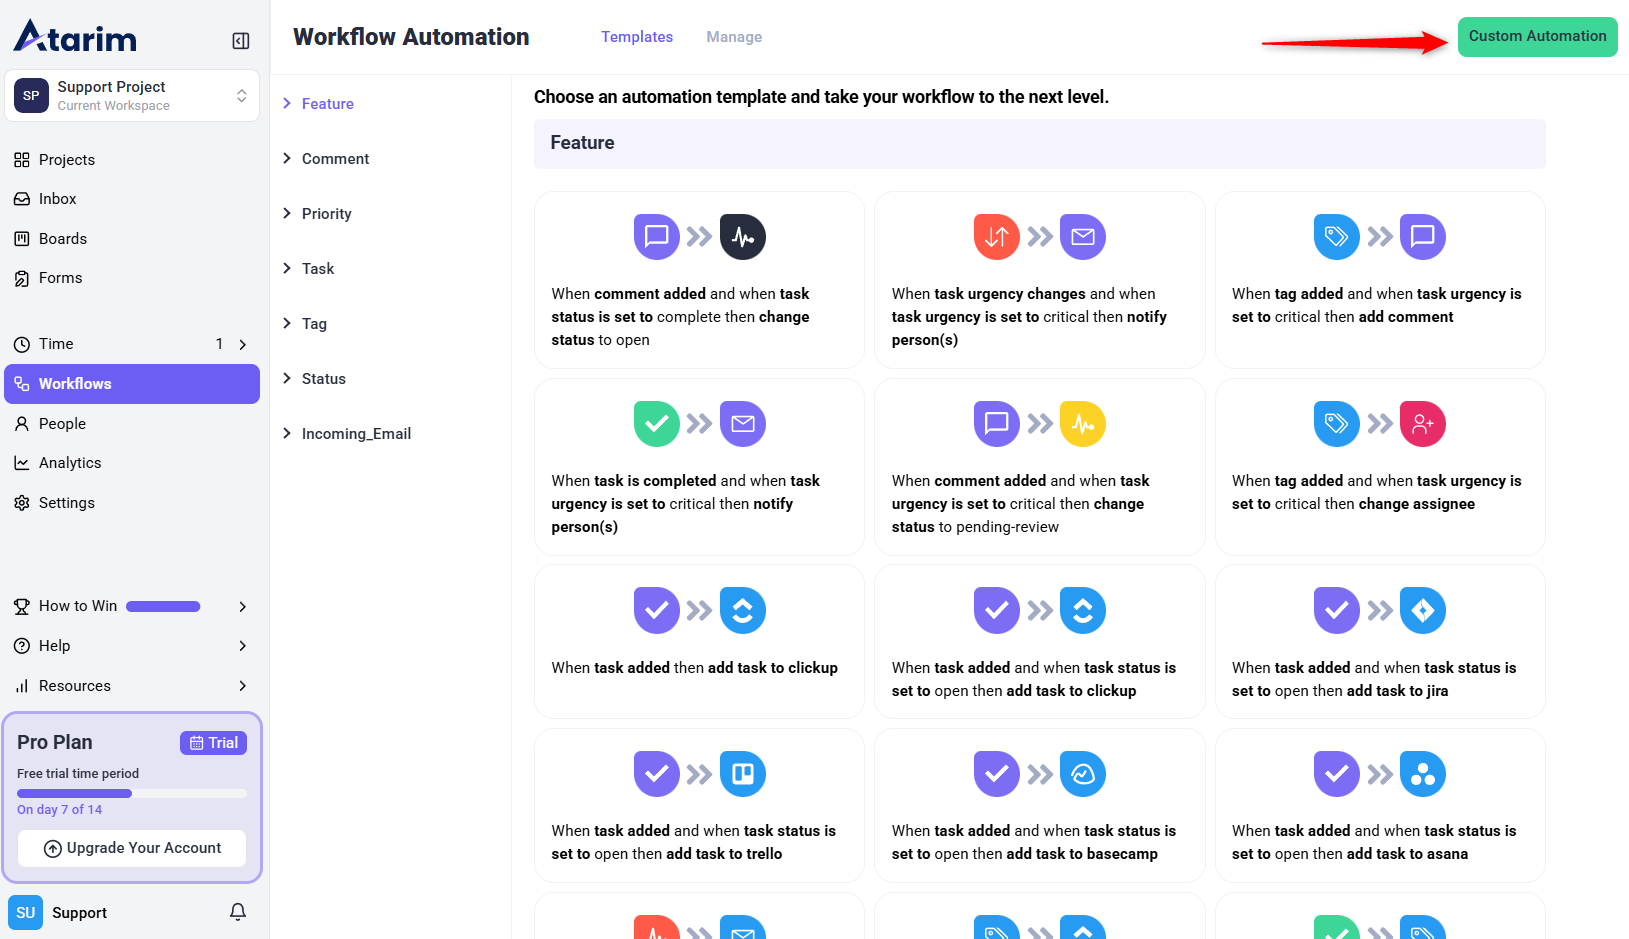
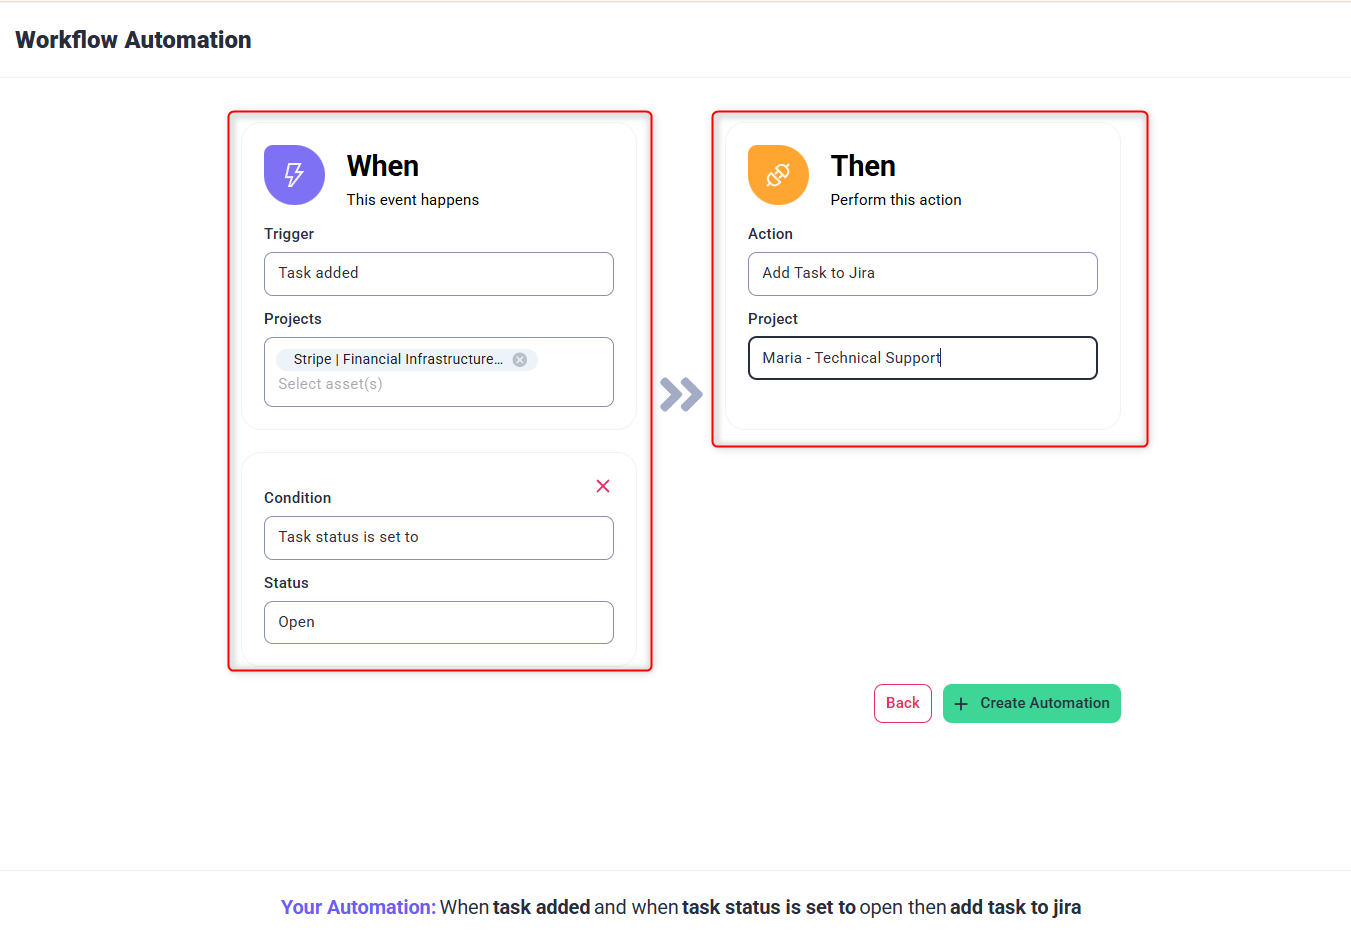
Tip: Use Atarim’s workflow automation to automatically assign tasks to the right team members in Jira based on task urgency.
4. Provide Feedback in Atarim and Sync to Jira
Ensure that development teams receive detailed, actionable items by syncing Atarim feedback to Jira.
Instructions:
- Use Atarim’s visual collaboration interface to leave feedback directly on websites or designs.
- When a task is created from feedback, it will be automatically synced to the mapped Jira project.
- Developers will receive Jira tasks containing screenshots, comments, and relevant details for accurate implementation.
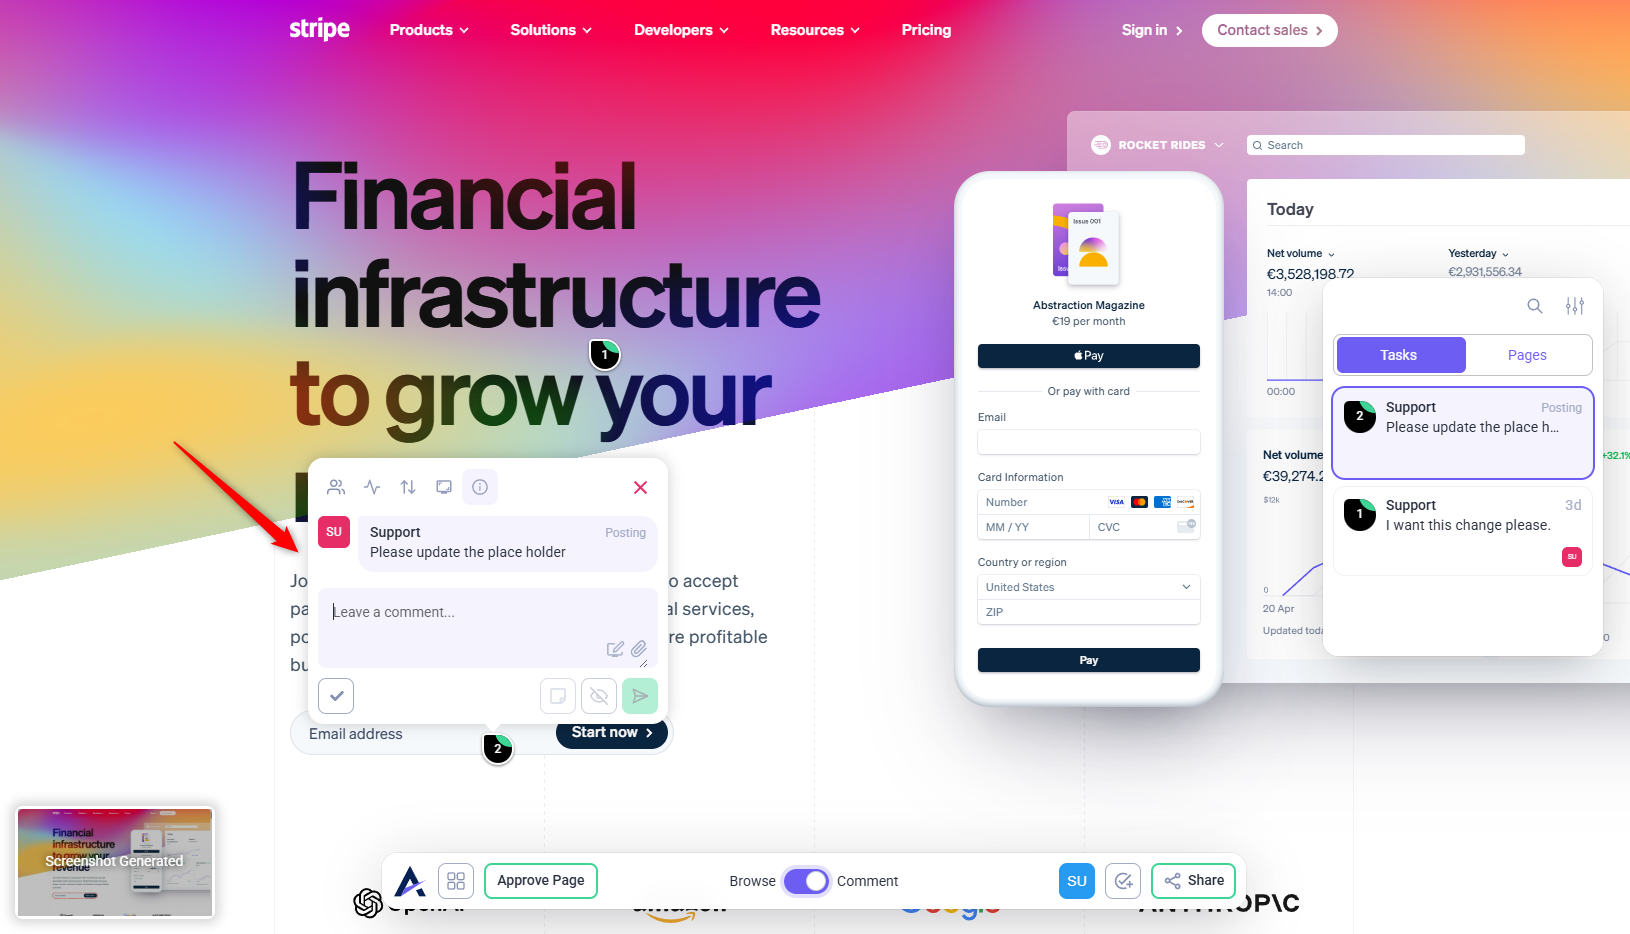
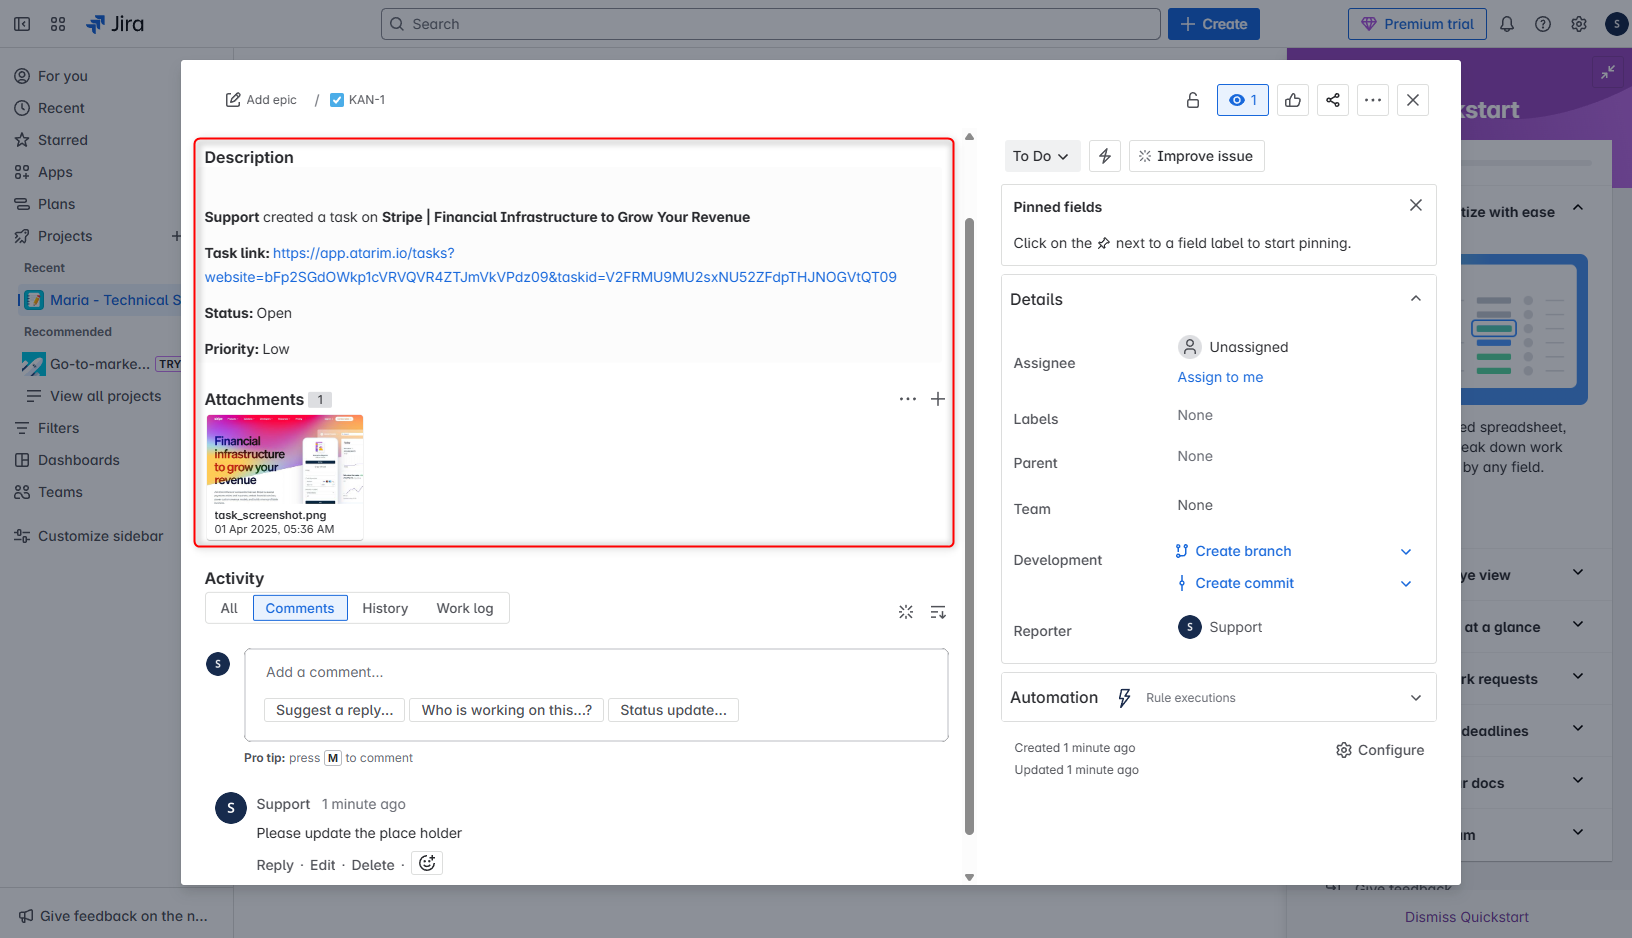
Tip: The automated screenshot feature in Atarim ensures that feedback is context-rich, reducing confusion and misinterpretation.
Benefits of Integration
- Visual Feedback to Actionable Tasks:
- Provide feedback directly in Atarim’s visual collaboration interface, and tasks will sync automatically to Jira, reducing manual work.
- Automated Workflows:
- Utilize Atarim’s workflow automation to define triggers for seamless task creation and updates in Jira.
- Context-Enhanced Collaboration:
- Tasks include technical details and automated screenshots for precise issue resolution.
- Streamlined Development Workflow:
- Developers manage tasks within Jira, while Atarim ensures detailed task creation and updates.
FAQs
Yes, you can revisit the Integrations tab in Atarim to disable or reconnect the Jira integration.
Ensure that the integration settings are correctly configured and that the Jira project is active. Retry syncing if needed.